The equipment of the attic room significantly increases the living space of the house. Even an unheated room will serve as additional thermal insulation of the dwelling.
A mansard roof is made in the form of a broken gable structure, but there are many other options:
- the classical gable roof is characterized by simple calculations, the work on the construction of rafters is feasible for a beginner as well, low ceiling;
- one-sided - a simple type of roof providing one full wall in the attic;
- a hip-roof with four slopes of the same size;
- multi-tongs — attractive and balanced, but complex design.
 Scheme of a house with a mansard roof
A gable broken mansard roof of the house allows you to get sufficient height ceilings in the room and expand the comfort area. For its construction will require a well-designed project. Creating it yourself is not an easy task; you can order it from a construction company or use a special computer program. The design scheme will allow to calculate the required amount of material for the rafters, insulation, waterproofing, roofing. The angle of slope for the roof slopes is calculated taking into account the recommendations of the manufacturer of roofing materials, in addition, the climatic conditions are taken into account - snow and wind load.
Features of a gable sloping roof
 A truss system of a sloping two-slope roof
Bottom The truss system is installed at an angle of 60 ° , its supporting pillars become the framework for the interior walls of the room. The angle at the top of the rafter does not exceed 45 ° , which reduces the amount of material used, but not at the expense of the quality of the coating. Additional rigidity to the frame of the room is given by struts, which are attached to the floor beam and the lower part of the rafters.
 Thermal insulation of the attic with a mineral wool
Insulation layer must be at least 20 cm, this thickness will provide sufficient insulation and keep the room from freezing in winter and overheating in summer. An insufficient layer of insulation will lead to regular heat loss and heated snow. Due to repeated melting and freezing, the roofing material will quickly become unusable. In the heat of summer to find an unprotected attic will require the installation of a powerful air conditioner. All these problems are eliminated while observing the norms of warming.
Before making an attic roof, the wood used for the construction of the structure must be treated to protect it from damage by microorganisms and from fire. It is important arrangement of ventilation, allowing to get rid of excess moisture.
Sound insulation is of great importance, because being directly under the roof, you will clearly hear the blows on the roof, especially if you use a metal coating.
Choice of insulation
 Insulation with foam glass
Mineral wool or foam glass and polystyrene foam. Foam materials do not absorb moisture like cotton wool, so they will last longer. Extruded polystyrene has the ability to absorb sound and will become a good sound insulation. Foamed glass does not burn, it is frost-resistant, does not rot, does not let moisture through. Mineral wool is affordable, it is thick enough for insulation, easy to install. Elastic basalt wool does not burn, it fits comfortably between the rafters and is characterized by high durability.
 Basalt wool insulation
Required materials:
- Thick timber 150 * 150 mm for beams, 100 * 150 mm - for mauerlat, 150 * 150 mm - for racks;
- board 50 * 150 mm;
- not cut board;
- fasteners: nails, screws, corners, brackets;
- battens for the sheathing;
- insulation;
- rolled waterproofing;
- vapor insulating membranes;
- roofing material.
The article does not describe the design of a certain size. How much material you need, you can find out using the calculator to calculate the attic roof.
Construction stages
 Frame construction
- By perimeter of the structure fits the supporting bar - mauerlat. It is attached to the bearing walls and transfers the load from the rafters to the base of the building. To the brick or block walls, the mauerlat is attached with embedded anchors or studs. Mark a place for drilling holes for mounting can be tape measure or by attaching a timber on the wall and crushing it until the appearance of dents. Roofing material must be laid under the timber for waterproofing. Mauerlat is put on anchors and secured with nuts.
- Overlapping beams are a durable coniferous timber.They are placed on the mauerlat and extend beyond the perimeter of the walls by 0.5 meters in order to increase the area of the attic. Another way - mounting in special pockets left in the clutch. The ends of such bars must be covered with mastic and roofing material to protect against moisture. Beams fasten with screws and corners. Extreme bars laid on the level to properly install the rest of the tension cord. The optimal spacing of beams is 0.6 m, it allows laying insulation without trimming. All beams are aligned in height, with an insufficient level - they enclose the boards; if a beam protrudes, it is cut off.
- Vertical posts are attached to the outermost beams. Their height and installation location is determined by the drawing. After placing vertically with a level and a plumb line, the racks are temporarily fixed by the stitches from the board. After fixing the extreme poles, a cord is drawn between them, along which the remaining bars are installed. Each rack is placed on the beam and temporarily fixed, it turns out two parallel rows.
- Racks are fastened with runs - boards, this element is necessary to impart rigidity to the structure. On top of the girder, place the bolt that connects the racks on opposite sides. Tightening is attached to the posts with metal corners. The complex of these elements limits the attic room. To make the structure stronger, the struts are subsequently installed.
- Before installing the lower rafters, a template is made that facilitates the work. In order not to check each time how to properly saw off the upper part of the rafters, take a board and, attaching it to the girder, cut it at the right angle. This will be the template. At the bottom of the rafters, which are attached to the mauerlat, a groove is cut. If the lower rafters are supported by the beam, they are trimmed in place and fastened with angles, screws and nails.
- Before building the upper rafters, it is necessary to note the center of the roof. For convenience, you can nail the board to the mauerlat and end tightening, it will serve as a guideline for aligning the rafters. To be able to trim the upper rafters on the ground, make a template. To do this, take the board and applied to the girder and sawn at an angle. The template runs all the rafters, when the racks are installed correctly, they are all the same size. The upper part of the hanging rafters is fastened with metal plates or scraps of the board. Places docking with runs are fastened with corners. The first installed extreme truss legs, then the rest. Suspended racks of timber size 25 * 150 mm connect the rafters attachment points with each other and tighten.
- The lower rafters require reinforcement with struts; for this, use a board bolted to the rafter and the supporting beam. After installing all the strut remove temporary support. Having assembled the complete truss structure, they sew up the gables.
Laying the roofing pie

The vapor barrier is attached to the truss structure using a stapler. Spreading cloths starts from the eaves, it is necessary to lay them with an overlap of 15 cm and secure with tape. A heater is laid on top, the material fits tightly, leaving no gaps. To fix the insulation stuffed crate. It is made of slats, the width of which is from 10 to 15 cm, and thickness - 5 cm. This part of the work ends with the interior decoration of the room.
A waterproofing is installed on the outside of the rafters that protects the roof from water ingress. The material is fixed with a crate to which the roof covering will be mounted. The pitch between the slats depends on the type of material. Soft roof needs a continuous crate, so the entire area of the attic roof is sewn with sheets of plywood, providing a smooth and solid foundation.
When sheathing gables, they leave room for windows, if they are provided for in the structure.
 Roofing of the roof
Work on the independent construction of the roof is a difficult and painstaking process. Using the experience of the masters who share the secrets of construction in the provided video will help to understand the sequence and nuances of the installation of the roof.
Video
This video shows how to make an attic roof of a house:
The author of this video will tell you how to calculate the attic scheme taking into account the loads on it :
Photo
 Attic roof of the wooden house
 Difficult roof construction
 Unusual attic
 Above the bath
 Broken roof
 The two-mansard roof
 With a balcony
Search
Related Articles
Waterproofing a bathroom in a wooden house

A bathroom in a wooden house can be attributed to the so-called "problem" places, which bring a lot of trouble to its owners. And, indeed, the high humidity of this auxiliary room has a destructive...
The need for a passport for waste and features of the certification process

The daily work of any organizations, and especially industrial enterprises, is accompanied by the formation of various wastes. Many of them have a harmful effect on the state of ecology. To assess t...
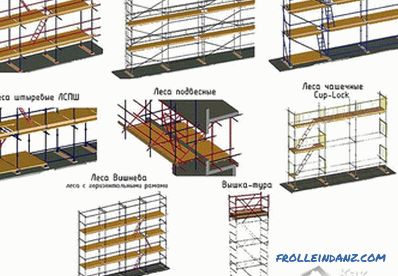
DIY scaffolding - how to make + photos, schemes
If you decide to make scaffolding, then you have to choose from two materials: wood or metal. In the first case, you will have a disposable design that can be made by any person who can work with wo...
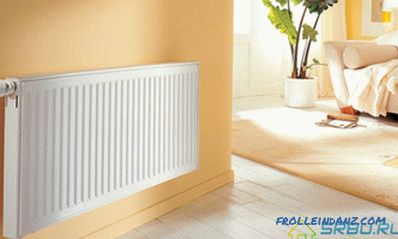
Steel heating radiators - technical specifications + Video
To select the right radiator for a heating system, it is highly desirable to know its main technical parameters. Otherwise, you can not get the result that we would like. The most important indicato...
DIY Trussing System
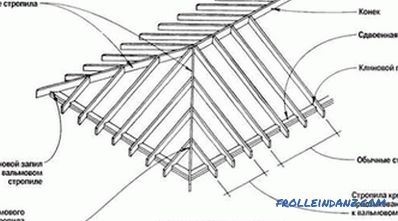
The rafter system with endovaya is an integral part of the roof of complex shape. There is a rafter system on each roof. Rafters are a structure made of beams, located under the slope of the vertic...