Nothing is simpler than the implementation of a carpentry project. However, he, like other undertakings, requires an indicative planning and budgeting. Making your own shelves requires similar planning. Almost any board that has a couple of points of support can be successfully called a shelf. In this case, the question always arises, what material is better to use.

Diagram of the size of the wall shelf.
What are the best dimensions for this product? What material should be used to make supports? How to make a closet or shelf so that they look beautiful and fit well into the existing interior? To do this, you should familiarize yourself with the advice of experienced professionals, who will explain in detail how to select the material, what the dimensions and methods of mounting shelves should be.
Also prepare the tools:
- hacksaw;
- screwdriver;
- chisel;
- tape measure;
- the square.
Determine the width of the shelf, calculate its height, find the optimal distance between several shelves.
Some features
Naturally, a shelf can store for many years the most varied documentation, various items. When the shelf sizes are selected, it is necessary to take as a basis the purpose of the storage. In order to be able to change the height of the shelves, it is necessary to use shelf tires having brackets. Apply special pin shelf supports having several drilled holes.

Schematic of the hinged shelf.
It is very important during manufacture to calculate the exact depth of the shelf. This value is in direct proportion to the part that will be installed on it. To determine the width of the shelf, you can use special tables where the width of the radio equipment, TV, etc. is indicated.
When mounting the shelf, you need to select the height so that there is easy accessibility for a certain category of users:
- Designed for adults - about 1725 mm.
- For boys of 10-11 class - approximately 1550 mm.
- For students in grades 6–8, approximately 1,400 mm.
- For elementary school students - about 1295 mm.
- A shelf for small children is about 1220 mm.
In the manufacture of the shelf on which the electronic equipment will be installed, it is necessary to provide a special place where there will be electric wires and cables. Each shelf must have drilled holes to allow the cable to be connected to the common network. In order for the plug of the wire to have free access to the socket, it is necessary to drill the hole diameter to the size of more than 32 mm.
How the appearance of the front edge affects the shelf rating

The shelf layout for flowers.
To finish the edge, you must have the appropriate materials. The front part and the overlay, made of wood, are glued together. The product becomes much stronger. If the main material of the shelf is plywood, then due to the lining the edge becomes much more beautiful. The wide lining, which protrudes slightly beyond the dimensions of the shelf, visually increases the volume. Book racks take on a massive look.
For the manufacture of edge patches, it is best to use boards about 19 mm thick, adjusting them to the required width. Shelf strength depends on it. The wide shelf is usually the most durable.
The adhesive bond of the lining with the edge of the shelf, if such an operation was performed using the latest PVA glue, is highly reliable. Such an overlay should slightly cover the upper part of the shelf. After the glue has completely dried, leveling is performed flush. This operation is performed by an edge cutter.

Scheme of manufacturing the corner shelves.
When the material of the shelf is a glued shield, the original appearance of it will create a glued decorative profile. Ordinary rounding turns the appearance of the made shelf into a softer one. Chamfer will give it a special appeal. To make original products, it is better to use a shaped cutter having a profile that meets the style of the designed project. Profile milling is carried out in several passes.
To make a quick decoration of plywood shelves, you need to stick flexible veneer strips on the edges. In addition, you can use a special edgeband. To do this, use a heated home iron to press the adhesive layer of the melamine strip to the edge of the shelf.
The iron temperature gauge must be set to the average heating temperature. Slowly moving, the iron will melt the glue, which tightly grabs the melamine strip. After the glue cools down, you need to cut the formed overhangs with a special tool. Of course, such materials do not affect the increase in shelf strength, but they help to hide rough edges.
Processing of a wooden shelf

Scheme of a wooden corner wall shelf.
The main thing when making shelves is the sanding of external corners. In order to achieve smoothness, the shelf must be sanded with 100-grain sandpaper. Grinding should be done along the fibers. Practical experience has shown that fine grit is not suitable for grinding, especially if the shelf is subsequently varnished.
It must be said that bookshelves made from a board that has not been processed are often used abroad. With prolonged use, the rough surface becomes smooth from constant touch. The structure of the tree is not broken, the board takes on a noble look.
Assembly work: nuances
In order for the shelf to rest tightly on steel brackets, it must be fixed with conventional wood screws.

Schematic of the hinged shelf.
Used furniture panels are fixed with special furniture ties of various dimensions. These screeds are screwed into the edge of the board. They are used in the manufacture of sophisticated furniture, such as desks, complex shelving, etc.
When self-tapping screws are used, you need to know a few characteristic nuances.
Often confused self-tapping screws, intended for wood, with special self-tapping screws, designed to be screwed into a chipboard. These screws have a short threaded pitch, poorly kept in a real tree. Other screws, designed for wood, have a large threaded pitch. The outer diameter of the fastener is very different from the inner, as a result, screws firmly screwed into the wood.
Sometimes it is very difficult to find a screw of the desired length, especially when thin shields are used. In such cases, the extra length is simply bitten off by pliers.
To avoid splitting the board, you need to pre-drill small holes.
The diameter of the hole should be slightly smaller than the internal diameter of the screw.
Fixing the shelf to the wall
When hanging a cabinet or a shelf, it is imperative to use a level. It will help evenly fix the structure. This operation is the most responsible, as unreliable fastening can not withstand and injure residents.
In a wooden house, it will be enough to fix the shelf with long screws.
If the walls are brick, concrete or plasterboard, then the best fixture will be dowels. Currently, the dowel is a metal rod, equipped with ribs, playing the role of thrust and metal screws. To fix the dowel, you need to drill a hole of the desired diameter, then drive a plastic rod into the hole and screw in the screw.
Didn't find the answer in the article? More information on the topic:
-

How to make a self-leveling floor on a wooden floor
Recommendations for how to pour the self-leveling floor onto the wooden floor with your own hands. Tools and materials needed for work. Preparation of the basis for filling by solution.
-

How wooden shelves are made with your own hands
Wooden shelves with their own hands are done in a short time. To do this, select the appropriate material, determine the size, choose a design. Then the assembly is carried out.
-

How to build a log house for the bath?
Recommendations on how to build a log house for a bath, choose lumber and prepare it. The nuances and technologies of installation of middle, lower and upper rims, as well as methods for their additional fastening.
Search
Related Articles
How to glue wallpaper on drywall and properly prepare the surface + Video
Wallpapering is the most popular type of wall decoration. It is easy and quick to glue wallpapers, this process is relatively simple and does not require any special skills or high qualifications o...
Combining wallpaper in the interior - the ways and basic rules + Photo and Video
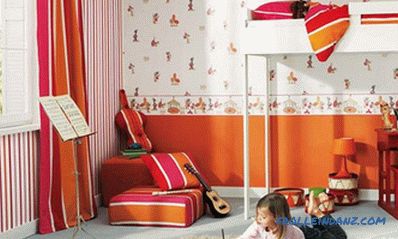
Combining wallpaper in the interior of the room, allows you to achieve originality and dynamism. It must be said here that if before the combination of wallpaper in the interior was a wonder, now no...
Spiked connection of the parts do it yourself (video)
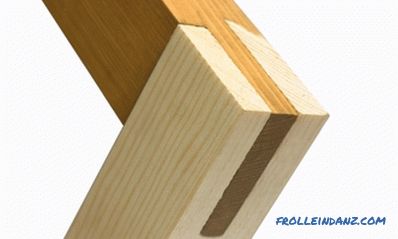
There are many types of various compounds that are widely used today in repairs. They are needed for the assembly and repair of furniture, for the connection of individual parts of some functional...
Installing doors of the wardrobe closet
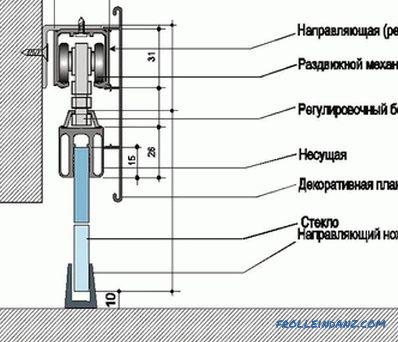
Only having appeared in the market, sliding wardrobes found popularity among the majority of inhabitants of the big and small cities. In the list of furniture sales for the past many years, they con...
The sequence of repair of the apartment and the order of execution of works + Video

In this article we will review the sequence of apartment renovation and provide some kind of action guide, with which it will become much easier to work. If you decide to start a repair in an apartm...