Only having appeared in the market, sliding wardrobes found popularity among the majority of inhabitants of the big and small cities. In the list of furniture sales for the past many years, they confidently hold the leading position. In today's understanding, the sliding wardrobe is a simple combined system that saves space in the house and favorably emphasizes the features of the interior. It is worth noting that this piece of furniture fits into almost any design. The ability to install the cabinet even in a small apartment, as well as sliding doors - these are the main advantages of this model. This article will discuss how to install the doors of the coupe with their own hands. If you follow the recommendations provided in this article, the installation of this element of furniture will not take much of your time and effort.
The design features and advantages of the sliding system
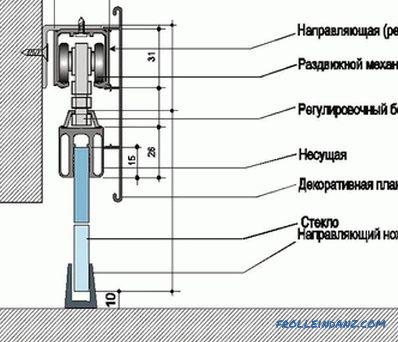
Sliding doors of the sliding wardrobe do not take up much space, which is why many owners of small apartments choose it. This is due to the fact that the cabinet doors do not need to open 90º. From such a cabinet is convenient to get things. It is quite functional, and thanks to design variations, even the most atypical buyer, who has designed an unusual interior in his house / apartment, can find his closet.
The doors of the closet can be decorated in different ways - from a personal photo to your favorite landscape, from painting to artificial aging of the surface. There is plenty of room for imagination.
Some companies offer their services in assembling the cabinet and installing doors to it. Usually this service costs about $ 50, which can significantly hit the wallet during the repair period.
Assembly
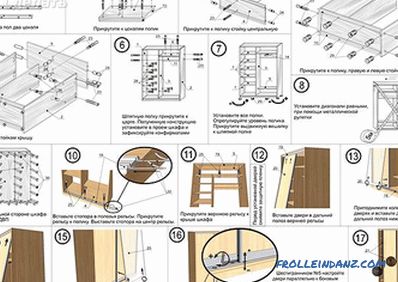
The cabinet is assembled according to a simple scheme. The greatest difficulty lies in the installation of doors. So that they work well and reliably, you need to adhere to their installation scheme. You will need upper and lower guides. They should be 1 pc. top and bottom for each door. The main load of the door falls on the lower guides, which means that you should not save on these elements. If you want to save so much, it is better to buy lighter doors, but not less quality guides. Another useful part of the door design is the stopper. With its help adjustment of width of disclosure of a product is carried out.
Installation of guides
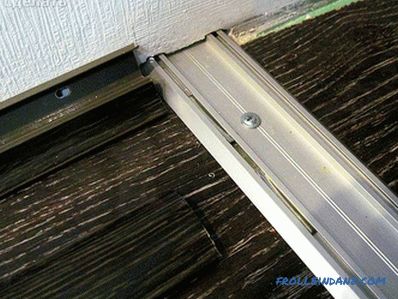
The dimensions of the guides should correspond to the width of the cabinet. The difference plus - minus 3 mm is not significant, so a small error in size is allowed. First install the upper rail.
Upper guide
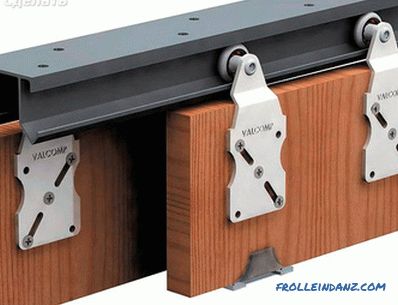
The guides are fastened with screws with a press washer 4.2 * 16 or with universal screws with a countersunk head 3.5 * 16. Make a hole in the top guide with a 4 mm drill. The pitch between the holes is approximately 300 mm.
If you have to fix the guide profile with a screw with a secret head, then you need to make a countersink in the holes using a 6-8 mm drill. This is necessary in order to screw, so to speak, sat down completely. So, the installation instruction of the top rail is quite simple. After you make the holes in the profile, you need to insert it, align flush and fix.
Lower guide profile
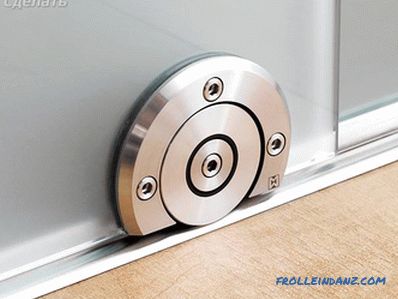
In this case, holes must also be made in the profile. But do not rush to fix the bottom guide to the cabinet. This is due to the fact that it must be shifted into the cabinet by 20 mm. To accurately determine the indent, you first need to put the lower guide profile in the cabinet. After install the door in the closet. In this case, you can not do without an assistant. The door must be installed strictly vertically. This can be achieved by moving the lower guide profile while checking the vertical with a building level.
The locking mechanism is installed before screwing the bottom guide. How to do it correctly and will be discussed further.
Installing the latch
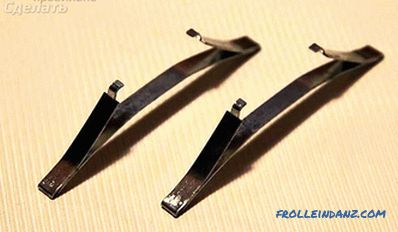
The stopper or the latch is needed so that the doors in the closed position are held tight (locked). It prevents the formation of a gap with touching sidewall. The installation of the stopper is carried out in the groove of the lower guide. On one door you need one lock (stopper).
So, you need to insert one stopper into each groove, then fasten the lower guide, install the door and adjust the tightness of the locking mechanism.
In order for the stopper or lock to be installed in the right place, close the doors completely, and then mark the center of the wheel on the guide fastened to the bottom. The stopper is established by the center on a mark. If necessary, you can move the lock with a flat screwdriver.
Adjusting the doors
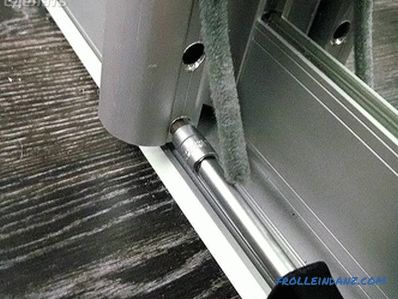
The lower wheels were designed so that using the adjustment screw located on them, you could adjust the uniformity of the door against the sidewall above and below.To do this, you need a special key hex 4 mm.
If necessary, lower the right corner and adjust the right wheel. To do this, turn the adjustment screw counterclockwise and vice versa.
How to stick a buffer tape
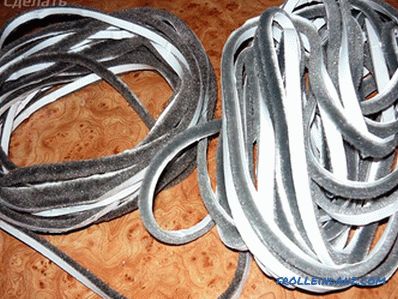
Buffer tape is stuck to protect the interior of the cabinet from dust. In addition, it softens the door knocks on the sidewalls in the process of closing them. If you no longer need access to the adjusting screws, then it's time to stick the buffer tape. This is due to the fact that it closes the holes on the vertical end of the door.
There are 2 types of tape:
- With a short nap - up to 6 mm.
- With a long nap - up to 12 mm.
Although the tape with a short nap is more popular, its long-nap counterpart provides a more comfortable use of the cabinet. The color of the buffer tape depends on the color of the system attached to the ends of the doors of the closet compartment. To glue the tape, remove the protective film and glue it to the vertical end of the door.
Step by Step Instructions - Calculation and Assembly of Doors
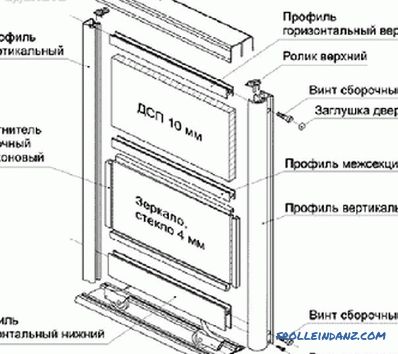
For example, take the wardrobe, which has the following dimensions: width 2000 mm and height 2400 mm.
 Door Layout
First of all, consider how to measure the width of the doors, and then the height:
- Width. So, we know the total width of the cabinet is 2000 mm. On both sides, 16 mm should be subtracted (the thickness of the side walls against which the door will rest). Hence, the width that must be closed by the doors is calculated as follows: 2000 - 16 - 16 = 1968 mm. For such a cabinet provides two doors. Therefore, it is important to consider the distance that the doors will overlap with each other. Here it is best to take with a margin of up to 25 mm on each door. Now add this amount to the width already available: 1968 + 50 = 2018 mm. This is the total width of the two doors. We divide this amount by 2, for a total of 1,009 mm, this is the size of one door wide.
- Height. Now we determine the height of the doors for the wardrobe. In our case, the height of the cabinet 2400 mm. When calculating, consider the top cover and the lining at the bottom of the cabinet 16 mm each. It also takes into account the gap between the top and bottom guides of 15 mm. It now remains to determine the height by the following action: 2400 - 16 - 16 - 15 - 15 = 2338 mm.
So, we determined the dimensions of two doors, which is 1009 * 2338 mm. After that, you can order the material.
After this, the required material or components for the doors should be accurately calculated. So, you will need 4 profiles handles, which will be mounted vertically on each side of the door. Also required framing profile for the bottom and top. Make measurements and purchase the required footage.
We frame the doors
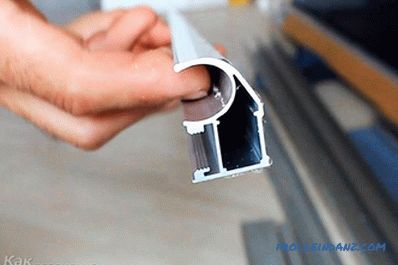
To construct the framework, you need to buy 2 sets of fittings, which include:
- 4 tightening screws for connections vertical and horizontal profile.
- 2 support wheels.
- 2 wheel bolts.
- 2 door support supports for the top rail.
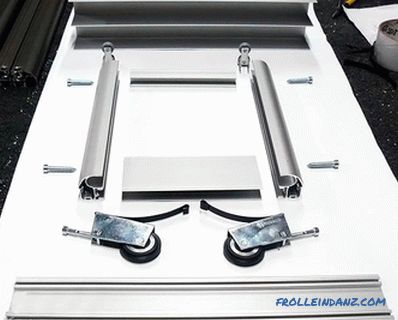 Fittings set
Now take the vertical profile knob and cut it to the height of our door which is equal to 2338 mm. The result should be 4 segments with such dimensions.
Profile handle is covered with a protective film that prevents damage in the delivery process. Also, do not take it off and when cutting.
Next, cut off the upper and lower horizontal profile of the appropriate length. In our case, the width of the door is 1009 mm. However, you should subtract the width of the handle profile, which is equal to 25 mm. From two sides it turns out 50 mm. Also in the vertical profile handle provides a special groove, which is intended for the positioning of the horizontal framing profile. The groove has a depth of 1 mm. This means that a horizontal profile will enter the vertical profile 1 mm to the left and right. Accordingly, we do the following calculations: 1009 - 25 - 25 + 1 +1 = 961 mm. This result is the length of the horizontal profile for the bottom and top in the end should be 4 pieces of 961 mm.
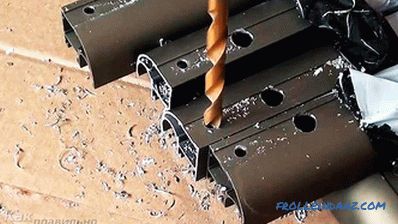 Holes for fastening
After, it is necessary to mark the drilling points under the self-tapping screws for the upper horizontal profile. So, from the end of the profile should be measured 7.5 mm. This measurement should be transferred to the vertical profile. On it, mark the place to remove the hole from the end of the profile and mark the center of the hole. These measurements should be made on the vertical profile of the handle, but only on the other side of the whip. It is also necessary to put a mark for mounting the support wheel. To do this, take the support wheel unit and measure from the end to the middle of the mounting hole. This size is also transferred to the vertical profile.
At the marked points, drill through holes for the Ø5 mm self-tapping screw through 2 strips.So, there should be 3 holes in each vertical profile: 1 for fastening the upper horizontal profile, 2 for the lower and 3 for attaching the support wheel.
Next, take a vertical profile and drill the top hole up to Ø8 mm. This is important, otherwise the screw head will not pass through it.
Assembling frames
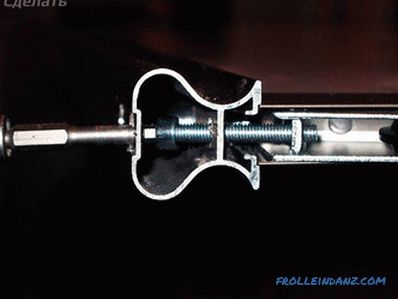
At this stage, you must connect the horizontal bar with the left and right vertical bar. Self-tapping screw all the details between themselves. Before finally tightening, the top should be supported in the top profile for positioning.
Next, you need to install the rollers on the door in the lower horizontal profile. To fix the support wheel, insert the bolt, which should be tightened by 2 mm. In the future, using it, it will be possible to adjust the position of the doors.
Filling installation
Suppose you decide to install a mirror as a door filling. To do this, around his perimeter wear sealing gum. After that, the previously assembled structure should be unwound, it is enough to unscrew the tapping screws. Lower wheels should not be twisted. Next, insert a mirror with a seal into the upper and lower bars, and then tighten the structure again. Make sure that everything coincides exactly, otherwise the mirror may burst. By the same principle, the door is assembled if the usb filler plate.
Video
In this video, there are additional details of how to assemble and install the doors for the closet:
