In this article we will review the sequence of apartment renovation and provide some kind of action guide, with which it will become much easier to work. If you decide to start a repair in an apartment, then a lot of questions will arise even before it starts. Everyone knows that in any case it is better to determine a clear sequence of actions than to rush from one to another, try to do everything, waste your time and nerves to correct your own mistakes.

Repair planning and preparatory work
Before you start preparing for repair, you need to clearly decide what you want to change. This may be a facelift - wallpapering, linoleum replacement, ceiling renewal. Or you need a major overhaul with leveling the walls, replacing doors and windows, re-planning or repairing the floor. From this will depend on the sequence of work in the repair of the apartment, as well as the need to attract certain specialists and the corresponding financial costs.
It is necessary to think about the layout and design of the room. You have to decide what kind of ceiling it will be, its material and design, whether you will glue the wallpaper or leave the walls for painting, where to place switches and sockets, what fixtures to install and in what quantity, what will be the floor covering. Take a piece of paper and describe each item in detail. This will be an indicative plan of action during the repair. Think about how you arrange the furniture after work is finished. After all, it can also play a role in the design nuances of finishing work.
It is necessary to think in advance where you can move during repair time and where you can transport large furniture and interior elements that will interfere during work. If there is no place to store furniture, then it should be moved to one of the rooms, laid as compact as possible and carefully packed with stretch film. At the same time, repairs are being started in other rooms. Then the furniture is transported to one of the finished premises, and the necessary work is carried out in the vacant one.
Photo - brooklynhomeexperts. com
Dismantling of unnecessary elements
The next step in order to repair the apartment is the dismantling of old elements. With cosmetic repairs, it may simply be the removal of old wallpaper, the removal of a layer of linoleum. In more complicated cases, at the dismantling stage, partitions are removed, the places of the door frames are changed, special niches are created in the walls, etc. It is important not to throw away all old materials at once. Many of them still come in handy. You will always have time to do this after the repair.
In old apartments it may be necessary to remove unnecessary partitions and old coverings. If you do not plan to change the entire floor, then you need to update it properly. First you need to assess how much it needs repair and insulation. And then carry out the processing of modern materials, maybe even have to replace some of the spoiled items. Before the end of the repair, the floor should be covered with sheets of cardboard or construction film to avoid damage.
Repair and laying of communications
After dismantling, the next stage is the repair of the communications system. This is the best time to replace radiators, install hoods and air conditioners, upgrade electrical wiring. A communication plan must be carefully prepared during planning.
Pay attention! If the construction of new partitions is planned, it must be completed before the laying of communications, so that later you don’t have to break or redo anything.
If the walls are hollow, then the electrical wiring is usually laid in the frame. For the full-bodied construction of the walls, make the grooves, which hide the wires. The same goes for pipes. If there is an opportunity to remove them into the wall, then it is better to do so. Installation of switches and sockets can be done after all the finishing work. So they can keep a neat and clean appearance.
Please note. In the toilet and bathroom, the walls are first aligned and the tiles are laid, and only after that the plumbing is installed.
Finishing sequence for different parts of the room
1. All finishing is done from the top down: the ceiling - the walls - the floor. It is this sequence of works that ensures that the parts of the room that have already been repaired will not be damaged during the installation of the rest.
2. However, if there is a need for a floor screed for leveling, begin repairs from this stage. To do this, you can use the usual cement-sand mixture for laying. This method is quite economical. But if there is a possibility, it is better to install using self-leveling self-leveling floors. Of course, they are more expensive, but the result will justify the money spent. They dry already on the 15th day after pouring. If you decide to install a "warm floor" system, it should be done at the screed stage.
3. Plastering is used to level the walls. Depending on their condition, one or more layers may be required. The duration of this stage and, accordingly, the total duration of the repair will depend on it.
4. After plastering, you can proceed to the final part - puttying surfaces. All irregularities, traces in the places of installation of communications are very carefully and carefully puttied. Final preparation for final finishing is carried out. It is very important to choose a good primer. This will help avoid problems when puttying and painting. The degree of adhesion of the paint or putty to the prepared substrate depends on the quality of the primer.
5. In the next step, you can produce a flooring finish for laminate, parquet or linoleum.
6. Next we install the doors and doorframes. To prevent the door from being damaged in the following stages, it can be removed or covered with film. In this case, fix the trim on the door at this stage is not necessary.
7. After this you can proceed to pasting the walls with wallpaper.
8. After all this, install baseboards, decorative elements and accessories, switches and sockets, trim, hang the door and fasten the trim.
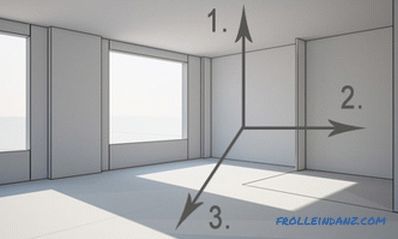
The procedure for repairing individual parts of a room.
Sequence of repair of individual rooms of the apartment
It is recommended to start the repair from the most distant rooms from the front door. This will avoid dirt and debris in the already renovated room. This is especially important if the room is passing, for example, a living room. Last but not least, a corridor is being repaired, as building materials, garbage and other items that can damage newly renovated walls, the floor or the ceiling are most often worn through it.
When the repair of a regular room is over, the door to this room should be tightly closed and hung with a building cellophane film. This will help prevent paint, plaster, dust and dirt from entering the newly installed clean finishing materials.
Video: Procedure for performing work during repair

