The floor is an important element of any dwelling, determining the aesthetically neat look of the rooms and the level of thermal comfort in them. For the floor in your house to be durable, smooth and beautiful, just buying decorative flooring will not be enough. Unfortunately, the floor surface is often far from ideal. This is an unpleasant moment, but reparable. You can always try to do leveling the floor with plywood with your own hands - this is the most accessible and easiest way, using which you can prepare the base of the floor for laying the floor you like. If, by virtue of employment, you have absolutely no time for repairs, then contact one of the construction companies with a proven reputation, and experts will help eliminate the defects of the surface of your floor.
Recommendations
 Plywood sheets
- To level the floor, use birch plywood, which, unlike chipboard and fiberboard, is an environmentally friendly, natural material that will positively affect the health of residents.
- The optimum thickness of sheets used for leveling the floor surface is 10-12 mm. Then the floor will definitely be strong and even.
- It is not necessary to take the best quality plywood for leveling the floor, sheets of the latest class are suitable.
Plywood must be moisture resistant.
Plywood alignment
 Plywood alignment technology with lags
- Even before installing plywood sheets, be sure to examine the subfloor for defects. Make sure that the base of the floor (concrete screed) is made with high quality, in compliance with all the requirements for technology. If the draft floor is wooden, then you should check the presence of loosened boards in it, which must be firmly fixed with screws. The cracked boards should be replaced as a whole, so that later the floors do not creak under their feet.
- In the case of a concrete screed, be sure to check the moisture level of the subfloor, which you are preparing for plywood flooring, using cellophane. It is important that the base is dry, otherwise excessive moisture of the subfloor may cause the floor to become unusable.
- A sturdy waterproofing backing should be laid on top of the concrete screed.
- Thoroughly clean the rough base of the floor from dirt and dust before starting work.
 Floor scheme
- In addition to leveling the floor on a concrete screed, it is common method of leveling the floor with plywood sheets on lags. In this case, a frame made of wooden bars using a special technology is installed on the concrete base of the floor.
-
 Insulated plywood floor When you are sure that the concrete base has dried out well and the wooden frame you have made is firmly fixed, you can begin the process of cutting plywood. Plywood is sold in fairly large sheets of 1.5 x 1.5 m. Sheets of large sizes laid on the floor is not always advisable. As a rule, plywood is divided into small squares, because a smaller square is not as susceptible to deformation as a large square. Usually the sheet is cut into four squares, which are laid out in stages (without fixing) on the prepared floor to determine the quantity of material used.
 - It is necessary to keep small intervals between sheets. The optimal width of the damper seams - from 8 to 10mm. Plywood sheets should not be allowed to fit tightly against the walls of the room. The distance between the wall and the extreme squares should be at least one and a half centimeters - only this way the floor can "breathe" and will be protected from deformation of the floors.
 We lay out the plywood in a checkerboard pattern
- Fit the fitted plywood sheets in a checkerboard order (in the style of "brickwork") and number them in order not to confuse them with the final installation. Do not forget to draw up the layout of the cut pieces (by numbers) and only after that temporarily remove the cut plywood from the floor.
- Parquet specialists advise to pre-coat the base of the floor with primer or special mastic to ensure its greater durability and strength. Adhesive mastic is applied with a construction toothed spatula. The thickness of the primer layer is usually about two millimeters.
- After processing the cut sheets with a primer, you can proceed to their laying: fix each sheet of plywood in the space provided for it and screw it around the perimeter with self-tapping screws. Try to keep a distance of 15-20cm between the screws to secure the sheets.
-
 Laying plywood by level Visually inspect the resulting floor and check its evenness with a two-meter rail-rule: apply the rail-rule to the plywood surface in different places, alternately orienting it in different directions.If everything is in order, polish and clean the finished surface from dust.
Now your plywood floor has become the perfect smooth foundation for the further installation of any coating you choose: laminate, parquet, carpet or linoleum. Before laying laminate, spread the substrate - a heat and sound insulation layer that will perform cushioning functions.
As you can see, if you have time, small skills for carrying out repairs and an appropriate tool, you can do the floor leveling with plywood yourself.
Video
After watching this video, you will learn how to level wooden floors with plywood:
Photos
 Fastening plywood sheets
 Leveling the floor with birch plywood
 Leveling wooden floor
 Laying on old logs
 Sanding the plywood floor
 Bathroom Floor
 Draft Plywood
Search
Related Articles
Bathroom redevelopment - how to make redevelopment in the bathroom (+ photo)
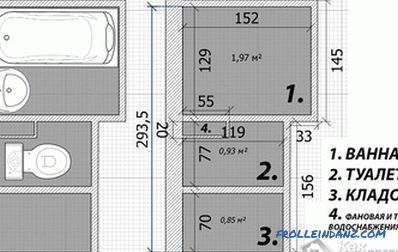
Thanks to the development of standard construction, the housing problem for many families can be resolved relatively simply. It all comes down to the financial side of the issue. But often in use co...
How to install a stove in the bath with their own hands

A private bath is the desire of many people. This is not surprising, since from time immemorial this outbuilding was not just a place of hygiene, but also had an almost mystical meaning. But times g...
Extension to a wooden house: erection technology, necessary documentation
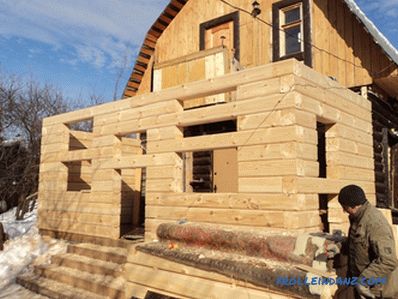
Sooner or later, many owners of private houses visit the desire to increase their area. This is achieved by completing the construction of additional premises. In its essence, the technology of suc...
Rating of shower cabins by quality - the best open, closed and combined

Any shower cubicle to some extent is built-in equipment that does not imply easy and quick replacement. Therefore, an error in choosing the right type of device at best means that, until the next re...
How to connect a grounded outlet
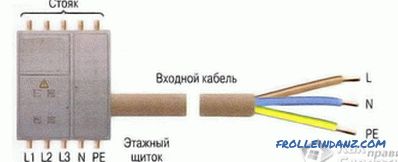
In private buildings and apartments of new buildings, the wiring of which is made using three-conductor wiring, the problem of grounding is usually solved easily. But how to connect an outlet with g...