Wood is predominantly used for laying floors. Despite the fact that wooden structures are characterized by a short service life, environmental safety, affordable cost and low weight make this material very popular among users.
")
The floor on the logs is one of the most popular. The basis of this floor are wooden bars of a certain size.
And if the walls can still be built from bricks and various blocks, then, deciding to lay the floor, the vast majority of owners will choose wooden structures. How to lay the floor with your own hands? Mostly done laying the floor on the logs. This is a reliable and time-tested option. You can cope with such work yourself.
Laying the lag on the overlap of different materials
Before you decide to lay the logs for the floor, you need to understand how this work is done in the case of different overlaps. So, if the ceiling is made of wood, then the beams in most cases will not be quite smooth. Before laying the lag for your floor, you must perform the preparatory work. To achieve a flat surface is quite difficult. In most cases, logs are attached to the sides of the beams.
")
To install the lag for the floor of the DSP, you must use dry and antiseptic-treated bars with a section of 100x50 mm or 150x100 mm.
The main advantage of the method of fixing the floor lag is that laying does not require the use of a lining to change the height of the products. Installation is carried out using incomplete screws. When mounting the floor on the logs, screws with a diameter of 6 mm are used. The length of the products must be greater than the width of the lag at least 2.5 times.
To prevent the wood from cracking during fastening, it is necessary to prepare a hole 2-3 mm smaller in the beam and directly at the lag before using the screw used.
If the beams are installed with a large step, lay the 2nd layer lag. It must be located perpendicular to the 1st, but with a smaller step. Another good way to remedy this situation is to use thicker boards when setting up a finishing layer.
If you decide to lay the floor on the logs, and the floor is made of concrete, consider the following rules:
- When installing the floor on the concrete floor, you must create a waterproofing layer. Without it, the floor will constantly melt.
- After waterproofing, layers of heat and noise protection materials are laid.
- Next, a cement or dry screed is necessarily made.
- After complete drying of the screed, logs are mounted. In the future, they fit the finishing layer.
")
The optimum ratio of the height and width of the log.
Lags for the floor should be made of boards longer than 2 m. In case there are not enough boards of 2 m, join them end-to-end. When making the connection lag for the floor, make sure that the joints in the adjacent rows are displaced not less than 50 cm in relation to each other. Laying lag is performed on the screed. If it is not possible to make a coupler, the base must at least be waterproofed.
Professionals categorically do not recommend mounting lags on soft thermal insulation material. The design will float, because of which the fine finish will gradually but inevitably collapse. If during the installation of noise and heat insulation materials are used that allow the choice of the desired width, the logs should be installed so that the insulating materials used are between them.
If it is not possible to install floor lagging along the width of insulation, install the boards at such a distance so that the end cells can be completely filled with cuts, i.e. the amount of waste should be minimal.
Laying the lag on the earthen foundation
")
Layout of the installation of the lag on the ground.
When installing the lag directly on the ground, the sod layer is first removed, about 5 cm of gravel is poured onto the surface, carefully tamped and poured with lean concrete of the same thickness. Further work is carried out in the same manner as in the case of a conventional concrete base, i.e., waterproofing material is laid, thermal insulation is put and a screed is made. In this case, instead of thermal insulation and screed, polystyrene concrete can be used as desired.
The step between lags was previously mentioned. It is important to know how to correctly calculate this value. To ensure optimal distribution of incoming loads on the lags, they need to be laid at the same distance between them.
How to set lags?
The distance between lags is one of the most important parameters. With its account the calculation of the consumption of materials.You can draw a floor plan and perform an accurate calculation of the required number of bricks, cement and timber, if the floor will not be laid on the floor. The distance between the individual elements in this case is determined by taking into account the power and strength of the finishing coating. For example, if the finishing part is able to withstand high loads, logs can be laid at a greater distance between them.
")
When installing the lags, there is a ventilation gap that allows you to ventilate the space under the floor.
If the finishing material is rather thin, the logs are mounted at a distance of 30-40 cm using boards no more than 24 mm thick. If 5 cm thick boards are used, the pitch between the lags can be increased to 1 m. Most often, 4 cm thick boards are laid in houses. In this case, the distance between the lags should be 70 cm. for an additional cost. Only the owner of the house can decide what is best for him. When installing the floor log, you must remember that the distance between the wall and the element nearest to it should not exceed the distance between the lags. Most often, no more than 20-30 cm recede from the wall.
What needs to be done before laying?
Before laying floor lags, you need to thoroughly clean the surface and then prime it well. Dry all wooden products and treat them abundantly with antiseptic. You can use special formulations or, for example, bitumen.
Sand, slag, fiberboard or others can be used as soundproof material. After the logs are laid, you need to take a long building level and check the evenness of their laying. If there are no irregularities, then everything is fine. If they are present, they must be eliminated. This can be done by adding sand under the lags in the place of unevenness.
")
Laying pattern of the support lag on the concrete base.
While working, you need the following:
- Construction level.
- Electric jigsaw or handsaw with fine teeth.
- The ax and the hammer-nail-catcher.
- Puncher.
- Screwdriver.
- Electric drill.
- Several different wrenches.
- Thermal insulation material.
- Nails 5 and 7 cm, screws 3.5, 5 and 7.5 cm, anchor bolts with a diameter of 1 cm.
- Lags 5x5 cm.
- Board for the floor.
Laying of the lag is performed on the noise insulating material with a step previously defined. When laying you need to use the construction level, ensuring maximum flatness of the surface. Fastening the log to the concrete base is carried out using anchor bolts. They are attached to other surfaces with dowels. To determine the required length of the anchor bolt is very simple - add to the height of the lag 60 mm, and you will get the desired value.
The device of thermal insulation and the subfloor
The gaps between adjacent logs are filled with thermal insulation material. Basalt fiber, polystyrene foam and izospan are most commonly used. The most convenient in the work of roll insulation. If desired, you can use expanded clay.
")
Laying of the subfloor on the logs.
Laying the lag starts at the corner of the room. The first row of boards must be mounted with a tongue to the wall. Remember to have a gap between the wall and the boards. The next row should be placed with an offset in relation to the previous approximately 2 lags. To make the boards fit tightly to each other, take a hammer, attach a piece of wood to the end of the adjoining board and lightly tap it to ensure a snug fit.
When attaching boards along walls, screws can be placed on top. In the future, they will still hide under the baseboard. In all the following rows, the cover can be fastened exclusively to the bottom wall of the groove. Screw hats should be driven inside the board. After all the boards are laid, it is necessary to close the expansion joints with a plinth. Additionally, it will protect the walls of the room from all sorts of pollution.
How to lay the boards correctly?
You can only lay the wooden floor after the logs are completely aligned. Boards must be attached to each lag. The size of the boards should be selected so that the joints are located in the middle of the lag. In addition, they should be perpendicular to the long side of the board.
To prevent the boards from splitting, prepare holes for fasteners in advance.
It should be 2-3 mm smaller in diameter than the fasteners used.
If you prefer, you can use a fillet instead of a plinth. These are special profiled strips that are installed between the floor and the walls.
To prepare the holes for the pipes, use a drill that has a diameter of 8-10 mm greater than the pipe section.To make nail fixing more reliable, you can pull the boards together with staples using a construction stapler.
Step by step instructions for leveling the floor
")
Fixing the sleeves on the logs.
The floors are almost never ideally even and smooth, especially in old houses. In some situations, drops can reach 20 cm in height. It is very difficult to bring such a surface into proper condition, and a concrete screed cannot be made in all situations. Not every beam in the old house can withstand heavy loads. In such situations, adjustable lags come to the rescue. They are installed in the following sequence.
First, bolts are screwed into specially prepared holes in the logs. The optimal number of holes is at least 5 for every 2 m of the beam. After that, the lags are arranged in a predetermined step. In the ceilings holes are created for dowel-nails. Drill the need to bring to the holes for rack bolts. The lags are leveled at the construction level, after which the dowel-nails are hammered. The protruding parts of the bolt racks need to be cut. You can lay the finish coat.
Finishing the floor
Laying the floor on the logs does not end the work. It is necessary to eliminate the differences in height and roughness. The most convenient way to do this is with a scraper or a small grinder. Scrape with a large sandpaper, then polish the smooth surface with a fine-grained sandpaper.
In conclusion, you need to apply a protective composition that will increase the wear resistance and the floor life. You can use wax mastic, parquet lacquer and oil impregnation. Choose the most suitable option for you. After the protective composition dries, proceed to the device of the desired finishing coating. Good luck!
Search
Related Articles
How to connect a washing machine to the water supply and sewage yourself

Even the most notorious skeptics finally realized that with an automatic washing machine, life in life becomes much more comfortable. Not necessarily long and tedious to prepare for the "big wash" -...
How to caulk a log house: varieties of caulking material
To caulk a log house, like a log house, is required without fail. And this should be done regardless of the circumstances of whether or not the interior and exterior are made with insulation. But...
Dry do it yourself floor screed method

Concrete screed - the most common method of manufacturing floors in construction, whether it is an apartment, a house or a production facility. This traditionally “wet” method has a number of drawba...
Warming the well with your own hands - Warming the well
A good well will provide water for the dacha, but its proper arrangement and warming is required. This becomes relevant in those areas where the comfort of everyday life depends on such structures....
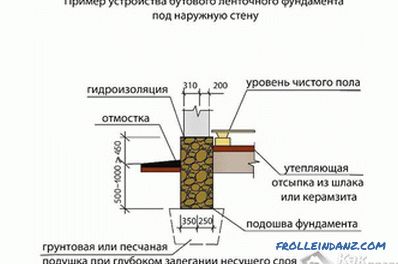
How to calculate the size of the foundation - the calculation of the foundation for the house
Calculating the size of the foundation for a house is a painstaking job that requires attention, because the quality of the elevated part of the house depends on its accuracy. As a rule, there is a...