Despite the abundance of opportunities for flooring using modern technologies, laying flooring in lags is still a popular technology among developers. The process associated with the pre-installation of support bars is more labor-intensive, but they are the best basis for the subsequent installation of the coating from a variety of wood-based materials - from boards to OSB. In addition, the free space under the floor provides air exchange, contributing to the ventilation of the ceiling and more uniform heating of the room.
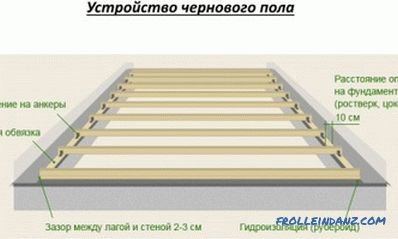
The device of the subfloor on the logs.
What and how much to buy
The best material for beams is softwood. Larch lasts the longest, but it is heavy, so most often used for log lag pine.

The distance between the floor logs depending on the thickness of the floor board.
It is less durable, but lighter in weight, more technological and cheaper than larch.
Pretreatment of pine boards will greatly improve their performance. Before setting up the floor on logs, the wood should be thoroughly dried. After that, it will soak in antiseptics and flame retardants. The durability of the supports and coatings will be ensured by waterproofing, which is laid before the flooring of the beams.
Optimum spacing of the batten
The distance over which the support bars will be laid depends on the thickness of the flooring. The sheathing pitch is from 30 cm to 1 m. Study the table below:
| Floorboard thickness (mm) | Lagging distance (mm) |
| 202530 35 40 45 50 | 300400500 600 700 800 1000 |
Plywood has higher strength characteristics, therefore for a plywood device the floor will apply a different step. The dependence of the distance between the bars on the thickness of the multilayer veneer is shown in the following table:
| Plywood thickness (mm) | Lagging distance (mm) |
| 151820 22 | 400450500 600 |
In addition to these factors when purchasing bars should also take into account the span of the room (the distance between the opposite walls). The longer the timber, the larger the dimensions it should have:
- 11x6 cm lags are used in rooms with a 2-meter span;
- bars 15x8 are placed in rooms with a distance between walls of 3 m;
- 18x10 - 4 m;
- 20x15 - 5 m;
- in 6-meter rooms lags 22x18 are used.
Ways of laying lag
It is best to make the device lag on an even screed, however, this work will take more time. Nevertheless, the support bars will be laid on the prepared surface, and if the sheathing plane will need alignment, then only minimal.
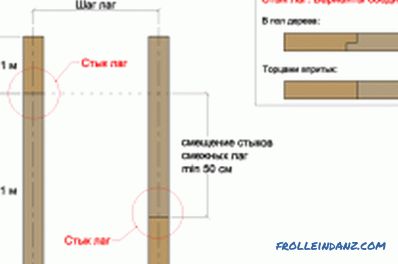
Lag docking options: end-to-end ends and cutting into the floor of the tree.
Sometimes lags have to be laid on the ground. In this case, its upper layer is removed, and the remaining surface is rammed. On the bedding of sand or sand glass, which also needs to be compacted, the waterproofing membrane is laid. Only after that bricks are laid on the base, which will serve as a support for the parallel bars. Between bricks and beams, there should be wooden slabs 2-2.5 cm thick.
Today, adjustable racks are used for flooring on the logs. They allow you to change the height of the batten in the range from 10 to 25 cm. This method is used if it is not possible to level the surface under the bars.
On whatever surface the logs fit, the principle of their installation remains general.
- First, beams are installed around the perimeter of the room. The gaps between them and the walls should be at least 2 cm.
- After that, the bars of the batten should be laid. Their direction should be perpendicular to the rays of natural light.
- At the end of the lathing device, thermal insulation (mineral wool or expanded clay) is laid between the beams.
- A vapor barrier membrane is superimposed on the lags.
Installation of a plank floor
Stapled or planed boards are laid on the logs. Their difference lies in the presence of a sampled material sample, which allows to connect adjacent boards in the thorn-groove. The process of laying and those and others practically does not differ, only the tongue-and-groove boards are fastened with nails or self-tapping screws, driven in or screwed into the sample, and the planed ones are fastened with fasteners, driven into the body of the timber. Before laying, boards should be dried out of the reach of direct sunlight.
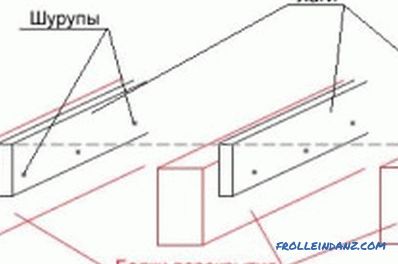
Installation diagram for a wooden floor log.
Boards are stacked transverse to the direction of the support beams.
- Markup is made for the first row. Its edge should be 2 cm from the wall so that during operation of the coating air circulation in the underground is ensured.
- The same distance is maintained between the wall and the ends of the row.
- The fasteners of the first row are driven into the material at an angle of 90 °. Nails and screws should be included in each lag.
- The ends of the boards should fit only on the supporting bars.
- The next row is mounted on screws or nails that are directed toward the first at an angle of 45 °. This provides a tighter contact of adjacent rows.
- The end joints of the second row boards should not coincide with the joints of the first row.
- In the same way, the rest of the rows are arranged.
- The fastener hats must be recessed into the floor surface to a depth of 2-3 mm.
- The floor is scraped and the slots are filled.
- Plinths are installed that hide gaps.
- The floor is painted or varnished.
A new plank floor should not be used as a base for laying the finish.
For this purpose, suitable plywood or OSB. It will be much cheaper. Nevertheless, high-quality plywood itself can be a good final layer.
Laying plywood or oriented strand board
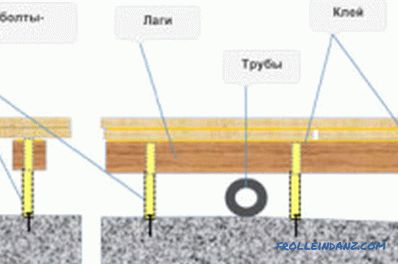
Scheme of the plywood base of the floor on the logs.
Plywood slabs or OSB are cut off so that the joints of the long sides fall on the central part of the support bars. The joints of the short sides in the adjacent rows also should not coincide with each other. A gap of 2-3 mm is maintained between the walls and plates. The width of the gap between the sheets is 0.4-0.5 mm. If another layer of coating is applied to the plywood, the width of the gaps between the sheets should be 2 mm.
The plates are fastened to the logs with self-tapping screws. The step between them on the perimeter of the sheet is from 150 to 300 mm. It is necessary to screw in the fasteners not only along the edges of the slab, but also into the remaining uneven bars under the sheet. The location of the screws, screwed along the edges of adjacent plates, should not be the same. The fastener is zigzag. Holes are drilled before screwing it into plywood. After this, the countersink makes recesses under the heads of the screws.
The edges of the sheets will have to be cycled with a plane or a belt sander, since the thickness of the adjacent plates may not coincide. After that, the gaps are sealed with an elastic sealant. The floor is saturated with varnish or painted. Rough plywood coating before applying the finish is treated with a primer.
Didn't find the answer in the article? More information on the topic:
-
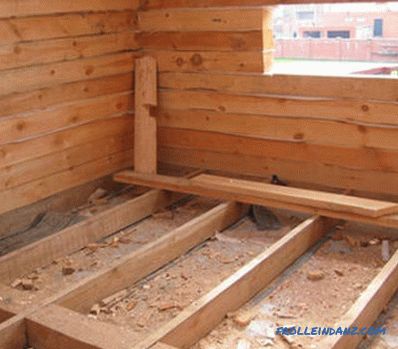
How to make floors in a wooden house
You can make wooden floors as well as other materials for this. If bricks were used to organize the foundation, the beams are placed immediately behind the basement floor.
-
Making your own wooden doors
Making a wooden gate with your own hands. Tools and materials necessary for the manufacture of wood gates. Sheathing and installation of wooden gates on a metal frame.
