Metal-plastic windows are designed for long-term operation for 10–15 years. In order to avoid any problems with them, it is necessary to very carefully approach the choice of the structure itself and the execution of assembly operations. Sometimes it depends more on the way the window is installed and the qualifications of installers than on the quality of the structure itself.
Manufacturers of windows and other metal-plastic structures have developed certain installation technologies for walls made of various materials, which must be adhered to without fail. It will be rather annoying if a wall starts to freeze around a five-chamber profile with a two-chamber energy-saving double-glazed window or mold stains appear.
In Europe and Russia, special standards have been adopted that regulate the number, type and sequence of operations when installing plastic windows. In particular, GOST 30971. 2002 and GOST R 52749 are in force in Russia. 2007 It is difficult to fulfill all the requirements of the standards, but it is absolutely necessary to rely on them - only in this case the window will serve properly throughout the stipulated period.

Preparation of the window opening
Work begins with the preparation of the window opening.
This process consists of several steps:

1. Dismantling old windows

2. Remove all types of seals and insulation;

3. Construction waste removal.

4. Alignment of the walls of the opening.
Proper installation of plastic windows according to GOST is possible only if they are made on industrial equipment and fully comply with the measurements made earlier. Even at the stage of preparatory work, it is necessary to take into account the fact that the opening should be 2 to 5 cm wider and higher than the window structure so that a full-fledged installation seam consisting of 3 layers can be formed there.
The easiest way is that if windows are installed in new buildings, one of the most difficult stages - dismantling - will no longer be there. But in case of replacement of windows, it is required. Starts removing the old window with the removal of the shutters. As a rule, at this stage, difficulties do not arise if the frame is not completely rotten. In this case, you must first remove the glass so that they do not fall out when you remove the sash.
The frame itself can be removed in several ways, among which there are very sparing, but time consuming, allowing the frame to be kept intact and suitable for further use, for example at the cottage or as a supporting element of the greenhouse. Most often, the old frame is simply cut with a circular saw and removed in fragments.
The opening is thoroughly cleaned from debris and remnants of old sealant. If there are notches, gouges and cracks with a diameter of more than 2 mm on the walls of the opening, then GOST requires that they be sealed with plaster or putty mortar. Very few people adhere to this point due to the fact that the full drying of the plaster occurs within 5 to 8 days, which is not very convenient. All this time, the opening will be open. But you can use quick-drying plaster or polymer blends, which will reduce the waiting period to several hours.
Installation and alignment of the window in the opening
After the opening is properly prepared, further installation proceeds with the installation of the frame. It should be borne in mind that the design is installed on a plumb line, and not on the edges of the opening. In most of the old apartment buildings of Soviet construction, and often in private houses, the side walls of the opening are far from the vertical, and the lower and upper are from the horizontal. If we take one of them as a reference point without checking the pre-level, then the frame can be installed, but with the doors it will be more difficult - all accessories are designed for strict compliance with the level.
When installing plastic windows according to GOST, the instruction requires compliance with certain tolerances - a vertical deviation of no more than 3mm. / m (less than 4.5 mm. for the entire length of the structure). The correctness of the frame installation is checked using a water or laser construction level.
Before the beginning of the seam start, it is possible to check the frame's plummet in another way - simply open the sash more than half. If it spontaneously opens further or begins to close, then the window is set with a violation of the vertical and the position of the frame must be corrected. If this is not done, proper sealing will not occur, which threatens not only the lower temperature in the room, but also damage to the window construction due to the appearance of ice.

The frame is fixed to the wall by means of anchors or special mounting plates, if any. Naturally, before fixing the frame it is necessary to dismantle the glass and remove the sash. This will greatly simplify the alignment of the frame and its installation.Usually, PVC window, properly made on industrial equipment, is very easy to disassemble into its component parts (except the frame) and then assemble back, possessing the necessary skills, of course.
For fastenings in the frame from the inside with the help of a drill holes are made for anchors - three on the vertical walls and two on the horizontal. Their diameter is 8 - 10 mm, depending on the used hardware. When drilling using conventional hammer drill, punch need to be used in the preparation of holes in the wall material. If the wall is wooden or made of cellular concrete, then only a drill can be used.

The fastening sequence is the lower anchors on both sides (they are not screwed to the end), then the upper and middle ones. At each stage, the sheer design is checked. When tightening anchors should be moderated - the frame, especially in the middle part is very easy to deform.
After fixing the frame in the opening, the support pads from the bottom are not removed, they act as a holding structure, which partially relieves the load on the anchor. When mounting, the support pads must be installed along the edges of the frame and at the point of contact of the vertical center pillar (impost) with the horizontal lower part of the frame.

Formation of a three-layer assembly seam
Professional installation of plastic windows according to GOST requires a three-layer seam between the wall and the frame cut, which should provide:
- thermal insulation;
- noise protection;
- vapor permeability;
- waterproofing.

1. Mounting foam.
2. PSUL - vapor permeable layer.
3. UGK - hydro-steam insulating tape.
4. Beta profile.
5. Support pads.
6. Silicone.
For the formation of a seam, several types of materials are used - steam insulation and heat insulating tape PSUL (or STIZ-A sealant), polyurethane foam, steam insulation tape.
Pasting PSUL
The formation of a seam begins even before the installation, if PSUL tape is used. It is glued around the perimeter of the frame or opening with the help of a self-adhesive composition applied to the surface of a tape rolled into a roller.

This will achieve two goals at once - to create reliable protection against moisture penetration into the outside of the seam and prevent extrusion of the mounting foam over the frame cut. The tape is made in accordance with GOST 30971-2002 and was created specifically for arranging ventilated joints when installing metal-plastic constructions. It is used only in conjunction with foam. The PSUL is made of polyurethane foam impregnated with special hydrophobic components and covered with a self-adhesive layer.
It is produced in a wide range of sizes, after sticking it expands independently and completely fills the seam, sealing it.
Characteristics of PSULs:
- resistant to UV light;
- not afraid of frost and heat (temperature range of preservation of the basic properties - 45 0 С… + 85 0 С);
- is chemically inert;
- does not harden with time;
- is water repellent;
- not susceptible to biological lesions (fungus, mold, mosses);
- has good vapor permeability (more than 0.15 mg / (m * m * Pa).
rolls, ready for direct use after unwinding. Adhesive layer has excellent adhesion to PVC and most wall materials s, which must be dry and free from dust. Porous materials are recommended to be treated with deep penetration soil.
The rate of expansion of the tape depends on temperature. At + 30 0 C it expands completely in 30 minutes, at zero temperature - for 48 hours.Therefore, when installing windows in the fall or winter, it is necessary to use a building dryer at the minimum position of the heating controller.

Filling the seam with polyurethane foam
After installing the protective tape, the seam is blown with polyurethane foam (polyurethane foam sealant). It is advisable to use professional PRO foam, which is sprayed with a gun. They provide proper material density after expansion and excellent thermal insulation, while their consumption is lower than household sealants sprayed from aerosol cans.
Manufacturers offer universal foam sealants in winter and summer. This definition applies only to the minimum air temperature at which they can be applied. Summer is used at temperatures above +5 0 C, and winter ones can be sprayed at several (up to - 10) degrees of frost. After polymerization (contrary to popular belief), they have nothing to differ either in mechanical or thermal properties.

When working with foam, it is necessary to take into account that polymerization occurs exclusively upon contact with moisture. Before filling the seam with foam, all surfaces should be moistened, and after finishing spray some water around the perimeter. But it must be remembered that the foam expands up to 40% of the original volume (meaning professional material), so tightly filling the seam is not required. If the sealant is blown into the gap too much, then when expanding it is able to deform the frame.
In order to partially level the loads occurring during the polymerization of foam, it is necessary to fill the seams with it after installing all the sashes and double-glazed windows and moving the opening parts to the closed position.
When using foam sealant it should be remembered that it, regardless of whether it is professional or household, is afraid of exposure to ultraviolet radiation and moisture from the air. It collapses faster in direct sunlight, and slower in the shade. But if you do not protect the insulation layer from external influences, then after 2 - 3 years it will collapse and the cold will certainly penetrate inside the house around the perimeter of the window.
The outer strip of the PSUL does not allow any moisture or ultraviolet light inside, so there is no danger of thermal insulation. At the same time, the structure of the tape allows an excess of water vapor to leave the thickness of the seam, it is dried naturally, which also has a positive effect on durability. If there is no tape PSUL, then you can use special acrylic sealants.
One of the most popular and common is Stiz A, specially created for the installation joints of metal-plastic constructions. It is made in white and brown color, you can pick up to any design. Possesses as high vapor permeability, as well as a waterproofing tape and approximately similar other characteristics.
The composition hardens to sufficient strength so that it can be painted or plastered, but it also retains a sufficient level of elasticity, allowing it to withstand thermal deformation and shrinkage within 15% of the seam thickness. Adhesion to aluminum, glass, plaster, concrete and other materials is not inferior to the adhesive layer of the tape. But you can only seal completely dry seam.
The thickness of the sealing coating is not less than 2 and not more than 6 mm. You can use sealant in the cold season, but before applying it must be kept for several hours at room temperature. The composition is sold in a completely finished form and is not diluted with water or other solvents. With a partial loss of ductility, it must be reheated.
Formation of the inner layer
The inner surface of the seam, from the side of the room, is sealed with the composition SASILAST 11 (StizV). It is based on polyacrylates and after drying forms a vapor-tight layer, similar to soft rubber. It protects the seam from penetration of moisture from the room. The sealant has excellent adhesion to putty and plaster compositions, the installation of slopes will not cause problems.
In addition to the sealant, for the internal coating of the seam, you can use one of the varieties of special vapor barrier strips, with a foil-coated or polymer-based. If the slope will be formed with the help of plaster compositions, then before purchasing the tape, it is necessary to study the instructions for it, having determined the level of adhesion to them.

Finishing works (slopes, window sills, ebb)
The functionality of the window is largely determined by the auxiliary elements that are supplied with the window or purchased separately.
Installation of a window sill
One of the main elements is a window sill. As a rule, it is also made of polyvinyl chloride and does not differ in color from the window frame. Its width is determined depending on the wall thickness.
The window sill comes under the frame no more than two centimeters. The opening under it is foamed or sealed with a solution, depending on the height of the window sill above the wall. From the inside it is fixed to the window frame or stand under it, from the outside it lies loosely on the sealing layer. If polyurethane foam sealant is used, it is sealed with vapor barrier tape or StizV, as well as a three-layer joint. On the sides, the sill should go down by at least 2 cm.
The sill width can be any, but the overhang beyond the inner wall plane should not exceed 6 cm. This will allow convection currents from the radiator to flow around it and protect the window from sweating. The inclination of the sill plane from the horizontal towards the floor should be within 5 - 6 0 . This will install a flowerpots or a vase with flowers on it, without risking that they will fall down and prevent the accumulation of dust or water droplets, if, for example, you forgot to close the window.

Installation of a low water
A low water is installed on the outside, which allows rainwater to drain away from the wall through the window. Installation of plastic windows according to GOST requires proper installation of the reflux. PVC also serves as a reflux material, but aluminum, zinc, and polymer coated steel can also be used. In any case, the ebb should protrude 3–5 cm, or even more, beyond the wall plane, depending on the wind load. It is also necessary to ensure the tilt of the ejection plane down from the horizontal by 5 - 8 0 . An ebb is attached to a special profile on the lower side of the window, which provides protection against moisture penetration under the frame. On both sides of the ebb should go under the slopes, which are mounted after installing the ebb from the outside and sill from the inside.

Installation of slopes
Slopes on the PVC windows are installed a variety of plastic, plasterboard, plastering. The choice depends on the size of the wall, window and type of interior decoration. Arrangement of slopes can be ordered with the installation of the window, or perform separately, during the general repair of the apartment. With properly made installation seam and installation of ebb and window sills, the slopes perform only decorative functions and affect the tightness and thermal insulation properties of the structure little.

Search
Related Articles
How to make a highchair: assembly procedure

Everyone knows that besides parental attention and care, children also need special furniture. This category includes chairs for children. There is a huge number of different children's stools, cha...
Creaks wooden floor in the apartment: the causes, ways to solve the problem
Very often a person who has a wooden floor in the house faces such a nuisance as his squeak. There may be many reasons for this. When the floor creaks, that is, the coating becomes unstable, we can...
Hand pump for well water
Not everyone is able to organize an automatic water supply system for a country house, which includes the installation of pumping equipment. Often the main problem is financial, because for the impl...
arrangement of mine and log (photo)
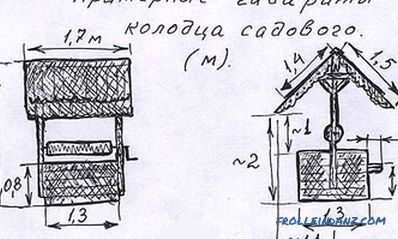
In a properly equipped wooden well, natural water purification makes it better and more palatable than after treatment at a water treatment plant. Such a source is always available and can serve as...
Dry do it yourself floor screed method

Concrete screed - the most common method of manufacturing floors in construction, whether it is an apartment, a house or a production facility. This traditionally “wet” method has a number of drawba...