Today, it is lags that are the most common basis for sex. They are easy to fit, create a solid base and have an increased lightness, which allows them to be used not only for arranging the first floor, but also for overlapping other floors of the building. This type of ceiling arrangement is the most common today. Consider how to put lags for the floor.

Construction of a wooden floor.
Tools and materials
Before you put lags on the floor, be sure to prepare all the necessary tools and materials. These include:
- wooden beams;
- mineral wool;
- roofing felt;
- dowels;
- self-tapping screws;
- screwdriver - battery-powered power tools are required, as the floor will settle in a new house;
- a hammer.
This minimum set of tools and materials will ensure that the entire volume of work associated with lags.
Workflow instructions

Installation Lag.
In order to properly put the lags, you need to create a good support for them. Most often for these purposes brick columns are used. Their laying is relevant only when it comes to arranging the floor on the first floor of the building. Brick pillars are rigid supports, so their use is quite reasonable. The posts themselves must be installed on a solid base. As it is most often used concrete or concrete pillars.
In some cases, the installation of columns is impractical, so you have to look for alternative methods of arranging reliable supports. Most often as them wooden beams of overlappings act. When logs are installed in a brick house, it is necessary to prepare slots in the masonry for them in advance. In wooden houses logs are mounted in the upper crown of the walls. There is nothing difficult in this, the main thing is to correctly determine the future basis.

Set the lag and check the horizontal position before laying the floor.
Before proceeding with the installation work, it is necessary to dry the edges of the beams to be used for the log. It is better to use already dried wood, then there should be no problems with warping. Sometimes a situation arises when it is not possible to find truly high-quality beams for installation. Then you can use an alternative method of forming the lag.
Sometimes a few boards, glued together and laid on the edge, may well replace a full-fledged beam. This method of arranging the lag is also very effective, since the stiffness of the edge of the board is large enough, it can easily withstand the weight of several people.
Next, bars should be laid on the beams. They will be used as the basis for the boards. In this case, the lower parts of all beams must necessarily be located in the same plane.

Table of distances between lags.
When the board is laid, you can proceed to the insulation of the floor or floor. Mineral wool will be used. This material has good ductility, therefore, with strong mechanical effects from the floor it will not suffer. Here you can lay the plates that do not pass water. This option is optimal. Mineral wool is able to retain heat in the house even in extreme cold.
Can also be used as a heater and bulk solids. It is necessary to put paper on the basis, filling is made on it. The process of insulation is simple, so it does not take much time.
First, all the plates should be laid in such a way that they fit tightly to each other. After that, they should be fixed on the beams. For these purposes, nails are perfect. You can use and screws, then the mount will be even more reliable.
In order to avoid the formation of cold bridges, all the gaps that form between the slabs should be eliminated. To do this, they must be glued with adhesive tape. It can be aluminum. In this case, it turns out even more reliable protection against cold.
Continuation of work
Warming is completed, you can proceed to the next stage of work. It will be waterproofing floors. It is especially important to use such a layer in the kitchen or in the bathroom; however, it will not interfere in other parts of the house. Ruberoid can be used as a waterproofing agent. This rolled material will well protect the insulation and boards from the harmful effects of moisture. You can go more simple method.
Polyethylene film is used as a waterproofing material.

Laying diagram of the support lag on the concrete base.
This material is even cheaper than roofing felt, but it has its drawbacks. Over time, the film becomes brittle. It may collapse, leading to loss of the protective layer of insulation.
Next, go to the lags. First, lighthouse lags are installed.They need to be laid in a strictly horizontal position, to check the position it is best to use a level. If there are distortions, they should be immediately eliminated.
The water level can be used as a tool, it is cheap and has high accuracy rates. For fixing the lag you need to use screws of great length. Suitable and special reinforcement fasteners. They can be made independently, logs with their help will be held much stronger than in the case of self-tapping screws.
After that, proceed to the laying of intermediate lags. Here it is necessary to observe the installation step, it can be equal to approximately 50 mm. Do not forget about the docking of short lag among themselves.
If in the process of installation there are low lags, then they need to be raised. To do this, under the lining installed under them and performing the function of an additional sound insulator, sand is poured. For lifting, you can use an additional layer of fiberboard. Due to their low rigidity, wooden wedges will not be suitable for this purpose.
Thus, the installation of the lag is made quite easily. The main thing - in the process of their installation do not forget to regularly check the horizontal floor. If this parameter deviates from the horizon, then the probability is great that the floor will creak and rise crookedly. It depends on the lag of its further correct position and how convenient it will be to exploit it.
Do not forget about the insulation design. In this case, the example was considered with mineral wool, as the foam for the arrangement of floors is poorly suited. This material is fragile, so at the slightest displacement of the floor may crack, which is unacceptable. You can also use bulk materials, but you need to work with them very carefully.
Didn't find the answer in the article? More information on the topic:
-

To glue the flooring with your own hands
What to glue parquet? You can use different glue, its features depend on what kind of parquet is planned to glue. The first step is plywood, which should be well polished.
-

Technology of laying wooden floor in the apartment
Tips to help lay the wooden floor in the apartment. Selection of materials necessary for work. Comparison of several types of bases under the wooden floor. Ways and modern technologies of laying.
Search
Related Articles
instrument setup and security measures (video)

Often there are situations in the household or during repairs when a screwdriver is simply necessary. This hand-held power tool is designed for tightening and loosening various fasteners (screws, s...
Screen under the bath with their own hands + photo
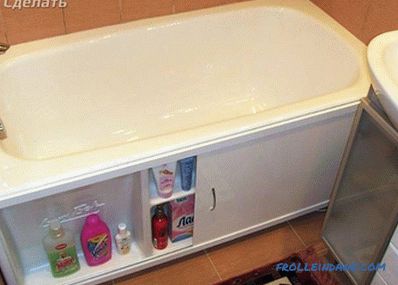
If you set up a bath, you probably already thought about how to hide all the communications under it. One of the possible options - put the screen. As a rule, this design is intended only to improve...
House of arbolita do it yourself
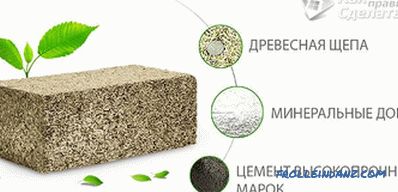
Building a house is a very crucial step, since everything must be done qualitatively and reliably, because the future construction must serve for many years. It is important to think over the detail...
How to install a sink - options for installing a sink

Installing a sink in the kitchen can be implemented by several methods. The choice of method is determined by the type of the sink itself, the material from which it was made, as well as the overall...
what is best for floor or wall decoration
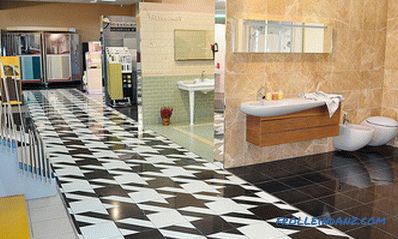
Porcelain and ceramic tiles are among the most sought-after finishing materials. However, the question of what it is to choose for decoration of a house, apartment or office space, still remains rel...