The table at the cottage plays a very important role. No lunch or picnic can do without it. If there is no table on the plot, you can solve this problem in 2 ways: buy it or make it yourself.
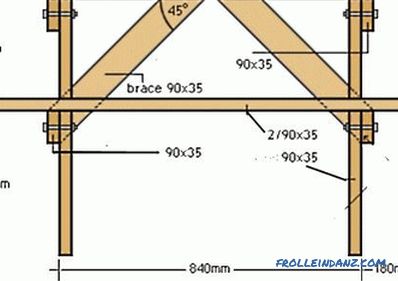
Table drawing.
Self-production of furniture will help to get products that will meet individual preferences, and at the same time help to save money. To understand how to make a wooden table, you need to know the sequence of its manufacture.
Making the table
In order to make a table with your own hands, you can use its simplest design for this. Its height will be 750 mm, length - 1200 mm, and width - 700 mm. To do this, you will need a planed edged board 40 mm thick and 140 mm wide. Also for this you will need wooden blocks, the cross section of which will be 60x40 mm, having a length of at least 700 mm.
Before starting work on the production of the table, you need to stock up on such material and tools as:
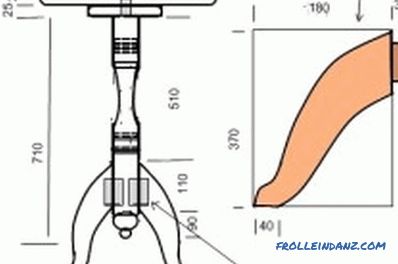
Scheme of manufacturing a wooden round coffee table.
- Electric jigsaw.
- Planer.
- Grinding machine.
- Chisel.
- Sandpaper.
- Screwdriver.
- Self-tapping screws.
- Furniture screws.
It is worth starting with the manufacture of the table top. To do this, you need 5 boards, which must be cut to the required size. After that, they need to be fixed on the transverse bars using a screwdriver and screws.
The length of the self-tapping screws must be chosen so that they carry out a firm fastening of the board of the tabletop on a timber and at the same time would not extend beyond its surface. The best option would be to use screws with a flat cap, having a length of 100 mm and a diameter of 8-10 mm.
In the case when a grooved board is used, the surface of the tabletop will be solid without gaps. But it must be remembered that from the last board you want to remove the dowel, using an electric jigsaw. If planed board is used, then a gap of 1-2 mm should be left between it. This will not allow dirt to accumulate in the seams, and if this happens, it can be easily removed.
So that the size of all the gaps is the same, you can lay a rail between the boards, the thickness of which will be the right size. If such a rail is not, then you can take a metal corner.
Assembling the legs of the table
The legs of the product must be assembled from the same material of which the tabletop is made. The legs are a very important part of the design, they will ensure its stability. So that the table does not move, you need to carefully mark the boards. To do this, take a piece of plywood or a sheet of fiberboard and draw a rectangle on it with dimensions of 75x60 cm.
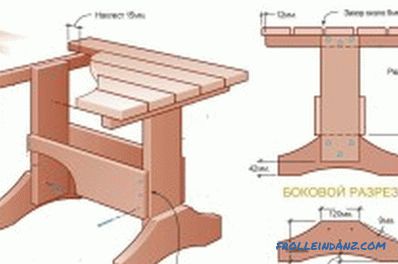
Wooden table scheme.
After that, the board is taken and laid at the corners of the marked rectangle. The edges of the markings will be the line of cut material of the leg. So, in turn, you need to cut all 4 legs.
Finished legs need to be fixed to the countertops of the tabletop. You can do this with furniture screws. Between the legs, along the tabletop, you need to secure the stiffener. It will allow not to spread legs from the vertical level. For this you need long screws.
The bars should be fastened along the ends of the table top, in its lower part. They will provide additional fastening of the legs, which will reduce the precariousness of the table, and at the same time they will protect it from external influences, which will increase the reliability of the table. It is necessary to fix these bars with the help of nails that do not have a cap. You can get such nails by biting off their caps with pliers. After that, you need to completely drown the nails into the surface of the timber.
Final work and painting of all parts
In case you need to make a round wooden table, you need to apply the appropriate marking on the finished table. To make it easier to perform, you can use a children's gymnastic hoop or any other object that has the required size. Most importantly, this item should not fall on the fasteners of the table.
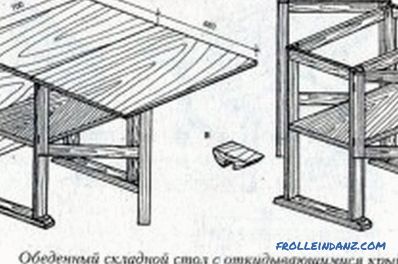
Folding table layout.
After applying the markup, you need to trim the extra parts. This can be done with an electric jigsaw. Start cutting is required to perform on the ends of the product. After the ends are sawed off, it is necessary to round the side parts.
It is necessary to work with a jigsaw carefully so as not to cause chipping of the surface of the material being processed. This is especially important when moving from one board to another. In order not to cause material damage, you need to turn off the tool before each new board.
After the required shape of the table has been obtained, it is necessary to grind its surface using emery paper.You need to start with a paper that has a large grain, gradually moving to a smaller paper.
The final step will be the painting of the table. To paint the assembled product, you can use a stain and a colorless acrylic water-based lacquer. This varnish has the properties of penetration into the wood structure, which, after drying, will provide the table with reliable protection from rain and moisture. Apply varnish in 2-4 layers. Each new layer must be applied after the full drying of the previous one.
Having finished these works, you can start using the finished product.
Assembling a wooden table with your own hands is an easy task. If you stock up in advance with all the material and tools, it will not take a long time.
Didn't find the answer in the article? More information on the topic:
-
Wooden garage: building your own hands
It is quite possible to build a wooden garage with your own hands, and in a rather short time. How to build a garage frame type: recommendations for the execution of works. Walls, floor, roof of the garage.
-
Properly making your own shelves
Making shelves with their own hands: planning, features of work. How the appearance of the front edge made affects the shelf rating. Wood shelf processing, assembly work.

