The swimming pool at the dacha is no longer a luxury item. After all, it can be done independently. If you have the necessary funds, the reservoir for the rest can be bought. However, a person who is a little familiar with construction work will be able to equip such a structure without the involvement of specialists.
First you need to figure out what types of similar reservoirs exist, as well as learn about the pros and cons of each of them.
Views
")
All pools can be divided into two types:
- frame;
- trenches.
Frame
")
Such pools are either above the ground or at least a little, but protruding above it. Their distinctive feature is the presence of the frame. It is very convenient for moving and dismantling for the winter period.
The disadvantage of frame structures is that they are very expensive. Although some masters can make them on their own.
Pitted
For its construction it is necessary to purchase concrete and waterproofing materials. The disadvantages of this design is that it can not be dismantled. Another disadvantage is a large amount of earthworks. We'll have to dig a pit with an area of about 16 square meters.
Pit
") Pit
Pit
Instructions:
-
") First you need to choose the optimal place. It should simultaneously decorate the site, and serve as an ideal place to relax. However, he should not spoil the soil and be located where there is a risk of permanent pollution. It is also desirable that the building be located close to the plumbing system.
First you need to choose the optimal place. It should simultaneously decorate the site, and serve as an ideal place to relax. However, he should not spoil the soil and be located where there is a risk of permanent pollution. It is also desirable that the building be located close to the plumbing system. - At the second stage it is necessary to calculate the size of the pool. Pitched structures are usually not less than 4 * 4 meters. The depth can be from one to two meters. The optimal depth is one and a half meters.
- After the dimensions are determined, it is necessary to drive the pegs where the future pool will be located. Its shape can be round, square or rectangular - it depends on the tastes of the owner.
- Having marked the borders, it is necessary to start earthworks. The dug trench should be a little deeper and wider than on the plans. Thus, the dimensions of the walls should be increased by 40-50 cm. When determining the optimal depth, the waterproofing layer should be taken into account.
- After the foundation pit has been dug, you can proceed to leveling the bottom and waterproofing. The first layer on the bottom of the sand poured. The layer should reach 30 cm. Then the sand is rammed. On the leveled bottom it is necessary to put roofing material in 2-3 layers and bitumen mastic. Roofing material should slightly overlap the walls.
") Preparation for installation
Preparation for installation
-
") Before you begin with walls, it is necessary to take into account the need to install a drainage system
Before you begin with walls, it is necessary to take into account the need to install a drainage system - The next stage of work is formwork.
- Between the formwork and the ground it is necessary to pour a layer of concrete. To make the walls more durable, you need to choose a solution of the appropriate brands and install a reinforcing mesh.
- When the walls grab and gain sufficient strength, the formwork should be removed. The walls of the pool at the same time it is necessary to process in a special way with the help of a mixture of solution and water. This process is also called fermentation.
- It is necessary to process the bottom. At the bottom of the rubble is laid and poured it with hydroconcrete. Under the tie is better to put a reinforcing mesh.
") Skimmer system of the pool
Skimmer system of the pool
The final stage of the work will be decorating the pool with decorative trim. If you plan to install a ladder, then it is better to design it in advance. It is installed at about the time the walls are filled. Around the artificial reservoir, you can also make a coating. Most often it is a different tile.
Polypropylene
") Iron
Iron
Polypropylene pool will require more effort and cost, than ordinary concrete construction. However, he has a whole lot of advantages. It is known that in the construction of such structures the biggest problem is waterproofing. Polypropylene is an ideal material. It has increased strength and durability. This material can be given any shape.
The construction of polypropylene can be constructed in two ways:
- Buy a polypropylene bowl of the desired size and shape and set it in a pit.
- Buy polypropylene sheet and make it a bowl of his own.
Independent production of a polypropylene bowl will cost about the same in cost as purchased, because in this case the master will have to buy a special tool for polyfusion thermal welding - an extruder. In addition, you will also have to pre-learn how to weld sheets and make stairs.
Installation is performed in the following sequence.
- First you need to dig a pit, the size of which should exceed the size of the bowl.
- After that, you need to put a waterproofing on the bottom and pour concrete.
- The finished bowl is set in place. If the bowl needs to be boiled, this can be done directly next to the installation site.
- After installing the bowl, you need to install a bottom drain, a skimmer and nozzles.
- The next stage is the pool warming along the edges. For this you can use foam.
- It is better to tie some walls with stiffening ribs.
- Pipes, too, need to be warmed up and, just in case, pasted over with regular tape.
- Next to the building, it is necessary to calculate a device for filtering water. It can be installed, for example, in the basement of the house.
- After all communications are connected, concreting can begin. So that the solution does not damage the polypropylene, it is necessary to install an internal formwork in the bowl. This ensures that all sides of the structure are smooth and beautiful. Filling itself is produced in layers of 30-35 cm in height per day. This is the optimal mode of pouring the pit. To prevent the concrete from damaging the bowl, you can also use water in addition to the formwork. For example, when pouring the next layer of the solution, it is necessary to add water to the bowl on the same level. Work on average takes about a week.
Filling should be slow. It is better to divide the process into several stages.
When the concrete hardens, you can lay tiles or other materials to give it an aesthetic look.
Polypropylene pools are gaining popularity today, although this technology was unknown a few years ago in Russia.
Video
Photos
") Equipment
Equipment
") Of polypropylene
Of polypropylene
") Installation
Installation
") Tiles near the pool
Tiles near the pool
") Swimming pond
Swimming pond
")
")
If finances allow, you can order a turnkey pool of any kind: polypropylene, plastic, composite, frame.
Search
Related Articles
Pond on the summer cottage - the construction of an artificial reservoir (+ photos)
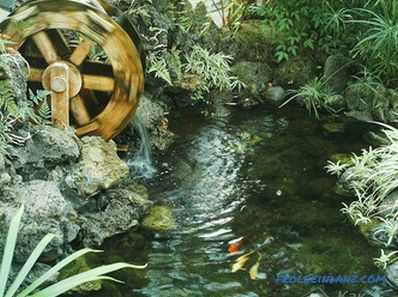
A small pond, made with your own hands, will give the suburban area an original look and make the pastime at the cottage more fun and exciting. Especially if you fill it with fish and aquatic plants...
tools and materials, drawings, diagrams (photos and videos)
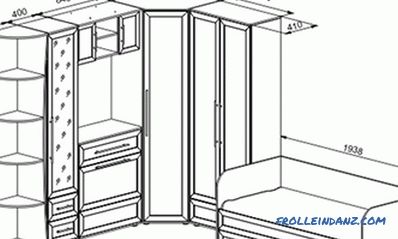
Many home craftsmen try to bring a piece of their soul into the house by means of their own making furniture. In order to make a corner cabinet with your own hands, it will take a lot of effort, a...
How to combine kitchen and dining
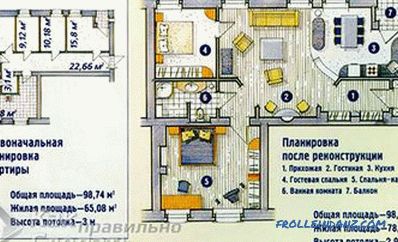
Traditionally, the kitchen prepares food, and in the dining area it is accepted. However, in most apartments the area of the kitchen room is so small that it is impossible to turn around on it. It...
How to paint a wooden staircase - painting a wooden staircase
Wood is one of the best building materials. While the tree is in the ground, it is constantly being renewed, thanks to which some species can grow for thousands of years. The situation with finished...
How to hire a brigade to repair the apartment

They say that repairs can only be suspended, but it is impossible to finish. To such a sad conclusion come those people who took up this case, "not considering the costs." Even this seemingly simple...