Metal, wooden or even plastic narrow strips from which a fence can be assembled are commonly called a picket fence. However, despite this "generalized" name, the fences made from them can end up being quite diverse. And, of course, even a beginner can easily cope with this kind of work, as it is quite easy to make a fence from a picket fence. Especially if you know a couple of nuances.
Supports
 Wooden supports
Any fence is usually divided into sections, which kept on buried in the ground supports. If the fence is heavy (for example, made of brick), then it should not just be buried and concreted into the ground of the support, but a real strip foundation should be made. Similarly, you should do in situations where strong winds are blowing in your area (capable of knocking over a poorly fixed fence) or there are dogs in the area (yours or a nearby one) who like to arrange "digging".
Making a picket fence with your own hands, you can choose either a metal pipe (including a square or rectangular section) as a support, or a wooden bar (at least 5x5 centimeters in size) or a concrete asbestos-cement pipe. Typically, supports are made of the same material as the fence itself (with the exception of asbestos-cement pipes, which are best combined with a wooden wall fence).
 Metal poles
Metal poles can be hammered into the ground by pre-drilling a hole in it to the depth not less than 50 centimeters (its diameter must exceed the cross-section of the support). After driving a metal pillar, the space around it should be covered with gravel and tamped.
A wooden bar, when used as a support, in the lower part should be treated with bitumen mastic, then wrap with roofing material and only after that concrete, plunging not less than 50-70 centimeters into a hole dug in the ground.
Asbestos-cement pipe supports should also be concreted to the same depth. Remember that the empty pipe is quite fragile, so after the installation of the fence is completed, concrete should be poured into it.
Framework
 Fence Frame
The fence strip will not hold in the fence by themselves - they need a frame that will interconnect the adjacent supports. If the supports are metal, then the frame is made of the same material (mainly from a shaped tube of small cross section). The frame itself consists of two or three horizontally laid elements, to which the picket strips will be attached later.
With wooden supports, the framework is made of a bar with a section of 4x4 or 5x5 centimeters or from boards with a width of no more than 10 centimeters and a thickness of at least 2 centimeters.
 Wooden fence made of picket fence
It is customary to mount a metal frame to asbestos-cement pipe supports. For these purposes, they make holes through which pass small segments of metal fittings. Then they are welded on both sides of the frame frame.
Fastening the picket fence
 Wooden fence elements scheme
The fence is attached to the horizontal slats the frame is approximately the same for all types of plank material:
- Measure the width of your picket slats and the distance between the supports. Calculate what the distance between the individual picket elements should be in order for the fence to look solid and not look like a leaky sieve.
- Determine the shape of the top edge of your fence. Since it will be quite difficult to make a fence of a curvilinear shape after you fasten all the straight elements, take care of giving the necessary bending to the picket fence in advance. Most often they use the shape of a convex semicircle (within the same section of the fence), but experts on feng shui (if you suddenly decide to listen to their advice) are recommended to give the sections of the fence the appearance of a concave semi-circle ("bowl"), everything you need: from money to family well-being.
- Install the supports of the future fence. If you have concreted them, then wait until the concrete has completely hardened, and the whole structure does not lean under the weight of the fence.
- Fasten the frame for the shtaketnik in the form of horizontal bars on the supports. Metal elements with each other is better to fasten by welding, and wood - self-tapping screws.
- Paint the supports and the frame (after fixing the picket fence, this will be difficult enough).
- Paint the fence if necessary.
- Attach the strips with equal pitch in all sections of the fence to the horizontal elements of its frame. The fence should not touch the ground, especially if it is made of wood. Attach the wooden planks should be with screws.
- If you want to make the fence as unobtrusive as possible, place the shtaketins on both sides of the horizontal bars of the frame in a checkerboard pattern. In this case, the step between the individual shtaetiny should be 2 centimeters less than their width.
Video
Instructions for making a fence from an evroshtaketnik:
Search
Related Articles
Apartment design project: how to make yourself
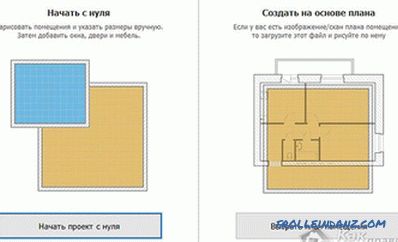
Repair is getting closer and closer, and you still can not decide which of the many ideas is better? The surest solution is to try them all. If this advice seems crazy to you, then you probably have...
How to fold the fireplace itself out of bricks
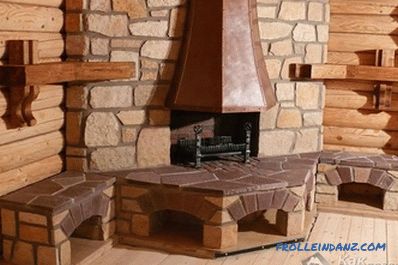
Today, the fireplace has already ceased to be a vital heating structure and in most cases serves as an original element of the interior. However, the fireplace can still be considered as an addition...
Top Acrylic Bathtubs - Manufacturers and Models Rankings
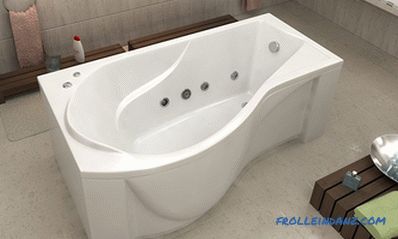
Acrylic baths have rightfully taken their place in the plumbing market, because they are an order of magnitude better than the usual cast-iron analogs. Their most significant advantages are much low...
Bath or shower - which is better detailed comparison
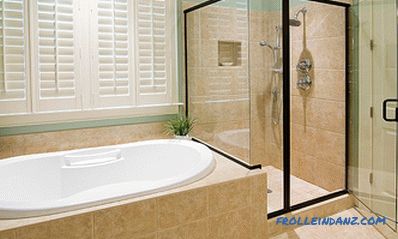
When arranging the bathroom, you will inevitably encounter a host of small and large worries and troubles. And immediately you will face the choice of plumbing equipment. Bath or shower - which is b...
Decorative panels for interior walls
In their search for original solutions for decorating walls and ceilings in a residential area, some opt for decorative panels. Such a material can serve as an element of decor, and the main finish....