Repair in the room is not only a very laborious and necessary process, but also at times quite fascinating. Most of the time, one has to perform repetitive manipulations, but when working with finishing materials, the most interesting begins.

The great popularity of the floorboard, not only because of the variability of the appearance, but also the ease of installation.
Basics of the material and surface preparation
Before you install the floorboard yourself, you need to familiarize yourself with it. The material is mostly natural, so it is he who is preferred in some cases. Usually there are 3 main layers, but in fact there are 5 of them:
- Seamless veneer. It lies down gently and serves for a long time.
- Reiki. Like the lower layer, it is made on the basis of coniferous trees, because they have high rates of endurance and durability.
- Interlayer to strengthen the ends. Usually made from beech, but often manufacturers use here hvoyniki.
- Facial wood. Usually, the material is chosen depending on the wear-resistant qualities, but variants with any wood of interest are possible. Only quality boards (slats) without chips and cracks are chosen here.
- Varnish. The number of layers depends on the manufacturer, but usually ranges from 5 to 7.

The design of the floorboard.
Externally, the parquet looks like a plank with a tooth on one side and a notch on the reverse. Special popularity it was acquired not only due to the variability of appearance, but also ease of installation.
It is not always possible to start installation on a perfectly flat surface, and aligning the floors in order to lay the floorboard is impractical. The easiest way to align is to use a chipboard, because the plate will give the floor exactly the look that is required. In this case, it is better not to use other options of operative adjustment, since the flooring board, despite its strength, may not withstand the point loads on the non-reinforced area (cabinet, sofa).
Main work activities
Tools and materials:
- jigsaw;
- tape measure;
- scissors;
- plastic film;
- adhesive tape;
- substrate;
- parquet;
- square;
- pencil;
- wooden bar;
- hammer;
- wedges.
Before you start to do something, you just need to bring the parquet into the room and leave it there for 3 days, so that he can “get used” to humidity and ventilation (packages are not opened at the same time). Otherwise, after installation, it may be difficult to change the deformation.

Technology of laying floorboard.
A polyethylene film of 0.2-0.3 mm is laid as a base, which serves as a waterproofing material. This film will reliably protect the lower layer from external moisture, along the way will not allow to depart necessary, which will significantly extend the service life. It is fixed with PVC tape to the base and among themselves. Directly on top of the polyethylene is laid substrate, which is also fixed with tape.
And only now one floorboard can be laid. The direction is chosen along the line of light or along a wide wall if there are several windows in the room (for example, they are facing east and west). The very first board is placed with the tooth against the wall, but the gap between the stackable board and the wall must remain, therefore special wedges should be used. No rigid fixation is required in this case.
Often it turns out that the length of one board is not enough, therefore measurements are made and another 1 cut is made with the jigsaw. You can use a fine-grained hacksaw, but it can give a chip with a greater probability.
Each next row begins with the installation of trimming the previous board, which will allow not to fall into the seam with the previous one, i.e. not to lose strength. After the board is brought into the lock by hand, you need to attach an oblong wooden bar to it and securely fix the material with light strokes. This is progressing to the very last row.
The last row often has to be cut to the width, since it is not always lucky with the width. Before cutting off the excess, you need to take measurements several times, and only then cut. It is best to use a trial cut of 10-15 cm in width, which will certainly reveal errors.
When the floorboard is laid, it is often necessary to encounter complications - pipes and internal corners, but they just need to be bypassed, cutting off all that is superfluous. In order to do it yourself, you need a tape measure, a square and a pencil. When bending around the pipe, you will have to cut a little more, because you need to attach a piece on the back side.
Final touches and debriefing

Laying parquet on the screed.
Tools and materials:
- tape measure;
- plinth;
- screwdriver;
- jigsaw;
- screws;
- dowels and screws;
- fasteners.
At the very end, the wedges are removed, the baseboards are cut and screwed to the walls. If the walls are wooden, then you can immediately grab the screws, while for concrete you will have to complete the following sequence:
- Drilling holes with a step of 40 cm.
- Driving dowels into each hole.
- Twisting the screws until fully locked.
At the very end, all open areas of the plinth are closed with a special edging, which ideally merges with the surface. If the length of 1 plinth is not enough, then you need to use special connecting elements, which are also used in the corners.
In order to independently put the floorboard in a room, it does not take a lot of time and effort, but you need to pay attention to the process with all attention.
Due to the fact that the material is natural, it will last a long time, and the convenience of its operation will not leave anyone indifferent.
Didn't find the answer in the article? More information on the topic:
-

Mounting steps for wooden lining
Installation of wooden wall paneling consists of several stages. You can fix the boards in several ways: nail, use clamps, use a construction stapler, attach with screws.
Search
Related Articles
Facade siding do it yourself
Facing the facade of the house is one of the main components of not only external attractiveness, but also reliable protection of external walls from the adverse effects of natural factors: rain, sn...
selection of materials and installation of boards
The lining of the house inside the clapboard looks extraordinarily beautiful. If the lining is wooden, then wood flavor is added to the exterior beauty. But the rather thin structure of the element...
material selection, tools, work order (video)
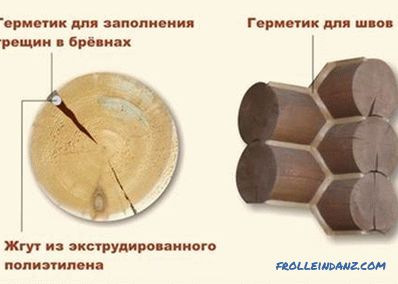
Without the caulking of a log house, a wooden structure cannot effectively hold heat, even if the logs are fitted very tightly. This is especially true for such facilities as the bath, where other...
Insulation for pitched or flat roofs
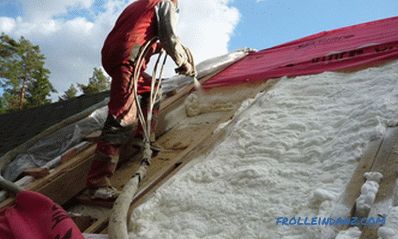
Anyone will enjoy the prospect of a thirty percent reduction in heating costs at home. It is quite real - this is the result that can be obtained by choosing the right insulation for the roof. In ad...
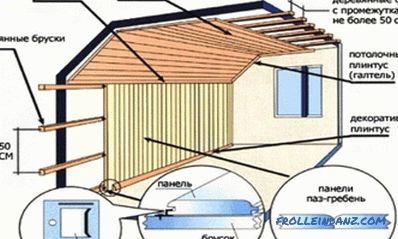
where to begin? Preparation before starting work, diagrams (video)
Balcony cladding with clapboard is by far the most popular and optimal finish for this part of the apartment. This is due to the fact that the material is environmentally friendly, has sound and th...