When the clinker tile appeared, the demand for it quickly increased and this is not surprising, because its characteristics meet many requirements. This building material is suitable for cladding virtually all types of surfaces, be it steps, walls, footpaths, indoor floors, and so on. In general, you can talk about the benefits of this product for a long time. Let's talk not only about this, but also about how to put a clinker tile.
Advantages and disadvantages
 The clinker tile has both advantages and disadvantages
The brick tile has a number of properties that distinguish it from other finishing materials:
- The durability of the material is a great advantage. The strength of the tile can be compared to clay brick, because in fact it consists of well-baked clay.
- Due to its composition, the clinker tile is considered to be an environmentally friendly material, fungi are not formed on it, it is not exposed to ultraviolet radiation.
- It has a low level of water absorption. This makes the tile frost-resistant.
- It is very easy to care for this facing. Enough conventional washing as pollution without the use of additional funds.
- The range of material is simply amazing. There is a large number of clinker tiles of different colors, shapes, with different patterns and reliefs on the surface. The front side of the tile can be glossy.
- Depending on the type of clinker tile, it can be used for paving, cladding, construction of hydraulic structures.
But there are clinker tiles and disadvantages:
- This is a rather fragile material.
- The cost of the tile is above average.
How to calculate the required number of tiles
 You can understand the principles of calculating clinker tiles using this scheme
It is very easy to calculate the amount of tile needed for lining. For this, it is necessary to measure the width and length of the surface to be veneered, whether it be a facade, a staircase or a stove. When measurements are made, the length is multiplied by the width and the surface area is obtained. The area of the elements inside the calculated surface is subtracted from the obtained value, and the area of the required number of tiles is obtained.
Often, the manufacturer himself indicates how much tile is required for facing 1 m 2 of the surface, and taking into account the tile joints, therefore, it will not be difficult to determine how many tiles are needed.
Video: calculating the number of tiles
How to prepare a surface for laying
 You should plaster a brick wall
An acceptable surface for laying clinker tiles on a wall is considered to be a fairly smooth and durable wall. Achieve a perfectly smooth surface is optional. For example, such a roughness, as in the cinder block, does not interfere with the installation at all. But the wall of brick with deep seams is desirable to plaster. Plastering the wall will be necessary even if there are falling out elements on it, such as broken bricks, old tiles or plaster. Before plastering, loosely adhering elements should be removed: tap the surface, for example with a hammer, and remove the separating fragments.
An ordinary mortar made from sifted sand and cement is perfect for plaster. Well, the thickness of the plaster layer will depend on the depth of the wall flaws. True, always try to do a minimal layer.
 The best reason for the clinker tile is the screed
The clinker tile has considerable weight, so it becomes clear that the ideal floor for laying clinker tiles is a concrete base, such as a slab or cement screed. The screed is needed in cases where the surface is embossed. But it should be remembered that the floor before pouring should be free from all kinds of debris and dust. Otherwise, the tile will not keep well and will eventually separate from the base.
It must be said that in preparing the floor one should pay more attention to the slope. In the case of wall surfaces, this is not too important, but on the floor, especially in rooms with high humidity, this should not be ignored. Take, for example, a bathroom. If you do not pay attention to the slope of the floor, it may be so that moisture will accumulate in hard to reach places. Floor horizontal is a must.
Required tool
 A notched trowel
will be required. To do this, you will need the following tool:
- grinder to cut tiles to size;
- drill with nozzle for mixing adhesive mixture;
- capacity for mixing adhesive;
- measuring instruments (tape measure, level);
- notched trowel;
- pencil;
- trowel.
In cases where the work surface needs improvement, that is, it is too embossed, you will also need:
- a shovel,
- buckets,
- rule,
- mesh for sifting sand.
Selection and preparation of the adhesive mixture
 For the clinker tile you need special adhesive
The clinker tile can be glued onto the cement mortar. To do this, you need sand and cement. 4 parts of sand and 1 part of cement are poured into the mixing container. Parts are very convenient to measure buckets. For example, if you pour 4 buckets of sand and 1 bucket of cement, you get the optimal amount of mortar that does not have time to harden while laying the tile. Sand and cement should be mixed still dry, and then add water and knead. For better solution tenacity, you can add liquid glass, but quite a bit, because then the solution freezes much faster.
It must be said that cement mortar does not provide the longest possible service life of the coating, and builders give more preference to special adhesive mixtures containing polyurethane. Such compositions can be produced both in finished and in dry form, and each adhesive is characterized by a certain degree of frost resistance, solidification and scope of application. The most popular brands of adhesive for clinker tiles are Ceresit CM, RKS, Knauf, Extrabond.
 The mixture is mixed with a construction mixer
Mixtures that are sold dry are prepared according to the instructions. However, most often the instruction is banal - you just need to add water in a certain proportion and mix it thoroughly with a construction mixer.
Water is first poured into the tank, and then, during the mixing process, the dry mixture is added.
Video: making glue for clinker tiles RKS
How to glue tiles to the floor
So, we come to the consideration of tile laying technology floor. First, it should be said about several nuances.
Choice of floor tiles
Floor tiles are made from 14 to 30 mm thick. When choosing a tile for the floor should take into account such an indicator as wear resistance. According to this parameter, the brick tile is divided into four classes of wear resistance, where class 1 is the least wear-resistant tile, and class 5 is the most wear-resistant tile. It is important to take into account the slippery material For the bathroom, kitchen and other wet areas, you should choose tiles with a slipperiness index of at least R11, but preferably higher. In the bedroom and living room can be laid tile with an indicator R10.
Methods for laying clinker on a floor
 The laying pattern may be different
To achieve a certain floor design, clinker tiles can be laid a certain pattern.
- Normal linear masonry is often used - this is a practical option for most rooms.
- Some people prefer diagonal styling, and this option is also possible, however, keep in mind that in this case there will be a lot of waste.
- The clinker tile can be laid with bandaging. This option is appropriate in some interior styles, for example, Provance, English style, loft.
- The combination of clinker tiles with mosaic looks presentable. 17 , from which with the ingress of water, the grout is washed out.
Technology laying on the floor
 The process of laying on the floor
Before laying the tiles it is necessary to process the floor, check the corners of the tile. If the corner of the tile does not fit into the corner of the room, then it is necessary to retreat from the wall and draw a straight line from corner to corner, using the rule to level the unevenness. This operation is repeated on each wall to get a flat rectangle of the largest size. If this operation is neglected, then you will have to adjust the tile against the walls. However, when using a plinth this may be irrelevant.
With diagonal laying, the markings start from the center of the room.
- Laying starts from an angle that is fairly well lit. Initially, it is necessary to lay out a series of whole tiles, check the plane by the rule, correct it if necessary.
- On the floor, using a notched trowel, glue is applied with a layer of about 8-10 mm. It must be said that the adhesive mixture can be applied not on the floor, but on the tile itself, there is not much difference.
- Next, lay the tile and press it down a little to remove cavities. The laid tile is checked by level and, if all is well, then the second one is laid.
- After each subsequent tile is laid, a separating cross of a certain size is inserted into the seams. In this matter it is better to focus on the recommendations of manufacturers. They usually recommend how thick the crosses are to use.
It is more profitable to produce the laying in rows along the width of the room. It should be noted that if you achieve a sufficient speed of laying, then you can align a row of tiles with a long rule. The rule is applied to the side of the row and slightly pressed until the entire tile moves in one line. For such an alignment, it is necessary that the mixture remain uncured. This means that you can adjust the position of the tile for about 15 minutes.
 Epoxy grout has greater strength
After laying, the joints are rubbed. To do this, use special grout. These can be furan-based grouting, epoxy, or cement-based mortars (cannot be used for grouting tiles between glossy tiles, as it works as an abrasive). Application is provided with a rubber spatula, and after drying, the excess is removed with a damp sponge.
The brick tile has a good thermal conductivity, therefore it is suitable for laying over a warm floor.
Video: laying tile after installing waterproofing
Facing with clinker
 Laying outside clinker tiles
In the event that the installation is performed indoors, it must be borne in mind that the walls intended for facing with clinker should be made of durable materials. Such materials as drywall will not withstand the heavy weight of the clinker tile.
 For the base it is better to choose glazed tiles
In the event that the laying is done on the facade of the building, you should make the lining of the entire perimeter of the base, and then begin to lay the rest of the surface. Glossy tiles are well suited for the basement, as it will be easy to remove dirt from precipitation.
- Before starting work, the walls should be primed.
- The first row, as a rule, is quite laborious, because you have to adjust the size of the tile to the same level, starting from uneven ground. To do this, spend a horizontal line on a row above the ground and on this line is trimming and laying tiles.
- If a masonry is selected with an offset, then the second row is shifted to the floor of the tile to the side in order to form a brickwork. Thus, at the corners of the building, you need to start every second row by laying tile cut in half. It should be noted that for a faster process of laying, you need to lay out the first row strictly on the level, then one corner, alternating the whole and half of the tile. This procedure will allow to engage in facing without being distracted by trimming. However, it is not necessary to glue the tile on two corners at once, because it is difficult to calculate what size of the halves will be needed for the second corner.
- The seams close up after the glue dries and the separators are removed. For joints, you need to use waterproof and frost-resistant grout.
Video: laying clinker tiles on the walls of the facade
Video: technology of laying clinker tiles in the interior
Cladding steps
 Facing the steps with clinker
For stacking, choose a tile with an abrasive coating so that icing the steps were not slippery. Consider the width and height of the step and choose the appropriate tile, this will help avoid unnecessary pruning and speed up the work.
- First of all, the vertical part of the step is faced. On the surface of the vertical side they glue the tiles so that its upper part lies in the same plane with the horizontal surface of the step. If necessary, trim the tile.
- Next, the tile is laid on the horizontal surface of the stair in such a way that the seams coincide with the seams of the vertical tile. It is necessary to ensure that the tile does not come forward more than 2 cm, because such a ledge will be an excellent lever when applying pressure to it. Steps with a large overhang of tiles serve less.
- The seams should be left empty. If you are facing the porch, the width of the seams should be no less than 10 mm, as this will reduce the stress on the tile during frost and prevent destruction. After complete laying, the seams are covered with decorative grout. Again, in the case of external cladding, it is necessary to choose a frost-resistant grout.
A selection of videos on the finishing of the steps
Facing the furnaces
 Technology of cladding the furnace with clinker tiles
There are no significant differences in the cladding of the furnace as compared to wall cladding. You must also use restrictive crosses for seams and keep the rows horizontal. You should also leave the seams empty to fill them further with decorative grout.However, you need to take into account large temperature drops, so the tile and glue should choose heat-resistant. Conventional cement mortar is not suitable for such a lining.
To make the stove look more beautiful, you can start work from the outlines of the doors and corners, using tiles with a darker color in relation to the main cladding. Dark color will hide the rapidly emerging pollution from smoke. However, when working in this sequence, you will often have to use a grinder, as there will be many elements for trimming. In addition, you need to know that the lining should be from one place, not jumping from the contour to the corner or to another place, otherwise laying will be uneven.
As you can see, the clinker tiles can be used to finish completely different surfaces, the main thing is to correctly select all materials. If you have any questions, you can ask them on the site.
Video: the process of finishing the stove with tiles
Search
Related Articles
How does the septic tank
Very often in country houses, and even in residential private houses, cesspools or some other storage tanks are used for waste. The main problem here is that such facilities do not meet sanitary sta...
How to choose a drill for home

The choice of drill depends on the specifics of the upcoming work. Sometimes you can do with a hammer drill, and sometimes you need a more professional tool. To choose a drill, you need to know some...
How to choose interior doors for quality
Interior doors are an important part of the interior. From their choice depends not only practicality and functionality, but also comfort and aesthetics at home. To understand how to choose interior...
How to make shelves in the bath with your own hands + drawings, photos
In order to take a comfortable bath in a bath, it is necessary to install shelves, observing certain standards. Material for flooring, too, must be chosen wisely. In this article we will explain how...
- technical specifications and scope of application + Video
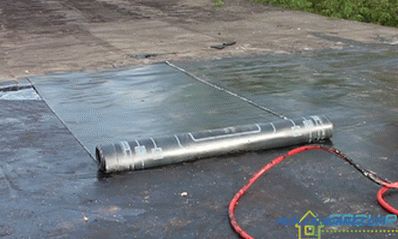
One of the important points in any construction is waterproofing. If proper protection of materials and structures against moisture is not provided for, the service life of the structure will not be...