Rain is not always good. For example, during atmospheric precipitation, water flowing from the roof of buildings can do much harm to them. Falling trickles and even drops eventually make holes in the blind area. Water soaked into the ground near the house can flood the foundation or basement. To avoid all these troubles, moisture must be removed, for this are plums from the roofs. They can be made in different variations, but serve one purpose - to protect the structure from destruction. In this article we will talk about how to install plums on the roof on their own.
What elements does the drain system include
 Drainage elements
Before to carry out installation of the drain on the roof, it is worth knowing what elements it consists of. The drainage system includes:
- Gutters. This can be said to be the main element of the whole system. Water enters the chute directly from the roof, then it flows to the drain. The drain itself is designed as a funnel, which is also part of the system. Gutters can be made of various materials and have a different shape.
- Chute connectors. The length of the roof may be different. Troughs themselves, if they are made in the factory, have a certain length. As a rule, you can find products up to 2.5 meters. To create a system using special tools - connectors. At the corners, other designs are used - corner troughs.
- Mounts and other fastening devices. They are used for mounting gutters and pipes.
- Pipe drain. That it gets water from the gutters. The pipe can be either straight or made in the form of a knee.
 Types of gutters
In addition to these basic elements, others can be used. For example, the grid on the gutter. It prevents large debris from entering the drain and does not allow blockages to form.
In regions with cold winters, you should think about anti-icing systems. They may include heating cables, temperature sensors and other devices.
Types of gutters and material used
 Plastic
On sale You can find gutters and pipes of different diameters. So, the first are produced in the range from 90 to 150 mm. Pipes can be purchased with a diameter of 75 to 120 mm. The choice of dimensions will depend on the size of the roof. If the area of the slope is less than 70 m 2 , then gutters and pipes of the smallest diameter can be purchased.
In addition to the sizes and shapes themselves (square, round and others), drainage elements differ in the material used. Basically it is metal and plastic.
The most common recently become elements of runoff from PVC. Due to the special coating (acrylic or titanium dioxide), such products are not afraid of temperature changes, moisture and sunlight. The service life of gutters and plastic pipes is about 50 years. Another plus is the low cost.
 Metal
Metal
Metal gutters and pipes for sewage exist several types. We list the main ones. Namely:
- Galvanized steel. Such material is often used before. But lately, galvanized steel has been supplanted by an analog with a pural coating. This is due to the long service life of the latter. The galvanized iron itself quickly fails under the influence of acid rain. But such material still remains in demand due to its low cost.
- Aluminum. Gutters and pipes made of this metal are light and fairly durable. Such products last much longer than galvanized steel, but also cost more.
- Copper. Such products are considered the most durable. In addition, they give the roof a sophisticated look. But copper is a very expensive metal, therefore such drains are not accessible to everyone. When installing copper gutters and pipes, it is important to consider one feature. If the roof is made of any metal or there are other metal elements, then it is impossible to install such products. The fact is that water, flowing down on another metal and falling on copper, will lead to corrosion of the latter.
- Titanium Zinc. This is the most expensive version of the elements of water supply systems. Such gutters can last for a century and a half and more.
Installation of the roof drain
 Location options
All work is possible perform in any season, but it is best to do it in a warm period. In summer, everything can be done much faster and better.
- Before making a drain on the roof, it is worthwhile to carry out calculations of the necessary materials. Decide where the drain pipes will be, how many gutters, brackets, connectors and other elements you need. It is best to make a preliminary plan and drawing.
- Then start attaching the brackets. It is important to correctly calculate the distance. The fact is that the gutters should not be located close to the wall. If the distance between them is less than 6–8 cm, then the wall may get wet even from water, but from condensate.
- Also when mounting brackets, it is necessary to withstand the slope of the gutters. It should go to the drain pipe and be 5‒20 mm per meter. Therefore, the brackets are not mounted in a straight line, but with offset.
- Before attaching, it is worth making a markup. To do this, you can spend some calculations. For example, if the slope length is 8 m and the slope is 10 mm per meter, then the offset between the first and the last bracket should be 80 mm.
- If the length of the roof is significant, then it is necessary to make two drain pipes, they will be located at the edges. In this case, the bias will begin in the middle and go in different directions.
- The first is fixed first and last bracket. Then a thread is pulled between them, and the remaining brackets are mounted with self-tapping screws. Between brackets, it is necessary to maintain a pitch of 40–70 cm, depending on the weight of the gutters. Do not forget that the gutters will be attached to each other, which means that there should not be a bracket at this place.
- Then the gutters are installed. The method of their installation depends on the model. Along the edges are installed plugs. The final step will be the installation of pipes. Its neck should be directly under the drain of the gutter. The pipes are attached to the wall on special holders or clamps.
- A drain elbow is installed at the end of the pipes. According to it, water from the roof will be drained away from the walls and the foundation. If the site has a drainage system, the knee should be directed to the water intake.
Photos
 Mounting brackets
 Fitting gutters
 Fitting
 Drainage installation
 Fixing the gutter
 Installing the funnel
 Fixing the element
 Assembling the drain pipe
 Fasteners
Video
A detailed video of the installation of the drain with useful recommendations:
Search
Related Articles
Spiked connection of the parts do it yourself (video)
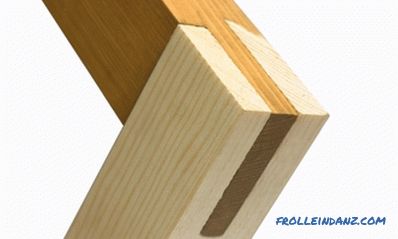
There are many types of various compounds that are widely used today in repairs. They are needed for the assembly and repair of furniture, for the connection of individual parts of some functional...
the choice of material and installation design
For the construction of wooden floors, which are based on lags, there are several technological variations. The choice of flooring flooring scheme depends on the building structure, the climatic co...
How to plaster the walls of the foam block

The so-called foam concrete blocks, well known even to non-professionals, have long been successfully used in modern construction. Building materials of this class noticeably surpass similar materia...
How to make lighting the facade of the house

Facade lighting emphasizes the architecture and design of the house, highlights the individual elements. In this article, you will learn the difference between the types of lighting and how to make...
The path in the country with their own hands

It's nice when the territory of a country house or cottage is refined. To move was convenient, you should make paths and paths. At the same time it is important that they fit into the landscape desi...