Increasingly, in homes / apartments, instead of a standard bath, they began to install shower cabins. It is very convenient and saves space in the bathroom, as the cabin is compact and takes up little space. To collect drains after taking a shower, use a pallet, which is installed with the shower, or a ladder, which is securely installed in the floor. Then the water through the ladder flows into the sewer system through pipes.
Such a system is very simple, convenient and durable. The main thing is to install the ladder correctly so that the water can flow freely. It is also important that everything is hermetically sealed to avoid flooding. In this article we will explain how to install a ladder for the shower with your own hands, consider the option of installation in the floor under the tile, as well as give photos and video instructions.
Design features
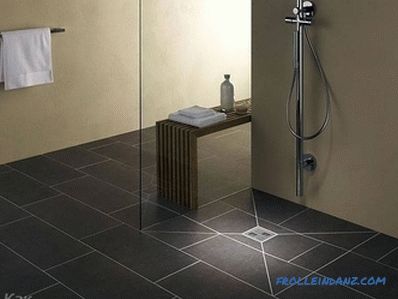
At the installation site, the ladders can be divided into the following types:
- horizontal;
- vertical.
A horizontal ladder is often installed in an apartment that is located in a multi-storey building, as the sewer connection often passes from the side, at a small angle of water flow into the sewer pipe. Thus, the water will go to the side, directly into the sewer.
The vertical ladder is suitable for owners of private houses and cottages, where sewage can pass under the floor. They have more bandwidth.
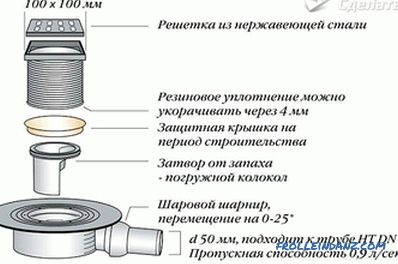 The set of shower drains
The set of shower drains is as follows:
- Siphon. It consists of a water seal and a dry / mechanical seal. This construction serves to block the odor that can pass from the sewer. The dry gate is a float structure that reacts to the siphon drying out and prevents the smelly odor from entering the drainage pipe. When water dries out, the float is lowered and the flap closes. Mechanical shutter - non-freezing structure, which is used in unheated premises.
- Decorative grille. It is installed on the body of the ladder and rests on its surface. The surface of the lattice on the outside is at the same level with the sides of the ladder.
- Drainage ring. If the waterproofing has ruptured, the ring will allow water to flow back into the drain through the hole that is in the ring.
- The clamping flange made of steel is used to ensure the tightness of the waterproofing connection to the body of the shower.
- The body of the ramp.
Choice of equipment
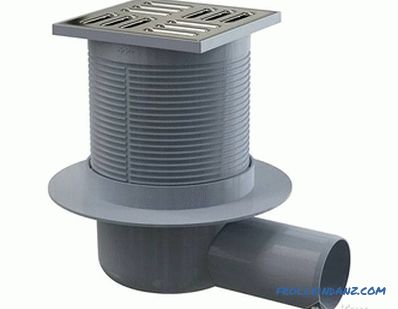
Before the installation of the ramp begins, it is important to choose it correctly. Immediately before purchasing the equipment, pay attention to the following features:
Water diversion direction.
- Diameter of the tap. Often there are 2 options: Ø 50 mm and Ø 110 mm. It all depends on what the diameter of the sewer pipe in the system.
- The height of the ladder will depend on the height of the floor where it will be installed.
If the kit does not provide a hydraulic valve, you need to buy it separately. There are two options: a device with a dry shutter or mechanical. In case of drying of the water seal, the unpleasant smell will be blocked by a dry or mechanical closure.
Choice of location
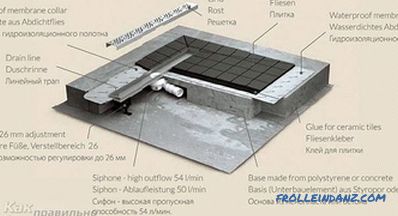
The place where the drain will be located should be chosen at the design stage. Why? Because the equipment will be mounted in the floor. Therefore, it must be prepared in advance. It installs a pipe that will be connected to the sewer. It is important to make a slope of not less than 3º, so that the water without obstacles flows through the pipe. Then a recess is made into which the ladder will be installed. But there are two options for development:
- When the shower is equipped during the construction of the house, problems should not arise. Indeed, in this case, the project includes the installation of sewage systems, with a conclusion for all means of communication. Therefore, the floor and the screed do so to ensure the correct angle of discharge of water from the ladder and mount the drain pipe.
- If the building is already built, the question arises, where exactly do the discharge? You can make a sustainable flooring by raising the floor and take the drain to the sewage system, or remove the screed, making a new drainage system.
The floor should have a slight slope directly to the ramp. Then the water will quickly go down the drain, without accumulating in the shower.
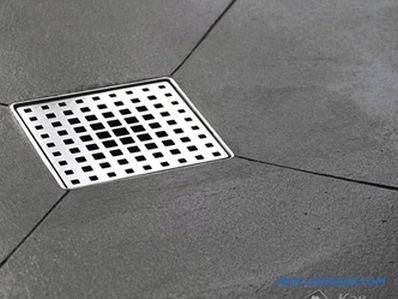 Tilt angle
You can place the drain in such places:
- In the center, where the slope of the floor must be on all sides towards the sink.
- In the corner when a triangular ladder is used. Then the slope of the floor should be on all sides and directed to the sink.
- Along the edge, where the slope will be directed only in one direction. In this case, a slit ladder is used.
Materials

After you have decided on the choice of equipment and location, proceed to the installation.All work can be done by hand without the help of specialists. For work it is necessary to prepare:
- sifted sand;
- cement;
- material for thermal and sound insulation (foam is most often chosen);
- waterproofing membrane;
- adhesive composition or mastic;
- anti-slip tile or mosaic from which the floor will be made.
Installation
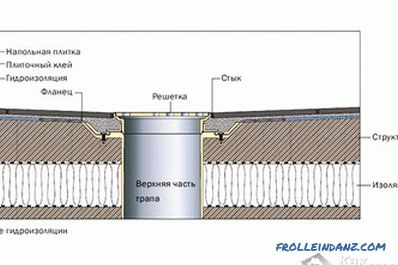
If you are working in a constructed building, the first thing to do is remove the top layer of the floor. The tile or other covering breaks to the basis. Do this until you reach the concrete floor. After that it needs to be cleaned.
Polystyrene is laid on the cleaned concrete. Its thickness should be at least 4 cm, and it should be quite tough. Do not forget that you need to ensure the inclination of the floor level to the place where there will be a discharge of water. To do this, use a level, checking each step of laying. Also in the foam you need to make a cut under the sewer pipe and ladder.
In the place that you chose and where the drain pipe is from, install a shower drain. It must be connected to the sewer drain. It is important to comply with the slope, which will be directed towards the riser. To install the device at the required level, use the available tools or special adjustable feet. Using a level, check if the grille is level with the floor.
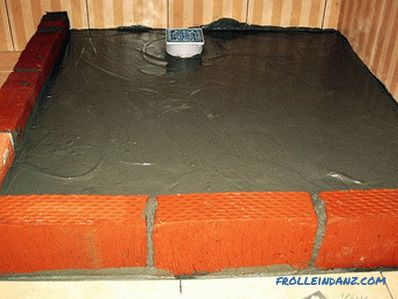 Filling the gangway with a coupler
Then everything is filled with a sand-cement mortar. Thus, the ladder will be fixed. In order for the screed to adhere well to the surface of the device, it must be degreased with acetone or solvent. Layer screed is applied with regard to the slope required for the direction of water to the place of flow. Each laying step is checked by level.
To ensure the tightness of the drain, after drying the screed, it must be carefully sealed. To do this, you can use silicone sealant. Since there will always be water on the floor in the shower, he should not let it through. Water should drain only through the ladder.
In order not to care about sealing and calculating the desired angle, you can buy a special acrylic or enamelled tray. It can be easily connected to the ladder without finishing.
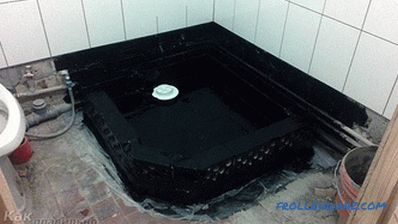 Waterproofing
Now you should ensure waterproofing. To do this, you need to fill the screed with a special waterproofing layer and "drown" in it a glass fiber seal using a special grater. A layer of waterproofing must be applied to the wall around the perimeter. Fiberglass mesh should be laid so that the canvas 10-15 cm and passed on the wall. No need to cut it in the corners. Make a fold and glue it to the wall with a waterproofing compound. Pour the concrete back in and make a screed, taking into account the slope to the ladder.
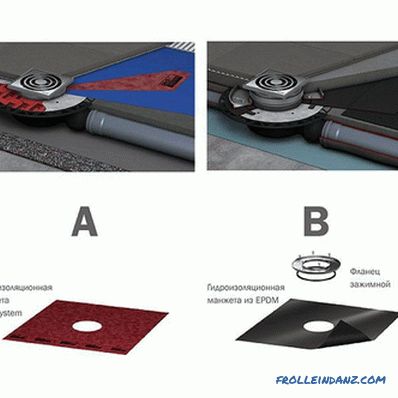 Types of waterproofing
After that, finishing works follow. It is necessary to apply mastic or adhesive composition and lay a tile or mosaic. It is important to consider that the grating of the ladder should be located at the same level as the facing surface. It is very convenient to use the mosaic on the grid as a finishing material, since as it is laid, it can be cut off at the place where the ladder is installed. After that, all seams should be sealed with a moisture-resistant grout.
A tile is laid on the wall in the same way. Before laying it, it is advisable to make a waterproofing screed to a height of 30-40 cm.
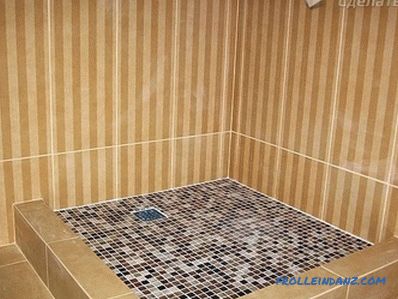 Ready-made shower tray
It only remains to wait for complete drying. The gangway is installed, it will provide reliable discharge of water into the sewer system. If you have any questions on the topic, then ask them at the end of this article. The specialist working on our site will provide you with a consultation.
Video
In a series of video lessons, it is shown how to prepare a high-quality place for the installation of the ladder and carry out its direct installation:
