Lining is a common material for cladding various surfaces. The material will be well located if you hold it to the walls, floor, ceiling. Therefore, it is necessary for every master to know how to fix the wall panel to the specified surfaces.
")
With the wall paneling you can trim the walls, the ceiling, as well as the outer surfaces of the walls.
What is the lathing for?
The presence of the lathing will allow you to create a layer between the surface and the clapboard that will protect the material from mold and rot . The design of the batten is represented by wooden sticks and metal profiles. Fastening lining installed on such a structure. For a good attachment, you should use boards made of pine or spruce, the dimensions of which are 2.4x4.8 cm. If you are planning this mounting option, like a Christmas tree, then you can use them as chipboard elements or boards.
The following tools and materials are necessary for the manufacture and installation of the batten:
- Puncher.
- Wooden beam or metal profile.
- Drill.
- Wedges.
- Means for protection against moisture.
- Remote counterplans.
- Construction level.
- Self-tapping screws or liquid nails.
")
Sheathing scheme for clapboard.
It is possible in some cases to fasten the wall panel to the ceiling or any other surface, without resorting to the help of the batten. This is a perfectly flat surface, or at least no visible irregularities. In addition, it is possible, provided that you do not need to install heat or sound insulation.
You can also do without crates in the absence of the need for free space between the material and the surface. This applies to those cases where you can hide the wires, for example, telephone. If such tasks are not worth it, then free space is not needed.
A wooden bar or metal profile is suitable for making the battens. You can and combine these materials. As for the previously mentioned chipboard and wide boards, their use will be required when laying the components of the wall panel at an angle.
The work of creating the batten begins with the drilling of holes in the bars. The distance between the holes is 50-70 cm. If necessary, the cladding in rooms where there is high humidity is recommended to treat the bars with moisture protection agents.
Next, the consolidation process itself is carried out. The arrangement of boards depends on the future installation of lining: either horizontally or vertically. To install the slats on reinforced concrete surfaces, you must use a punch. If the use of screws for fixing is not possible, then you should apply liquid nails.
")
Types of lining.
Check the accuracy of the location of the main elements of the batten should be using the building level. For more fit elements on an uneven surface, you can use wedges made of plastic or wood. When installed in rooms with high humidity values, it is necessary to use remote counterplans, which will increase the distance between the surface and the material. In turn, this step will improve ventilation. The connection of the short rails is performed butt-to-butt, the distance between the elements is from 60 cm to 1 m. This will allow you to prepare the wall panel for installation, as there will be unnecessary moisture. Then you can begin to trim, but it should be remembered that this process goes after the crate is aligned and well secured.
Now you need to select the size of the workpiece.
Cutting is recommended to be carried out carefully, as a sharp or rough movement can lead to cracking of the wall panel or groove.
This can be avoided if, when sawing, one element of the wall panel is placed in another. Sawing vertically produced at right angles. It is recommended to put the element face up. This will allow you to carry out this process carefully.
Fastening the wall panel is not difficult, but a newbie in this business should try. After that, the installation will be easier, and the process will be similar to the installation of the laminate, that is, it is necessary to fix the lining, inserting each subsequent element into the groove of the previous workpiece.
")
Layout of the lining.
Installation begins from the left corner of the room, and that part of the workpiece that is protruding should be directed toward the corner. Fastening the first board is carried out with the help of nails, which are devoid of a cap. The nail is driven into the paneling from the front. Holes that are clearly visible, can be masked with wax, or putty putty, and then - varnish.
To avoid bumps or gaps, a small wooden block and a hammer should be used when laying.This will achieve a snug fit, but efforts must be calculated so as not to spoil both the boards and the lining slots. After these procedures, you can proceed to the consolidation of the material and further finishing activities.
Thus, in order to start fixing the lining, you should take the following tools:
- Hammer.
- Screwdriver.
- Finishing nails.
- Wood saw.
- Klyaymery.
- Screws.
Attachment Installation
Attachment with nails is set at an angle of 45 degrees. In this case, you need to be careful not to damage the wall panel, so installation is done carefully. In order not to damage the material, you can use a doboynik. When using screws, the situation is similar, plus everything needs to be screwed in until the end, so that the next board can easily enter the groove.
")
Methods of fixing the wall panel.
However, with such methods of fastening there is a danger of splitting the board, which can later lead to material deformation, especially in rooms with a high level of humidity. In order to get out of a difficult situation, it is recommended to make a hole in the intended place of screwing in and then screw in the screw.
The use of finishing nails is well suited for fixing the wall paneling on the batten, which was discussed earlier. The pitch of the batten is 50 cm, in this case you can not be afraid of bad fasteners. However, if there are concerns about this issue, then it is advisable to play it safe using keys or self-tapping screws.
The method of fixing the wall panel with klyimer is very reliable. This element is a plate with holes for nails. Klyaymery keep lining, and their installation can be done so that it will not be visible from the side, thus maintaining the aesthetic appearance of the lining.
When mounting these devices, the first board is mounted in the same way as when fastening with nails. The Kleimer must be put on the spike, after which the Klymera is fastened to the crate. In this case, you can use both nails and screws. When using self-tapping screws it is recommended to use a screwdriver to speed up the work.
To perform the fixation with the specified element, you can also take a construction stapler. However, in this case one should be extremely careful, since a weak pressing on it will lead to incomplete fixation, and if you make a strong pressing, then the workpiece may crack.
Attaching to the surface of the ceiling
When asked how to fix the wall panel to the ceiling, you can say that it is done in the same way as when mounted on the floor or wall. The first step is to assemble the frame, determine the correct location of the elements that should be checked at the building level. To this frame is held fixing lining, while you can use klyymery or nails.
Laying lining is carried out with a spike to himself. For laying the first board, it is recommended to retreat 1-2 cm from the edge of the ceiling, after which, at the intersection of the batten and lining, from the side where the spike is located, nails or clamps are fastened.
Thus, this work is not difficult and only requires the availability of materials. Step by step, the board behind the board the result will meet all the expectations of the installer. It is only important to perform the installation correctly, following the basic recommendations.
Search
Related Articles
How to choose a heated towel rail for the bathroom, water or electric
In Europe in the early 1900s, plumbing has ceased to be the privileges of the elect, the comforts of modern life have become available to more and more people. If we talk about Russia, then many of...
Fastening the wall paneling: several ways
Wall paneling is a very common lining material, widely used for wall decoration inside and outside rooms, balconies, loggias, and ceilings. This material is made of wood and plastic. Lining...
The floor on the balcony do it yourself
When the need arises to repair the floor on the balcony, it is important to know that there are quite a few ways to do this work. One of the simplest is the call to the house of masters, who will...
Mounted cabinets do-it-yourself: recommendations
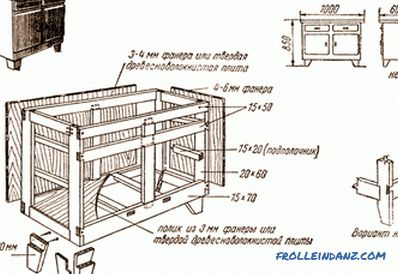
Wall-mounted cabinets are integral parts of any modern kitchen. They are used to store dishes, cutlery, food and other utensils. Today there are wall cabinets are quite expensive. Not every person...
features, nuances, instructions (photos and videos)
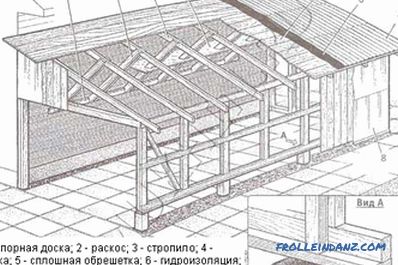
Sooner or later, many owners of country houses are faced with the need to expand the usable area of their homes. The most budget and easiest option in this case would be a frame extension to the...