The demand for environmentally friendly materials for the construction of various structures by private customers today is quite high: natural wood is aesthetically pleasing, inexpensive and has good thermal and sound insulating qualities. However, in order to know how to build a log bath in the absence of experience, it is necessary to turn to experts: a high-quality log house assembly means following certain rules.

A wooden frame is not only environmentally friendly, but also a budget option for building a bath.
Selection of lumber and preparation
Most often, pine, spruce or larch wood is used in the assembly of a log house. In some cases, wood is combined: for example, the walls are made of pine, and the lower rims are made of larch, since the latter has a higher resistance to decay. If it is intended to use exclusively spruce logs, then it is necessary to pretreat them with an antiseptic composition. To build a log house qualitatively, preference should be given to the dried material; otherwise, the appearance of cracks and other defects associated with deformation is unlikely to be avoided. After the material for the log has been brought in, it is necessary to prepare the tools:

Methods for assembling logs.
- a good carpenter's ax;
- a chisel;
- a mallet (preferably wooden, not rubber);
- drill;
- chainsaw (light narrow-cutter with a narrow tire is best suited);
- “line”: a string, rubbed with chalk.
When choosing, you can give preference to rounded logs: they look much more attractive than their raw "colleagues". However, without knowing thoroughly how to build a log house, it is worth remembering that the most durable layer of wood in any lumber is closer to the bark, and not to the core. Therefore, raw logs will last longer.
How to choose a technology?
A bath or sauna from a log house stands best on a ready-made strip foundation with waterproofing already laid. If you look at the method of connecting logs, you can distinguish two technologies: cutting "in the bowl" and "in the paw." In the first case, a semicircular groove at the ends of the logs is selected, ensuring their reliable fit to each other; at the same time, the ends of the logs go outside, at angles of 20-30 cm. The second method (it is also called the “dovetail”) involves making joints by means of spikes; at the same time the ends of the logs do not protrude beyond the corner, which allows not to lose the length of the building material. To build a bath, it is best to use the second method, since the "bowl" can become a "water collector", which will lead to the rapid rotting of the log house.

Methods for assembling timber.
Before you start building a bath with your own hands, you need to sand the existing logs and clean them with an ax to a depth of about 1 cm. When laying the logs should be in the "butt-to-top" order. Begin felling from the lower rim (it is called a saloon), which must be reduced to 1 edge, to ensure maximum contact with the plane of the foundation. For the lower rim, choose the thickest logs. Then on the laid 2 lower logs spread waterproofing (for example, roofing material). After that, the following 2 logs are laid in a position perpendicular to the previously laid.
Now it is necessary to mark the points of contact at the ends and cut down (it is better to cut with a chainsaw) the grooves. To ensure the minimum clearance, when a log house is assembled, the top log is made with a “dash” and the chainsaws make a longitudinal groove. It may be triangular or semicircular. For the bath is favorable the second option, implying better thermal insulation. To increase the strength of the structure, it is necessary to use wooden pins or dowels for additional connection. This will help avoid excessive shrinkage of the log house. Use better finished dowels made of durable wood. Installation step - 1 meter, depth - 1 upper crown and 1/3 of the bottom.
As a last resort, a log house can be assembled using ordinary nails: their length must exceed the thickness of the timber. For example, for a bar or log with a thickness of 100-150 mm, nails of at least 250 mm length will be needed. You need to drive them in such a way that the cap is recessed by at least 30 mm; otherwise, the wood bath will dry out during drying, and the nails will squeeze out the upper logs or bars (cracks will appear, rusty drips). Before you collect the log house, do not forget about the insulation. It is better to use organic materials: tow, jute, flax fiber, moss.
Final assembly steps
On the last, uppermost crown, subrafter beams are attached. After their installation, you can proceed to the arrangement of the roof, roof. For the upper rim, select the strongest logs, since the roof will rest on them.When you are sewing the gables, do not forget to make a door on one of the sides: it is necessary for airing the attic space. After installing the roof, you can proceed to making door and window openings.
If the bathhouse was built in a separate place, not on the foundation, then each wall should be numbered.
Didn't find the answer in the article? More information on the topic:
-

How to build a reliable house from boards?
A plank house is considered environmentally friendly and cozy to live in. It is built quickly, it is not necessary to acquire expensive materials. Be sure to provide insulation.
Search
Related Articles
Making a stool do it yourself from wood
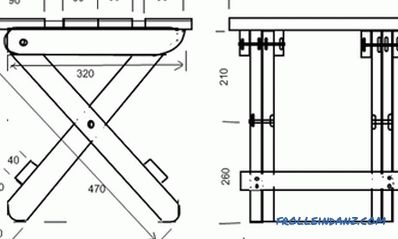
Many home craftsmen eventually begin to make furniture, but it is optimal to start such work with the manufacture of stools with their own hands. Drawing of a folding stool. This interior...
How to install rafters on the roof
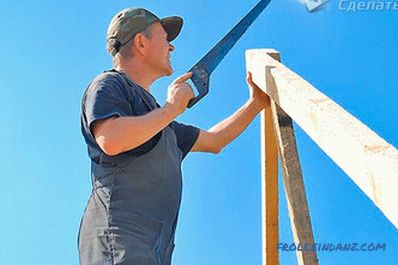
Building a house is no easy task. This statement is obvious and understandable both for a professional builder and for a person who is familiar with the question only superficially. In this case the...
Warm floor under linoleum on a wooden floor
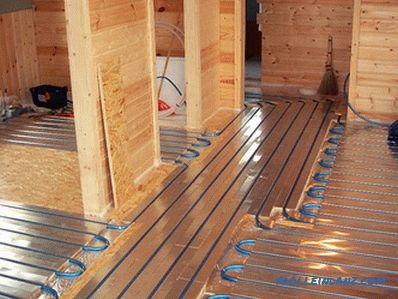
Earlier, the arrangement of a heated floor was a pleasure not cheap, and only in the bath he could pay for himself. As for our days, now the situation is quite different. This technology has spread...
Which polycarbonate is better to use for the greenhouse

Currently monolithic and honeycomb polycarbonates of various thickness are colored and transparent. The nomenclature of polymeric materials of this type is diverse. The consumer appreciated the high...
DIY PVC Pool
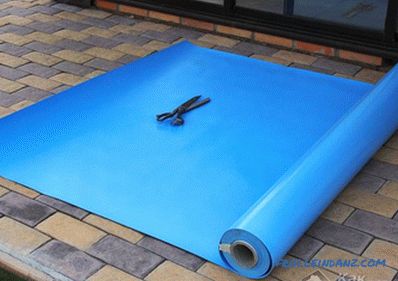
The swimming pool is a useful building, as it cools down in the hot summer heat, it helps to relax, get away from everyday cares and have a good rest. An important step in the construction of such a...