The swimming pool is a useful building, as it cools down in the hot summer heat, it helps to relax, get away from everyday cares and have a good rest. An important step in the construction of such a structure is its interior decoration. Often the pool is faced with ceramic tiles or mosaics - materials that are not only aesthetically beautiful, but reliable and durable. But, as you know, technology steps forward in long strides, so today there is another material that has won a place of honor among such facing materials as tile and mosaic. What is this about? This is a PVC film for the pool. Increasingly, pools are covered with this material, and not without a reason. After all, the price of such a film is significantly lower than other materials, and working with it is much easier and faster. Moreover, PVC film can act not only as a finish, it may well be the main material for the manufacture of the pool. Let's learn how to make a PVC pool with your own hands.
PVC film 2 in 1 - waterproofing and finishing
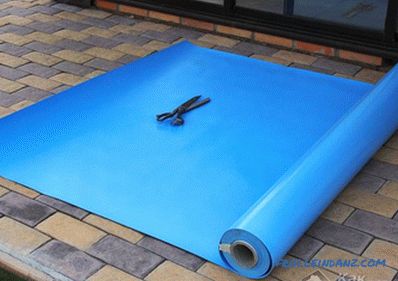 PVC film for pools
Polyvinyl chloride film (PVC), besides that it looks aesthetically beautiful, has another important advantage: it can serve as a waterproofing material. Water will not pass through such a film, so you can save your money on waterproofing the pool bowl itself. It is pleasant that even if there are cracks in the concrete, and all the work was performed without waterproofing, appropriate waterproofing putty and primers, PVC film can hold all the water in the pool, despite the enormous pressure of the water column.
Due to this property, the film is often used in the restoration of old pools, the bowl of which is cracked, and there are problems with waterproofing. Save the situation will help exactly taping the pool with PVC film. And what is most surprising is that you can do this even without removing the old material, for example, a mosaic. In this case, it is only important to take care of the strong adhesion of the tile to the surface so that it does not peel off. Thus, choosing a PVC film as a finishing material of the pool, you can kill two birds with one stone.
Varieties
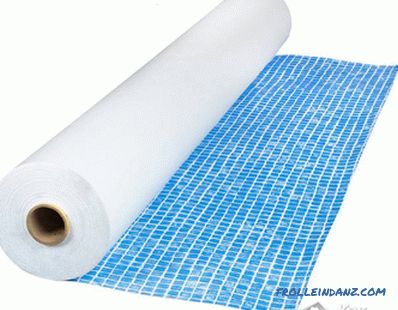 Blue mosaic
The manufacturers took into account various preferences, financial capabilities people and purposes for which the film will be used. Thanks to this, you can choose a pool cover from several types of PVC film:
- Simple non-reinforced film. It is an economy class material that anyone can afford. This is the cheapest material of the three types of films. Its thickness varies from 0.65 to 0.85 mm. Such a film can not be called very durable, but it still copes with its functions. A frame pool cannot be made of such a film, but it is quite possible to sheathe a bowl of a small pit pool.
- Reinforced film. The most common option. The price / quality ratio is fully justified, since this film does not just have a thickness of 1.5 mm, which is 2 times more than the usual one, but it is additionally reinforced with polyester yarns, which gives it greater strength. A pool with such a finish can withstand considerable mechanical loads without deforming at the same time. This property is especially useful for those who want to make a frame pool, where the role of the walls is performed by the film. It takes upon itself all the load, being a supporting structure, therefore, it must withstand enormous pressure, with which it copes.
- Anti-slip film. Its difference from all is a ribbed surface, therefore it is often used to prevent sliding on the surface of the pool. Such a film is indispensable for families with small children.
 Reinforced film
Please note that there is also a material having an acrylic coating. What does it give? Thanks to him, the film is protected from bacteria and algae, which can colonize micropores. As experts say, with such a coating the film will last twice as long, it will better preserve color and elasticity. But what are the advantages of PVC films in comparison with other finishing materials?
Advantages and disadvantages of material
One of its main advantages is an affordable price. Building a pool is in itself an expensive pleasure, so the PVC film finish is a salvation for some. Another important point is that, as already mentioned, it acts as a waterproofing and decorative material. Moreover, this material is hygienic, resistant to ultraviolet rays and a sharp temperature drop. It is easy to care for the material, because it is not afraid of chemical care products.
 Types of films
It should be noted that you can buy a film of different colors.It is produced in different tones of blue, blue and green, they are able to "highlight" the water and give it a beautiful "sea" shade. You can also buy material that simulates a mosaic of beige and white, blue and white, and similar tones. One of the main advantages is that the film is easy to install with a special tool.
It is clear that, like all materials, the film has its drawbacks, they are the following:
- during operation, scratches will form on the surface, which leads to rupture;
- over time, the saturation of colors is lost, all this will happen in 6-10 years, so the material will have to be changed;
- butt joints spoil the overall look of the coating;
- when in the territory where the pool is located , ground water is close to the surface, it’s impossible to sheathe the pool with a film.
So, having considered all the options for the material, its advantages and disadvantages, you can proceed directly to the case .
Works on the installation of the pit basin
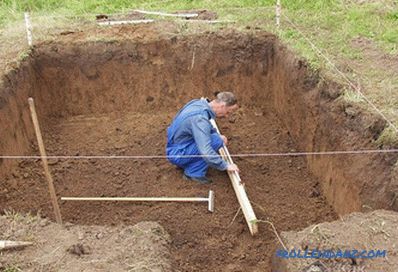 Pit for the pool
If you want to make a pit pool at home or in the country, you need to follow this sequence:
- First, decide on the structure and shape of the pool. After that, select the optimal place where it will be located. It should decorate your site and serve as a suitable place to relax. You should not choose a place where the pool will often be exposed to pollution. Note that the structure should be close to the plumbing system.
- Now you need to choose the size of the future tank. Typically, these pools do not less than 4 * 4 m. Choose a depth according to your preferences, it can vary from 1 m to 2 m. The average depth suitable for all is 1.5 m.
- When with all sizes found out, on a place of the pool it is necessary to make an appropriate marking, using pegs and a rope. The pool can be rectangular, round or square.
-
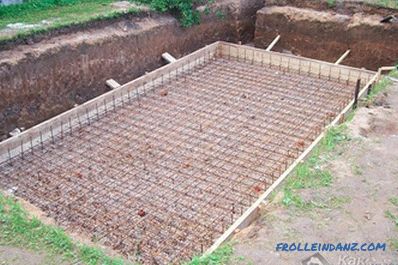 Install the formwork and fill in the Now dig the excavation hole to the desired depth. This can be done both independently and call a special technique. Keep in mind that the pit itself needs to be made slightly larger than the size of the pool itself. For example, make the size of the walls more by 40-50 cm, and the same with the bottom, as further waterproofing works, pouring, etc. will be carried out. The bottom of the pit should be compacted.
 - Then the finished excavation is leveled and waterproofing works are carried out. Put 30 cm of sand on the bottom and tamp it down. After that, lay the roofing material in 2-3 layers and bitumen mastic.
- At this stage it is necessary to carry out all the work to ensure the discharge of water from the pool.
- To make the walls, build a formwork around the edges of the pool.
- Now pour the concrete between the soil and the formwork. In order to strengthen the walls, pre-make a grid of reinforcement and install it.
- After the concrete has set, the formwork is removed.
- It remains to make the bottom. Pour another layer of rubble, install reinforcing mesh and fill the bottom with hydroconcrete. Now, after drying of the concrete, you can begin to finish the pool.
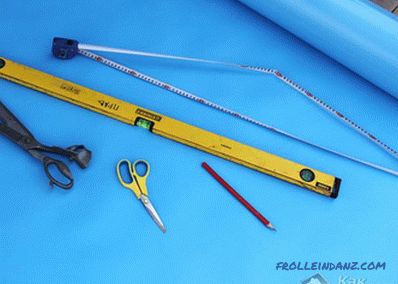 Tools for finishing
If you want to install a floor drain, it’s best to do This is in advance, even at the fill stage.
Finishing work
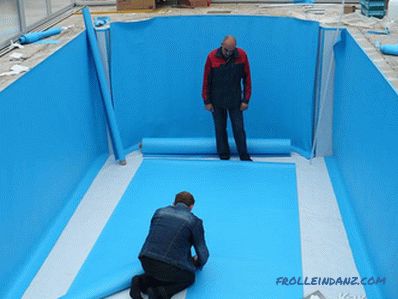 Finishing the pool with
film To perform the installation PVC film, it is important to adhere to the instructions. The process itself is simple, but requires attention. Even if you are a layman, the tips below will help you cope with this matter.
- First of all, you need to prepare the surface: remove all trash, leaves and all that is superfluous. If the walls and floor are not sufficiently level, they should be leveled with plaster. A smooth surface is necessary, because under the pressure of water PVC film will repeat the relief of the bowl, if the surface turns out to be a curve, after installation it will be very noticeable.
- To finish the pool with a film around the perimeter, a fastening strip or corner is laid, which must be fixed with screws. On the one hand, the strip has a plastic coating, to which the film will eventually be welded, if this is a corner, then the film must be fixed with screws. When the pool is large, additional stripes are fixed to the walls.
- Now put a special insulation over the entire surface, due to which the friction of the film on concrete will decrease, it will not wear off, and the service life of the material will increase. When the pool is placed indoors, geotextiles can be laid instead of insulation. The substrate is fixed with fastening strips, and in difficult places it is fixed with glue.
- After that, a film is spread on the surface with an overlap of 8 cm sheets and a distance of 1-2 cm from the wall. To make the film fit the corners well, use a corner.
- Using special equipment for gluing PVC films, weld stock seams and additionally seal them with sealant.
- At the last stage, the PVC film must be connected to the mounting profile on the side of the pool.
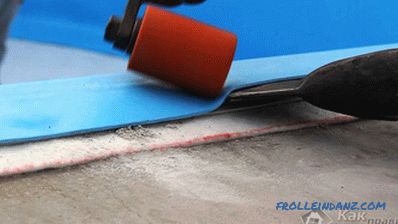 Edge mounting
As this work is done, you can see it in the video below:
It remains only to fill the pool with water and check the new cover. Your pool is now ready for full use. To do the work you needed the following tools:
- punch;
- sharp knife;
- sealant;
- PVC bonding equipment;
- silicone roller;
- corner;
- PVC film itself.
A PVC frame pool
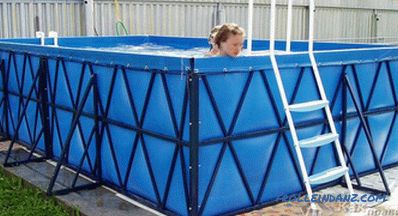 A frame pool
If you do not have the opportunity and the place to build a pit pool, you can make a PVC frame pool that will be installed on the ground. We will consider a homemade pool made of wood and PVC film, which will measure 4.5 * 2 m and a wall height of 1 m. It can be done in a day.
- To install a non-submerged pool, it is important to ensure a flat and stable surface. Choose the perfect place to not carry out laborious earthworks.
- Prepare a place by removing the upper fertile soil layer from it, removing the roots and unnecessary plants. The surface must be clean, free of stones and protruding solids.
- After this, make a sand pillow that will align the area. The sand layer should be 5-10 cm. To simplify the leveling task, set the level of the beacons, which will serve as a CD-profile and stretch the sand to get a flat surface.
- Now we need to assemble the frame of the future pool. It can be made of a wooden bar, the cross section of which is 100 * 50 mm, half-edged and unedged boards 25 mm thick. Timber should be cleaned of bark and treated with antiseptic. For this work, dry wood is best suited, as a last resort, dried.
- To make the frame, mark the corners of the structure. Check all sizes so that everything is the same and even. Then you need to make wells, manually with shovels or a drill, about 50 cm deep. In order to strengthen the design, two racks are additionally installed on the long sides, and 1. 1 between the short ones. parallel bars To ensure waterproofing, the part that will be in the ground is covered with molten bitumen. The space in the pit is filled with rubble and tamped well.
- After all the posts are securely fixed and aligned, they are tied with planks.
- Since all the pressure of the water column will fall on the supporting pillars, they must be additionally reinforced with booms.
- When the frame is ready, a ladder should be made. You can buy it in the store.
-
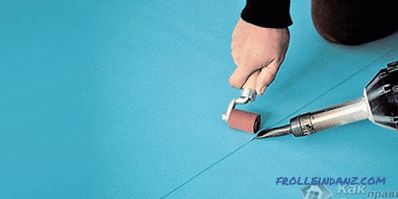 First you need to solder the Now the pool is sheathed with PVC cloth. But first you need to cook it. Cutting and soldering of the film is carried out on a flat surface in a spacious room. It is important to be careful not to damage the material. So, take the welding and select the temperature allowed for the material you purchased. Cut the material and lay it with an overlap of 2-3 cm. Heat the film at the junction to a slight melting so that the material softens and press it tightly with a silicone roller along the line, gluing the film together.
 - Watch out for the quality of the seam, because this is the weakest link in the pool, which should be reliable and tight. For a better effect, seal the seam with sealant. In order not to spoil the canvas, you can practice on pieces of film to adjust the temperature, speed and fill the hand.
-
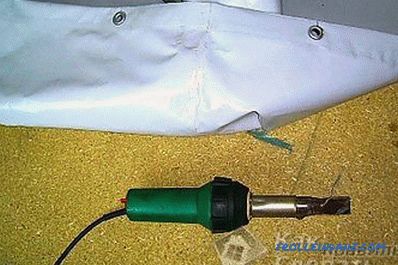 Processing the edge of the blade When everything is ready, bend the film around 5-7 cm around the perimeter from the top and then boil it again. Now, in this rim, you need to make holes in 50 cm increments and install metal rings (grommets) into them using a special press or flaring. Through these holes, the pool cloth will be attached to the frame with ropes or screws.
 - Finally, you need to connect the canvas with the frame. It is better to fix the film to the tree with self-tapping screws with a 35 mm press washer and additional large washers, which are larger than the holes made in the canvas. It is important that the fasteners are galvanized. Stretch the canvas well and do all the work carefully.
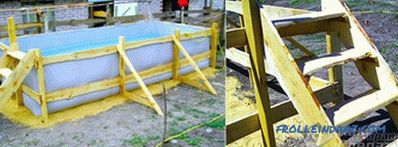 Wooden frame PVC
That's all you need to do is to check the tightness of your new basin, filling it with water. To make such a pool can be quickly and inexpensively, but there will be many benefits from it.
Video
To simplify your task, you can use wooden pallets as a frame:
See also:
How to make a pool in the bath

