Today, garages of corrugated flooring are quite common. This was facilitated not only by the low cost of the profiled metal, but also by the opportunity to build the structure quickly and inexpensively. Let's see how you can make a garage out of corrugated flooring with your own hands.
The advantages of building from corrugated
 Construction with a lifting gate
In order to to build such a garage, it does not require much time, experience and special knowledge. If desired, any car owner who knows how to hold a tool in his hands will be able to perform these works without outside help.
A corrugated garage is not a temporary structure and, if properly used, will last for about 40 years.
Terrain marking
 Marking for a garage
First, mark the terrain . For this purpose, pegs or pieces of reinforcement are hammered in the selected area, and between them a rope is stretched, which will serve as an indicator of the location of all sides of the structure. In the middle of the markings, around the entire perimeter of the future garage, you need to dig holes in the corners of 0.5 * 0.5 * 0.5 m.
Do not try to save by cutting the dimensions of the garage to a minimum. Think about that, drove into the garage, you will need to have space in order to open the car door and get out of it. The minimum size of such a facility for a passenger car can be 3 * 4 m, although a more convenient garage will come out with side sizes of 4 * 6 m.
You will also need the following materials:
- U-shaped steel profile 50 * 50 mm.
- Flat head metal screws.
- Cement.
- Professional sheet.
- Crushed stone.
- River sand.
Well, and, of course, you need a tool to work:
- A spade.
- Shovel.
- Scrap (if the soil is with stones).
- Level.
- Plumb.
- Screwdriver.
- A grinder with a disc mounted on metal.
Base

The foundation for a garage is fundamentally different from a similar house structure. First of all, it concerns the method, since at first metal pipes are inserted into the dug holes and concreted in the ground. Further, a trench, 30 cm deep, is excavated from one pipe to another. If necessary, formwork is installed, and all this is poured with concrete. In order for the construction to not crack, the foundation and the floor must be reinforced.
The upper part of the foundation must be above the intended floor level.
Device of the viewing pit
 Viewing pit
If the level is unpaved water is low, and there is a desire to make a viewing hole, it is better to dig it out right away, as long as there is an opportunity to use an excavator for this. The walls need to be leveled, and the edges must be concreted, or laid out with bricks. For convenience, you can make the steps, or then make a small ladder for descending into the pit. Now you can concreted floor.
If there is lighting in the pit, then run the wiring before concreting the floor.
Putting the frame
 Garage layout
In order to to weld cross-section and longitudinal fasteners from pipes, or a corner to the concreted posts; You can make a combined structure of metal and wood - in this case it will be easier to fasten all with bolts and screws. The skeleton itself is quite simple, and is a vertical upright and cross member, fastened together with screws. And since the profile sheet is a unique building material, it can be used for cladding the walls of the building, and for the construction of individual structures. Therefore, for the construction of the garage, it is preferable to use a profiled sheet of category "C" - a special wall option.
Making the walls and roof
 Fixing sheets with special self-tapping screws
Mount sheets better just upright, checking the level of their position. It is necessary to fasten this metal to the frame with special screws with a rubber gasket that seals the hole and helps to avoid the following troubles:
- A simple screw can scratch the sheet, breaking the insulation layer.
- If moisture gets into the drilled hole, the metal will deteriorate very quickly.
 A small garage made of sheeting
It is best to start to sheathe the garage off the walls.
If you first make a roof, then screwing the screws into the upper edge of the wall sheets will be a big problem, since the roof sheets protruding beyond the edge of the building will restrict access to this place.
For greater reliability and safety of the joints of the sheets, it is desirable to fasten with rivets.
Insulation
 Insulation of the garage
Most often, garages are not insulated from the profiled sheet, but if necessary, this can be done without problems, only there will be no sense from these actions if the garage is not planned to be heated. Let's start with the fact that you need to seal all the holes. The easiest way to do this is with foam, as it adheres well to the surface of the metal, and, expanding, will fill all voids. Then the walls and ceiling are sheathed with insulation - it turns out inefficient and troublesome. In addition, in this way, it is possible to significantly reduce the “life” of the garage, since in the cold season condensate will collect under the insulation, which will lead to its premature corrosion.
 Warming by polyurethane foam
Warming is now widely applied by polyurethane foam. A coating is applied to the metal from the spray gun, under which no air enters. It will actually be efficient and practical.
Video
This video shows the assembly of a galvanized flooring garage in detail and clearly:
Search
Related Articles
Diamond Cutting Technology - Diamond Cutting

Nowadays, the most effective method for cutting concrete, bricks, floor slabs, reinforced concrete, tiles and other surfaces is diamond cutting. The quality and speed of cutting is the best way to f...
Half-timbered house with their own hands - how to make + photo

The technology of building half-timbered houses came to us from the Middle Ages. Although the first buildings of this type appeared in the 12th century AD, they were most prevalent in Germany in the...
Photos of living room interiors in the apartment

The city apartments of the old building did not differ by a large area, but there was a room in them, which the owners called the hall with some note of pride in their voices. Usually this room was...
Electric underfloor heating with your hands under the tile, laminate
A heated electric floor allows you to create warmth and comfort in your home. Often the floors freeze in winter so much that neither carpets nor slippers help. Therefore, there is a need to mount th...
The transfer of the gas pipe in the apartment
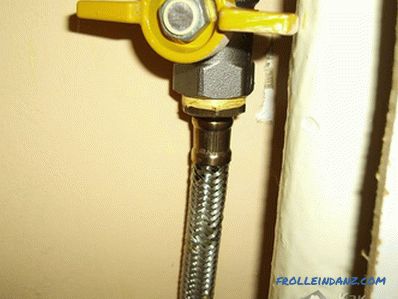
Carrying a gas pipe in an apartment is a responsible job that requires certain skills and knowledge, independent performance is not recommended. The invitation to perform professional professionals...