More and more citizens are trying to escape from the stuffy apartment to nature, away from the noise of cars and smog. And it is for this purpose that the cottage is most suitable. Relax, have a good time with friends or take care of the garden and garden - for all the cottage is good. The country house will save from rain and cold, and the outbuildings will ensure the safety of inventory.
")
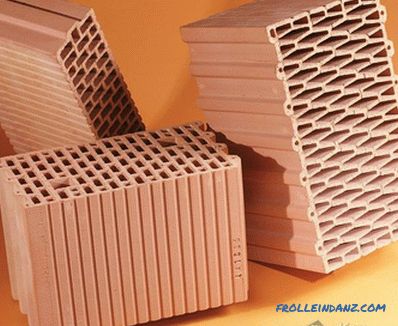
Prefab houses are gaining more and more popularity. They are built quickly with minimal cost.
A country house, if it doesn’t exist, is quite capable of building independently. After all, modern technology can do it quite quickly and fairly economically. Country houses from brick, cinder block are gradually departing into the past. For this purpose, the use of frame technology. Frame cottage house with your own hands can be built over the summer. And then at the cottage you can spend your whole family vacation next year. However, the cottage can be used not only in the warm season, but also as a full-fledged country house. Therefore, country houses frame technology gradually acquire their adherents.
Design features
")
Project framework for a frame house.
Any construction begins with the project. And country houses are no exception. The presence of the project helps to calculate the amount of necessary materials, as well as their range, which is very important for building a house with your own hands. A successful project will not only save money, but also minimize the remnants of the materials used. Based on the project, you can decide on the timing of construction and its cost. The frame cottage house must meet all the requirements of the owners, therefore, in the creation of the project must take into account the views of all family members. It is at the design stage that you can change any size of the future home. During the construction process, of course, it is possible, but it is associated with a number of problems.
Consider and the necessary tools:
- hammers;
- ax;
- chainsaw;
- tape measure;
- plumb;
- level;
- screwdriver and others.
Foundation: nuances of construction
")
Frame houses are usually built one-story. As the second floor you can use the room under the roof.
Skeleton country houses are usually built at a height of 1 floor, and the construction of the roof allows you to use a room under the roof as a 2 floor. Frame construction involves the use of light enough materials: wooden bars, OSB sheets, heat insulating mats (or other insulation). Therefore, the construction of a very strong and strong foundation is not required.
The following can be used as a foundation:
- screw or bored piles;
- posts;
- strip foundations with a small depth.
When choosing the method of laying the foundation, first of all it is necessary to take into account the peculiarities of the soil on which the frame country house is built. Asbestos-cement posts filled with concrete are most often used.
The following materials and tools will be required for the construction of a columnar foundation:
- asbestos-cement pipes (posts);
- cement, sand, crushed gravel, water for concrete mortar;
- auger (petrol or manual);
- plumb;
- tamper;
- a concrete mixer or a container for manually mixing the solution.
")
Scheme of a non-buried column foundation.
Before laying the foundation, they mark the future house. At this markup, holes for the posts are drilled at a distance of about 80 cm. Asbestos-cement columns are installed vertically along a plumb line, and free space is carefully covered with sand, ramming tightly, but without disturbing the vertical. For better density when tamping sand pour water.
Further, concrete is poured into the pipes through a special funnel. Concrete is prepared from cement, sand and rubble in a ratio of 1: 4: 5. In this case, the concrete should not be thick and fill the space inside the asbestos-cement pipe. On the foundation tubes it is necessary to install the plates, to which the lags will then be fixed. After the concrete has completely set in, you can start building the house itself.
It should be noted that the distance between the columns of the foundation can be different based on the size of the materials used and the layout of the house. All this should be taken into account and calculated at the design stage.
Frame: practical recommendations
")
Floor plan for a frame house.
Skeleton country houses can be built from various materials. But for self-building most often use wood. The beginning of the construction of the frame of the house begins with the floor. It is necessary to install the lower trim. For this, bars, whose size is 150x150 mm, are placed on an edge on the foundation columns. At the top of the columns, several layers of roofing material are pre-laid as a waterproofing.
With the help of screws with a length of 100-120 mm, the inner trim boards are interconnected. 95 mm screws are used for fastening the middle board of the bottom trim. After connecting all the boards of the lower strapping, the upper part of the boards must be leveled with an electric planer, checking the horizontal, diagonal, angles by level. The bottom strapping should be done strictly according to the level, the slightest distortions will cause a change in the geometry of the entire country house.
Next, using an electric jigsaw or saw, the grooves for vertical posts in the corners and across the harness are sawn for further installation of the floor log according to the project. The width between the lags is determined by the width of the heat insulating mats, which are used to warm the floor. If the room provides for the installation of a heavy stove or fireplace, then the lags in this place are laid with a smaller distance. Lags for the floor are placed in the grooves and carefully fastened to the pillars of the foundation and the bottom of the strapping.
")
Laying scheme for heat insulating mats on the floor.
Next, a 40x40 bar or boards for the subfloor is nailed to the lower parts of the lag across them. Cut plywood sheets or sawn OSB sheets cut to size are placed on them between the lags. Secure with screws. Then lay a layer of waterproofing, and then insulation. It is important to heat-insulate mats overlap - this will make the floor even warmer. Next, the entire surface is covered with a vapor barrier film. And it is necessary to cover both lags and insulation. The film is attached with staples and a construction stapler to the logs, and the seams between the strips of the vapor-insulating film are taped. For floor ventilation, a 40x10 board is laid on top of the vapor barrier. This ventilation gap will be additional protection of the floor from rotting and heat insulation. Next, put a clean floor.
The material for it can be boards that are stacked tightly to each other, which is achieved by a lock joint, or plywood sheets not less than 5 cm thick. Then laminate, linoleum or parquet can be laid on this floor. Lags and bars (boards), which are used for the floor, must be treated with antiseptic compounds to extend the service life and avoid the appearance of rotting fungi.
")
Scheme of ventilation gap when installing the floor.
After the installation of the floor, the construction of a frame for the walls of a country house is started. In the prepared grooves of the lower trim vertical posts are attached. Vertical expose strictly on the construction level and secure the rack with stitches. These additional bars are fastened to the floor and the nail stand. Further, after the completion of the construction of the 1st floor, these stubs are dismantled. As a longitudinal jumper bar can act 40x40 mm, which is mounted on the principle of a groove in the groove and fastened with nails. After fixing all the jumpers, you can sheathe the outer walls with OSB plates or plywood sheets. Leave only the door and window openings. Rather strapping can be the same timber used for mounting the bottom, which also fits into the grooves.
Roofing installation
Once the skeleton of the 1st floor is ready, it is necessary to start building the roof. On the top trim stack ceiling beams, which are fastened with short stitches. The distance between the beams is 60 cm. Next, down the beams down fill the raw board. On top of this board are sheets of OSB or plywood, which will serve as the ceiling. In the space between the beams fit insulation.
As it can be used sheets of mineral wool, expanded clay, insulation mats. After laying the insulation, the entire surface is covered with a vapor-insulating film and OSB sheets or plywood are filled on top.
")
Roof construction of a frame house.
Rafters are attached to the beams. At the same time, the lower ends of the rafters should protrude beyond the boundary of the house at a distance of 50 cm. For additional fixing of the rafters use short hacks, one end of which is nailed to the rafters and the other to the beams. This will give the structure rigidity. The distance between the rafters is not more than 60 cm.
By fastening the rafters from above, you can form the ridge part of the roof. Next, fill the crate untreated board. Boards can be laid tightly to one another or at a short distance. For waterproofing on top of the boards lay a layer of roofing material - the simplest material. Laying is made vertically overlapped with nails with a wide cap.
It is desirable to miss the seams with special mastic.
To enhance the waterproofing, you can put a second layer of roofing material, placing it perpendicular to the first. Next, you should lay the roofing material, for example, roofing decking, shingles, metal. Whatever material is chosen, it should be fastened very carefully to avoid breaks in gusts of wind.
If the frame dacha house is planned without an attic and this room is residential, then there is insulation between the rafters, vapor barrier, everything is sewn up with OSB boards or plywood, as is done throughout the house.
Exterior and interior finish
After the frame and roof are installed, the exterior wall cladding can be started. You can use OSB-plates for exterior walls or thick sheets of plywood. They are attached to the racks with self-tapping screws. Next you should warm the walls.
The process of wall insulation is no different from the one that was made during the construction of the floor, except that the ventilation gap is usually not done. The ends in the roof is also sewn OSB-plates. House built with his own hands. Only the exterior and interior are left. Good luck!
Didn't find the answer in the article? More information on the topic:
-
")
How are wood veneers made?
Information on how veneers are made. Three ways of industrial manufacture of veneer. Making veneer your own hands. Finishing veneer of various surfaces.
-
")
How to make floors in a wooden house
You can make wooden floors as well as other materials for this. If bricks were used to organize the foundation, the beams are placed immediately behind the basement floor.
-
")
Technology for installing the ceiling from clapboard
Detailed instructions for beginners how to make a ceiling from the lining with their own hands. Description of all stages of work, lists of necessary tools. Types of lining and installation features.
Search
Related Articles
Sink over washing machine - how to choose and install

A washing machine has not been a luxury for a long time, but it’s difficult to find a place for it, especially in a small apartment. However, even if there is enough living space, a stand-alone wash...
How to make ventilation in the bathroom

Ventilation and good air circulation is very important for a person’s home. And such systems play a particularly important role in rooms with high humidity. These can be safely attributed to the bat...
stages of work (photo and video)
It is very important to have communication with water on your personal plot. This may be a central water supply, as well as a well, built by his own hands. Previously, wells were everywhere, but wi...
Do-it-yourself furniture from shields: basic data, example
Every person wants his home to have exceptionally high-quality furniture, which also has a presentable appearance. For a long time there were only 3 options - an array, edged board and chipboard, b...
How to impose a house facing brick
The exterior of the house is important not only in terms of aesthetic appearance. It is a very important element in terms of functionality: additional protection of the building against negative...