From the climatic zones in which your personal home is located and from which types of building materials it is built, the shape of the entire roof, options and methods of attaching the rafters should be chosen. This is considered the main part of the system that holds the entire roof.
")
Diagram of the roof truss system.
Roof overlapping is a complex process that is carried out according to special rules. For example, fixing rafters to floor beams is done in several different ways:
- using special strapping;
- by attaching rafters to the crown of log walls;
- s using mauerlat;
- with the use of tightening and special rafter bars;
- through the floor boards.
Fastening of rafters to beams
Installation of all elements is carried out according to special rules. Let's start with the fact that there are 2 types of fixed bars:
- Hanging (suspended) elements are used to create residential buildings that have a roof of rather considerable dimensions.
- Suspended planks and planks are used if a small house is being constructed.
Fastening the rafters to the floor beams is a complex process that requires special attention. Hanging bars usually have only one point of support - this is the wall of the house. As a consequence, there is a horizontal spacer pressure throughout the truss system.
")
Figure 1. Connection diagram of rafters with a tooth and a spike.
In order to reduce it, use a bar or board. This is the so-called tightening. They connect the feet of each counter rafters of the ceiling together. Thus constructed indistinct triangle adjacent to the wall of the house. It happens that the puffs are replaced by the bars of the floors installed perpendicular to the walls.
Such rigid attachment of rafters to beams is often used in the construction of penthouses. It is important to note that it is better to use such a mount if you are sure that the walls of the house you are building are strong enough and will withstand all the point gravity from the rafter bars.
When connecting wooden rafters for lightweight roofs, as a rule, slabs of overlap are selected that have a cross section only 5x15 cm wide. 550 mm.
Also, the rafter log itself is also carried outside the wall of the house. It must be attached to the edge of the ceiling beam itself.
Fastening elements
Attaching rafters to beams is one of the important processes during the construction of the roof. In order to prevent possible sliding of the structural elements along the roofing board, the rafter board must be securely fastened using the following mounting options:
- The tooth with a special stop and a spike.
- A tooth with special support at the end of the beam.
Depending on the angle at which the rafters are located, they are joined by either 2 or 1 tooth to the floor beams. This design allows you to distribute pressure from concrete boards to the entire system.
Option 1: cutting with a single tooth
")
Figure 2. Connection scheme of the rafter with a double tooth, a bolt and a clamp.
Fastening of rafters and girder bars using a single tooth is used if the roof of the building has a steep shape. In other words, if the angle between the board elements and the beam is 35 ° or more. For reliable adhesion of the roof elements, a tooth with a spike is made in the rafter itself.
A special stop is created in the counter part, having a notch for a spike, which is usually recessed 1 / 4-1 / 3 of the total thickness of the counter board. Cut deeper is not worth it, so as not to weaken the beam itself (Fig. 1).
The cutting of sockets to the ceiling beams is usually carried out 250 mm from the extreme side of the hanging element. A single tooth can be made with a spike.
Option 2: cutting with a double tooth
If the roof of the house being built has a rather flat form (less than 35 °), then the rafters are mounted differently. They are reinforced with a help of a cutting with 2 teeth. This is necessary to increase the supporting area of the rafter on each beam. The connection can be made in several ways:
- A lock with a cut-out double spike.
- By joining with 2 spikes.
- Using a stop with a spike or without a spike.
Inserts in the beamed boards are usually created at the same depth. But if you need to install them at different depths, you should take into account an uncomplicated rule. The second tooth is performed at half the thickness of your beam, and the first at 1/3 of the thickness (Fig. 2).
The overlap can be constructed differently. There is an even more complicated mounting option - a joint at the end of a special tightening. Then the tooth-emphasis is placed in the foot of the rafters in such a way that the first plane of the tooth is at the end of the plank beam.
Another plane should rest against the girder created in the bar, which is usually made 1/3 the thickness of your entire beam. Masters advise to build a tooth-emphasis as far as possible from its edge.
By the way, for arranging your entire system, metal or wooden fasteners can be used when installing the beams. Usually use such wooden parts as:
- kerchiefs,
- bars;
- inserts for making a spike;
- dowels and plates.
The fixing of rafters is performed using metal elements, from which the following can be distinguished when creating the system:
- corners;
- "slide" and "sliders" for fasteners;
- MZP - toothed plates;
- perforated tapes;
- nail and mortgage plates.
The roof overlap must be strong enough.
To give the whole structure and your timber greater reliability, rafters and beams are attached with clamps and bolts, and then fastened with wire loops or iron ribbons.
This entire unit is fixed on the wall of a house under construction on an extreme bolt or on a specially bricked crutch.
Materials for rafters:
- Boards.
- Bars.
- Beams.
- Washers, bolts, nails, nuts,
- Clamps.
- Wire.
Tools for rafters.
- Hammer.
- Saw.
- The Ax.
- Drill.
This ensures the strongest fastening of rafters. This will allow your design to stand for more than a dozen years.
Didn't find the answer in the article? More information on the topic:
-
")
Features of the device for flooring with wooden beams
The device of a floor on wooden beams is 1 of 2 possible variants of its construction. Floor beams are important structural elements of the structure. To lay the floor on them need to special rules.
-
")
Wooden house: do-it-yourself process
How to build a wooden house with your own hands? Choose a suitable project, purchase materials and tools and, following the recommendations, start construction. Recommendations further.
Search
Related Articles
Sound insulation stretch ceiling in the apartment

Owners of an apartment in a high-rise building, along with the cherished housing, also receive a weighty problem - poor sound insulation. Just a few years ago it was quite difficult to isolate onese...
Optimal cultivators in quality and price

Agricultural work begins in the spring. Villagers and gardeners prepare the land to plant it with popular vegetables and provide a rich harvest in the fall. Cultivators significantly facilitate agri...
How to make a waterproofing foundation + video
House building works require a huge investment of strength, finances and maximum responsibility. The main stage of construction work is the installation of the foundation. In order for the foundat...
Attic finishing with drywall - features of work
Most of the owners of private houses, as a rule, think about making the attic located under the roof suitable for living, which will allow them to significantly expand the usable area. As an option...
Laying facing bricks with your own hands
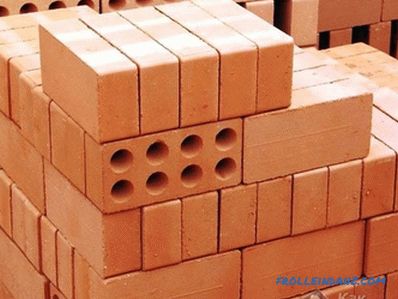
Thanks to the exterior finish, it is easy to change the architectural appearance of the house. Making the facade will allow the laying of facing bricks with their own hands. The work requires accura...