The epoxy floor is a solid, solid construction. It is easy to care and harmless to human health. This coverage is very often found in luxury apartments, airports, restaurants and more. If you are dreaming of making such a floor in your modest home without much expense, then this article is for you. It tells you how to make an epoxy floor with your own hands. But first, consider its positive and negative sides.
Epoxy floors - to be or not to be!
") Epoxy floor in the service station
Epoxy floor in the service station
It is difficult to find better floors than epoxy. They contain ideal proportions of hardeners and epoxy resins, which when combined form a durable and monolithic coating. This floor has a large number of positive technical characteristics:
- Wear-resistant.
- Durable.
- Hardy to temperature extremes.
- There are no seams.
- Simple cleaning.
- Resistant to aggressive chemicals.
- A wide range of designs and so on.
") At a medical institution
At a medical institution
Because of all this, this floor is very popular different rooms, including in residential apartments. To be objective, one should not forget about some of its shortcomings:
- The casting process involves a large amount of work, and the material used must be of high quality.
- If the technology is not followed, the coating may peel off.
- It takes a lot of effort to remove a portion of an outdated and damaged epoxy floor.
Considering all these nuances, you must make a personal decision whether to be epoxy flooring in your house or not.
How to achieve high quality coverage
") The surface needs careful preparation
The surface needs careful preparation
To achieve the most qualitative result, it is extremely important to perform a number of preparatory work:
- Preparation of the foundation.
- Fill the base coat.
- Laying the decorative layer.
- Finishing layer.
With the observance of technology at each of the listed stages, you can make an epoxy floor independently and of high quality. An important role is played by the correct preparation of tools.
A necessary tool for working
") Tools for pouring epoxy floor
Tools for pouring epoxy floor
For work you will need:
- Several rollers covered with padding polyester.
- Needle aeration roller.
- 2-3 spatulas 600 mm wide.
- Mixer for mixing.
- A special mixer is needed for organ-soluble materials, which is equipped with a function for adjusting revolutions and reverse.
- Racquel.
- Sprays.
- Special vacuum cleaner.
- Respiratory protection.
To remove all possible contaminants, each metal element should be soaked in a solvent before starting work. This also applies to new purchased instruments.
Careful preparation is the key to success!
Concrete screed is the best and most reliable basis for an epoxy floor. According to the theory of the composition can be poured on a ceramic or wooden base, but for this it is necessary to conduct an extremely complex preparation. Moreover, the lifetime of such a coating will be much less. For this reason, it is best to use a concrete floor as a base. It is time tested!
") Structure
Structure
The floor surface must be even and dry. For every two meters only horizontal deviations of up to two millimeters are allowed.
This can be achieved using self-leveling compounds. Room humidity should be no more than four percent. Neglect of these tips is unacceptable, since the epoxy floor has no vapor permeability property. If moisture gets on the main floor, then the filled epoxy floor will gradually collapse.
") Epoxy floor installation with a decorative layer
Epoxy floor installation with a decorative layer
It is easy to check the humidity level. To do this, cover the plastic wrap on the floor and leave for two days. If during this period there is no condensation on the film, it means that the room is dry and you can start working.
If the screed is fresh, then it acquires absolute strength after one month. If you have to work on the old screed, then a number of preparatory work will be required. For example, remove dirt, grease, paint stains and other possible contamination. After it is necessary to level the cracks, chips and as much as possible to level the surface. To fix the old base, buy an epoxy paint and apply a uniform layer on the floor surface. Glue a waterproofing layer along each wall. Using a vacuum cleaner, remove all dust from the surface. Only then can a layer of primer be applied.
") Painting the concrete floor
Painting the concrete floor
The process started
") Primer floor
Primer floor
The primer is applied in two layers. The second - after complete drying of the first. On the surface of the primer should not appear islands of gloss, otherwise it will lead to contamination. If such a place appeared, then it should be cleaned and primed again. In some places, the primer can be absorbed more strongly, so re-priming will be required. After applying the second layer, the surface is filled with quartz sand, which is removed a day later.
") Quartz sand for the floor
Quartz sand for the floor
") A wide range of designs
A wide range of designs
After applying each layer, the rollers should be thoroughly washed.
") Base layer
Base layer
The primed surface dries out after 24 hours. Now it's time to apply a base coat. To do this, use a squeegee or spatula, which evenly stretches the composition of the strips. For movement on the filled surface it is necessary to use only krasknosty. At the same time, shuffling movements should not be allowed. With the help of aeration roller air is removed from the composition. On the floor, you can step on exactly after two days. Under this coating you can place a decorative layer.
") Epoxy Floor Installation
Epoxy Floor Installation
Although epoxy floors do not shrink, fill the walls along shrink seams sealant.
Choice of a possible design
") Self-leveling floor with a decorative layer
Self-leveling floor with a decorative layer
Epoxy flooring can be done in different ways. For example, decorative tips are poured on the not yet frozen floor. in addition, after drying the floor, the surface can be painted with acrylic paints. For an apartment, an ideal option would be hand painting. For example, in a printing house you can order a banner network. Any digital coverage with the required resolution will be applied to it. A cheaper option would be to apply a graphic image, which is done using vinyl stencils. Well, if you want to create floors with chic, then you can do three-dimensional printing of a 3D image using special microlenses. You can order them in an advertising agency or in a printing company. When the decorative layer is fixed, a finishing coat is applied. Often finishing glossy layer distorts the image. Therefore, you can use a polyurethane matte varnish.
") Decorative coating with quartz sand
Decorative coating with quartz sand
So, to create an epoxy floor in your house you need to hold a row sequential processes. Each layer must be made perfectly in accordance with the instructions. The only way you can achieve the desired result.
Video
This video shows a step-by-step filling of the epoxy floor in the garage:
And here you can see how the epoxy floor is filled with quartz sand:
Photo
") Epoxy floor in the bathroom
Epoxy floor in the bathroom
") Dark self-leveling floor in the living room
Dark self-leveling floor in the living room
") Striped floor
Striped floor
") With the image of fish
With the image of fish
") Water pattern
Water pattern
") Elegant decor in a classic style
Elegant decor in a classic style
") Black and white pattern
Black and white pattern
") With a small black and white pattern on a gray background
With a small black and white pattern on a gray background
") With an image of colors
With an image of colors
") Self-leveling floor with leaves and pebbles
Self-leveling floor with leaves and pebbles
") Epoxy self-leveling floor dark
Epoxy self-leveling floor dark
") Filling 3D
Filling 3D
See also:
- Dry floor screed.
- How to make the floor on the balcony.
- Infrared floor do it yourself.
- Dismantling the old floor.
- Warming the floor in the bathroom.
Search
Related Articles
Arbor of metal with their own hands
The metal gazebo is a durable and reliable construction, which, provided it is properly arranged, designed and planned, will be an excellent addition to the suburban area. Today, a large number of t...
Choosing a circular saw for home: features and characteristics
Nowadays, circular saws are becoming more and more popular among ordinary people. A few years ago, this tool was considered extremely professional, however, already today, circular saws enter the p...
How to make the overlap between floors
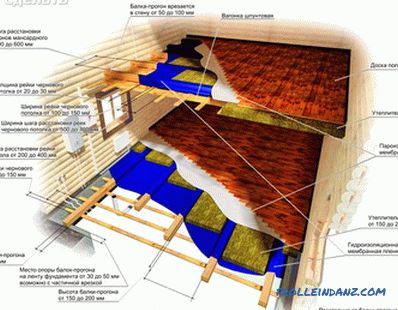
During the construction of modern country buildings, their future owners often have to independently engage in the manufacture of floor decks. However, before you do the overlap between floors, we s...
How to make waterproofing roof

Any roof covering is, as you know, a multi-layer cake, each of which is intended for its own purposes. These layers usually include: direct coverage; waterproofing layers; natural roof ventil...
Waterproofing a swimming pool with your own hands - how to make waterproofing

For a comfortable and enjoyable holiday, vacationers and homeowners arrange pools on their site, which in our time have become a fashionable trend. Especially often these tanks do on their own to re...