Wood flooring is currently very popular because it uses environmentally friendly materials. Such coverage is established not only in country houses, but also in city apartments. Therefore, many owners have a question: is it possible and how to lay a wooden floor with their own hands? Yes, of course, you can do it yourself. This process is not complicated, just by following it, you need to follow some rules.
")
Floor plank layout.
Classification of a wooden floor
Flooring of a wooden floor provides for the selection of quality wood such as oak, aspen, alder, pine, spruce, cedar, etc. The wood of each of these species has strength and wear resistance and low cost. For flooring your own hands, you must choose the right wood. It should not be raw or dried, as its deformation may occur later. The material must be dry.
")
Classification of a wooden floor.
It is impossible to use boards with obvious defects, such as cracks, splits and tar stains, for the installation of wooden floors. It is better to select them from one batch so that the shade and the pattern coincide. When purchasing material for flooring wooden floors, it must be taken with a margin, and the length of the boards should not be less than 2 meters. Before starting work, all wooden elements, which include boards, lags, and gaskets, must be treated with special solutions to increase the fire resistance and to protect against fungus.
For flooring, boards are made of solid wood, parquet boards of wooden solid wood, with grooves on all sides. Also applied is glued parquet board, consisting of three layers glued together under high pressure, and parquet, which is a small strip with grooves and grooves on all sides. Laying the floor of the tree is carried out in two layers. First, the preparatory layer, which is the foundation, is mounted, and then the wooden flooring itself is laid. Its installation can be carried out directly on the ground with lags or on the floor beams. Under the future floor, a waterproofing layer, such as polyethylene or penofol, is laid out on the base.
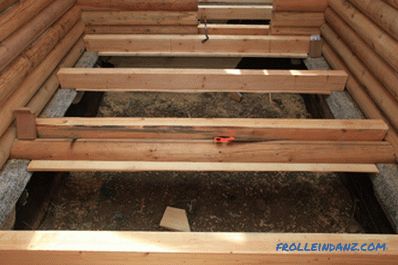
Flooring on logs
")
Flooring on logs.
Required:
- construction level;
- roofing material;
- mineral wool;
- electric drill;
- screws 60-100 mm;
- a hammer or mallet;
- planed bars;
- floorboard.
Before you start laying wooden floor, you need to find the highest point of the surface of the subfloor in the room from which to start the installation of the board. To do this, use the construction or laser level. Then the marking is applied to it and the sound insulation is laid down with a layer of 10 cm. Waterproofing is laid on it, for example, roofing material, in order to avoid moisture accumulation and decay. After that, retaining bars 50x50 mm in size are installed, at a distance of 60 cm from each other. They are fixed to the surface of the subfloor using dowels and self-tapping screws.
Lags made of only planed bars 50x50 mm in size are used for flooring wooden floors. They are installed at a distance of 35-50 cm from each other, it depends on the thickness of the board of the future floor. The thinner it is, the smaller the step between the lags. The installation of planed bars begins with the found and marked high point. Lags must be set horizontally with a level. For alignment of their height as necessary, ruberoid is used as linings. After installing the first lag and securing it with self-tapping screws at a certain distance, the next one is mounted in order. This is necessary in order to eliminate errors during installation.
Before laying a wooden floor, it must be insulated.
")
The structure of a wooden floor with insulation.
For this, after installing all the lags, layers of sound and heat insulation are laid, and if necessary, vapor barrier as well. Mineral wool is great for floor heating with their own hands. After this begins the installation of a wooden floor. The first plank needs to be laid out from the wall so that its groove is turned to the wall, and gaps in 1 cm remain at the ends and along the front. To fix them, gaskets are used, the thickness of which is also 1 cm. This board is fixed to each lag with two self-tapping screws. One of them is screwed at a distance of 3-4 cm from the wall, and the second screw - on the other hand, at an angle of 45 ° . Their caps must be recessed.
When mounting subsequent elements, a thrust board is used, which is temporarily fixed to the logs at a distance of 20 cm from the last installed board using self-tapping screws. Also, crimping wedges made of wood 20-25 cm long are additionally used.Each subsequent floorboard is placed in the support against the previous one, then prepared wedges are inserted between it and the installed stop plate. At their butt with a hammer or mallet you need to hit until the two adjacent boards are close to each other. When wooden floors are laid, the last board should be installed so that there is a 1 cm gap from the wall. Its crest is inserted into the groove at an angle to the horizontal, then the boards are crimped with wedges. Fastening occurs with the use of screws, which are screwed at a distance of 3-4 cm from the wall.
Final work
")
Plywood flooring.
Required:
- grinding machine;
- wood putty;
- primer;
- paint for wood ;
- lacquer;
- roller or brush.
After installing the wooden floor with your own hands, you must remove all the resulting defects. These include cracks, resulting in the joints between the boards, and holes from screws, and the presence of accrete knots. To eliminate them, use a special putty for wood. It is important to choose it by the color of the wood used.
Before installing the floor plinth, the entire surface of the wooden floor must be sanded. This is necessary in order to remove all the projections from the floorboard, which were formed during its installation. After that, for protection, you can leach the surface with soda or treat it with ointment-like soap. The next stage of work - priming the floor with a mixture of linseed oil and vegetable oil. After the primer is completely dry, the wood coating can either be painted or varnished. Polyurethane or oil-based varnishes are used for use. Primer, paint or varnish should be applied so that traces from the brush or roller are not visible, i.e. it is necessary to move parallel to the wood fibers. If the natural shade of the floor covering is assumed, then the entire surface is treated in the old way by fumigating the wooden floor with smoke.
Didn't find the answer in the article? More information on the topic:
-
")
How to level the floor in a new building with your own hands?
Instructions on how to level the floor in a new building with serious drops in the horizontal surface of the base. Preparation and leveling of floors using log or cement-sand screed.
Search
Related Articles
Floors in the house: installation according to the instructions, features
The future peace and comfort of the whole family depends on how well the floors are made in the wooden house. This stage of work should be taken very seriously, so that then there would be no diffe...
How to move the light switch to another location
Once you began to notice that the switch in your house is too high or not in the place where you would like. Every time you have to either lift your hand up high or make your way to the other end of...
How to make a lawn in the country with their own hands (+ photos)

Agree, it is always pleasant to walk barefoot on soft grass in the morning, and in order to do this, you will need a lawn. In the article we will tell how to make a lawn in the country with their ow...
Decorative columns in the interior - use

Long since the columns were and remain an integral part of the classics, made in the spirit of antiquity. Decorative columns in the interior, created in a classic style, give the room grace and luxu...
Finnish frame house with their own hands: design and calculations
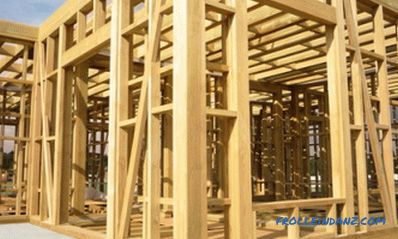
A frame house with your own hands can be built very quickly in time, while financial costs will be insignificant. The cost of building a frame house is relatively low compared to other buildi...