The overlap can be used no matter what material the walls of the house are built from. It is easy enough to make hardwood floors with your own hands.

Wooden flooring scheme with separated beams.
Attic and interfloor systems have almost the same design. The basis of such structures are beams, boards or shields. The overlap is a supporting structure that is responsible for the strength of the floor, rests on the walls and then evenly distributes the load on them. Most people prefer wood material due to indicators such as strength, ease of installation and environmental friendliness.
Wooden floors and their main characteristics.
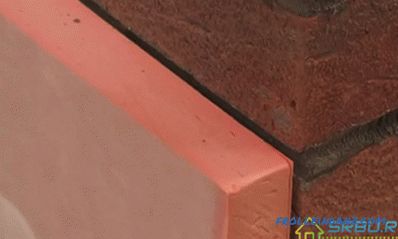
When making a floor deck, you should pay special attention to the room underneath. If the ceiling is located above the living room, then it is enough to use only noise insulation material. If the ceiling is located above the bathroom or toilet (or another room with a high level of humidity), you should take care of high-quality insulation and waterproofing.
From the main characteristics of this design, the following can be identified:
- high level of heat saving,
- easy installation,
- high acoustic quality;
- installation work can be carried out at any time of the year;
- wooden structures are used both as a ceiling between floors and as an attic floor.
General characteristics of wooden floors

The scheme of wooden ribbed floors.
The load on hardwood floors is calculated from its own weight and other additional loads. On average, the weight of the wooden system is 230 kg per 1 m². For additional loads, a value of up to 200 kg is provided. In order to determine the distance that must be made between the beams, it is necessary to take into account the main indicators: the length of the span, which loads are provided for the floor, the characteristics of the beams. On average, the spacing between beams should not exceed 1 m.
The main recommendations that should be used when choosing beams to overlap:
- beam thickness should not be less 5 cm;
- The height of the beam most often is 15 cm;
- If the beams are placed at a distance of 50 cm from each other, it will be easy to lay mineral wool or other thermal insulation material between them.
There are also tables, thanks to which it is possible to calculate and select the necessary beam much faster.
For manufacturing, boards can be used whose thickness is not less than 60 mm, round timber can also be used. An alternative option is to use 2 planks 50 mm thick, which are fastened together with the help of nails. But experts recommend such options for the design of the box. In the future, finished beams are lined with boards from 1-2 sides, depending on certain criteria.
Do-it-yourself overlap: preparatory work

Tools for installing overlap.
In order to start assembling the floor construction, you must first prepare the beams. It is very important that the moisture content of the finished products does not exceed 20%. The bark on the material needs to be removed. After cleaning, the beams are treated along the entire length with special antiseptic agents and fire-resistant impregnations. More expensive material are systems that have undergone a full range of processing in a production environment.
In order to make the overlap with your own hands, it is worth preparing all the necessary tools:
- keys of different sizes;
- anchor bolts;
- brackets;
- metal corners;
- screws of a suitable size;
- a screwdriver;
- nails;
- a saw for wood;
- rope;
- ladder or stepladder;
- ax;
- water level;
- tape measure and pencil for marking.
Very often for installation glued laminated timber of no more than 12 m is used.
This type of material is today considered the most practical and reliable. In addition to high quality indicators, such a bar can be made to order and have different sizes, which will minimize the amount of waste.
Stages and features of the work
Work should begin with the laying of support bars, which are located at the edges. Further laying is carried out to the center. In the process of work it is very important to control the distance between the beams.
When laying all beams, it is necessary to check the horizontal plane with a construction level. Irregularities can be eliminated by placing a plank under one end of the beam. Such boards are very important to pre-treat with special protective agents.
In order to lay beams, when erecting walls from the outside, sockets are left, the depth of which is 15-20 cm. To make the construction as reliable as possible, every 3rd component must be secured with anchors.
In addition, in order to increase the resistance to various rotting processes, the ends of all the beams must be coated with bitumen mastic and wrapped in several layers of roofing material. Thanks to this method of protection, they will last much longer.
After the roll forward is made, the space that is formed between the beams must be filled with sound and heat insulating material.
A slab of mineral wool, extruded foam, and expanded clay concrete can be laid on top of the flooring. If the insulation is laid in the attic, it can be covered on top with a layer of clay clay sand, the thickness of which should be 2-3 cm. It will significantly help to increase the insulating quality of the material.
After all the insulating layers are placed, it is necessary to lay a reinforcing mesh on top, over which the screed is poured. This will continue to be the basis for the flooring. If overlappings are created in the attic, they can be made of sheet piling.
Didn't find the answer in the article? More information on the topic:
Search
Related Articles
How to eliminate leaking heating pipes
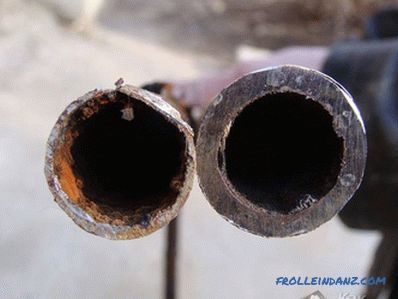
Typical steel pipes used in domestic heating systems, as is well known, have one significant drawback associated with the possibility of corrosion of their surface, which often leads to leakage. Tha...
How to replace a window sill - dismantling and installing a window sill
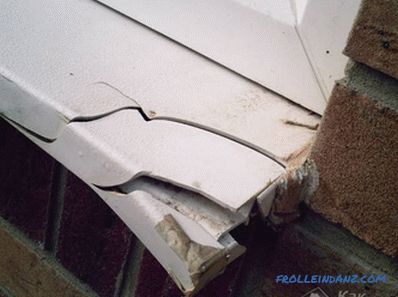
Most often, window sills are mounted when they install windows. Therefore, a separate installation of window sills is extremely rare, only in special cases. But it also happens that in the course of...
from mounting racks to installing stairs
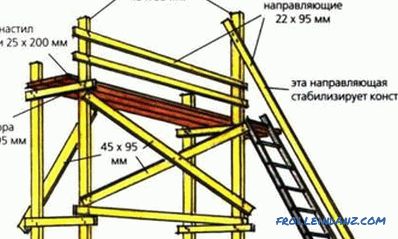
A variety of equipment is used during construction, but scaffolding is indispensable. They allow to carry out high-altitude work, workers are able to be in complete safety at the desired height. Th...
cover removal and frame repair (photo and video)
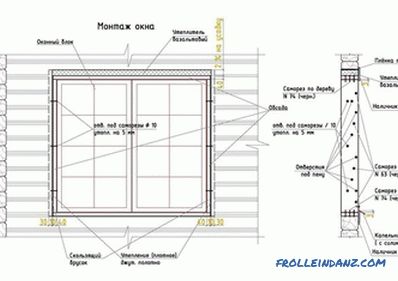
Despite the popularity of modern plastic windows, traditional frames, made of solid wood, for many people remain the best option for protecting an apartment. But in this case, the house craftsmen f...
Istirol - characteristics and the whole truth about the heater + Photo and Video
Heating an apartment in the winter is costing us oh, how expensive it is, and the price of energy increases every year. And it is a pity when such a costly heat is uselessly leaving the apartment t...