The wooden floor is valued primarily for its naturalness and safety for health. But over time, even the highest quality wood wears, it dabbles, gaps appear between the boards, floorboards begin to sag and creak. With a great desire to the floor in a wooden house can be restored independently. The nature and complexity of the work depend on how much the structure is worn and damaged. Consider the main and most common situations, choose the appropriate option and feel free to start repairing wooden floor with your own hands.

The construction of the wooden floor along the logs.
What does the repair of old wooden floors do with your own hands?
When planning to repair the worn floor in a wooden house, you need to carefully study the structure and decide what exactly needs to be done: update the flooring, perform a small either a major overhaul or a complete replacement of the flooring.

Construction of a wooden floor on the floor beams.
In order for the floor in a wooden house to serve as long as possible, you need to properly and regularly take care of it, conducting minor repairs as needed. So, for example, the coating should be updated 1 time in 2-5 years. The frequency of replacement depends directly on the coating used and the condition of the wooden floor under it. Repair can be performed or according to plan (the best option), or as wear.
Normal repairs are done when the floor in a wooden house starts to creak or bend a little. Understand that the time has come to carry out repairs, it is possible to begin to bully the edges of the boards and the cracks between the floorboards.
A major overhaul of the floor in a wooden house is carried out if a complete renovation of the dwelling is done or if the floor has been severely deformed and rotted. Full replacement of the flooring is also carried out during major repairs.
With regard to the durability of the floor of wood, there is only one thing that can be said with confidence: if the source material was of good quality and the owner takes care of it properly, then the life of the floor can exceed even 100 years. The quality material here should be understood as boards dried in accordance with the technology without excessive knotiness and rotten areas, necessarily treated with special protective impregnations. Therefore, the need for a complete replacement of the flooring you are unlikely to arise, because nowadays rarely anyone lives in a wooden house that was built more than 100 years ago.
Tools needed for work: a hacksaw, a plane, a circular saw, a square, a pencil, a measuring ruler.
Any floor repair in a wooden house is carried out in 3 main steps. First, the necessary preparatory activities are carried out, followed by major repairs, and then finishing is performed. However, each case requires individual consideration. And the order of repair in each of the situations is individual. The most time-consuming and responsible event is the overhaul of the floor.
Before you start work, prepare the necessary materials and tools:
- new boards;
- timber, lath, plinth;
- nails;
- hacksaw;
- construction level;
- hammer and nail picker;
- plane, better electric;
- ax;
- circular saw;
- angle;
- grinding machine;
- pencil measuring ruler.
Step-by-step instructions for overhaul

Sanding a wooden floor.
As a rule, a major overhaul of a floor comes down to a partial replacement of floorboards. Broken, cracked and rotten elements are changing. Additionally, insulation and vapor barrier are performed, and a floor heating system is arranged at the request of the owner. In general, the order of repair looks a certain way.
First, preparatory work is carried out. At this stage, the repairman needs to do the following:
- Get rid of the old plinth.
- If the boards were painted with an oil-based paint, then they are erased to clean wood.
- For greater convenience, the boards are numbered.
- Floorboards are carefully removed and carefully examined for suitability. Defective material must be replaced. Fully throwing out the boards is optional. You can simply cut out the damaged fragment and replace it with a piece of quality.
- The inner side of the boards is treated with a special impregnation against rotting and mildew. This will extend the life of the material.
- The “Underfloor” is thoroughly cleaned of all kinds of rubbish. Remove any excess so that the floor slab or concrete base is visible.
- Carefully examine the state of the lags, check the material for integrity, replace the damaged parts.

Thermal insulation of a wooden floor.
When all the preparatory work is completed, proceed to the main stage of repair. You are to do the following:
- To build a thermal insulation material between the lags. For insulation suitable a variety of materials. Most often foam and mineral wool are used, expanded clay is used less often.
- Steam insulation is applied. Lay the film with an overlap of 20 cm. Fix the sheets with foil tape. Polyethylene film is the simplest and most budgetary variant of a vapor barrier device. If you wish, you can use a more modern and expensive vapor barrier, for example, penofol.
- Lay the floorboards in accordance with the numbers printed earlier.
- Attach the boards to the lags. To do this, use screws. This option is more reliable fixing than fixing with nails.
- Be sure to check the horizontal position of the installation with the help of the construction level. In places where the height of the boards is noticeably different, work with a plane. With power tools, you can do everything much faster.
- Next, you need to grind a rough, leveled surface. The maximum allowable drops are 2 mm per 1 m².
- Putty into the existing gaps, grooved grooves, etc. Grind the plastered parts carefully again.
- Remove all trash. It is most convenient to use a vacuum cleaner for this. Finishing touches can be made with a brush and a clean damp cloth.
- Treat flat and clean wood with special protective impregnation. If you plan to paint the floor with oil paint in the future, then you can use ordinary varnish as impregnation.
- Install the new plinth.
Choice of a finishing covering

Laying options for wooden floors.
Your wooden floor is almost ready for use. In conclusion, you only need to process the boards with a finishing sheeting. A huge range of such materials is available on the modern market, select the most suitable option for you:
- Lacquer. Currently, this coating is used most often. Varnish provides reliable protection of wood and does not hide its natural beauty.
- Paint. Special floor paints provide long-term protection and allow you to give the design any desired color.
- Oil. The compositions currently being developed penetrate deep into the wood and make it more durable and wear-resistant. However, it is better to use oils not as a finishing coating, but as an impregnation.
- Wax. The wood treated with this material looks great. The disadvantage is the need to constantly conduct a fairly expensive service.
Thus, even a major overhaul of a wooden floor is not such a difficult task. You will have to make an effort and spend time, but the result is definitely worth it: you get almost a new floor at a very affordable price.
Manual on small repair of wooden floor

Features of laying wooden floor coverings.
Sometimes flooring is done using materials that are not of the best quality, especially if the floor is not the owner of the dwelling, but third-party companies. If the floor of your house has not yet failed, but only bends slightly and creaks, the restoration does not take much of your time and money. However, even a simple repair must be approached with the utmost responsibility and expertise. The work is performed in sequence:
- First, the old paintwork is removed to clean wood.
- Each floorboard is carefully examined for the presence of mold, rot and rotten areas. The affected places must be cut out and replaced with new material.
- Boards are additionally fixed to the lags. The best option is to get rid of old nails and use screws instead. Everything is done so that the caps of the fasteners go deep into the boards by about 5 mm.
- The narrow slits are plastered with putty. In a wide gap on the plaster sits a wooden plank.
- The floor is ground to a smooth, even surface.
- Clean floorboards are impregnated to protect and improve performance.
- At the end, floors are varnished or painted in the desired color.
This repair will not take you long. And even with minimal time and cost, the floors will look almost like new. Especially noticeable will be the update, if previously there was a solid layer of paint on the floors, from which, as already noted, you must first get rid of. For grinding large areas, use a grinder, and the remaining small areas additionally refine sandpaper.
Recommendations for periodic repair work

Grinding and varnishing scheme for parquet.
By making floor repairs earlier, you must have used the best coating that provides excellent protection of wood from mold and mildew, mechanical damage and deformation. However, even the most expensive and best protective agent is not eternal. After some time, there will definitely be a need to update it. It does not take much time and money. This is an extremely simple process. Everything is done in the following sequence:
- The surface is thoroughly cleaned from grease, dust and dirt, that is, from everything that could have a negative effect on the new coating.
- A layer of new protective coating is applied. In those places where the surface is subjected to the most intense loads, you need to apply 2 layers.
That's the whole repair. The only point that can be considered additionally is the decoration of the floor surface.
You can change the color or apply some original pattern, thanks to which your floor will change and make the design of the apartment more interesting.
There are many options for decorating the floor. You can choose the most suitable option for you without any problems. Of course, you need to focus on the cost of work. If you do not have enough money to carry out a good repair of a wooden floor, you will have to be content with the most modest options. But even with a small budget, you can achieve excellent results if you connect your imagination and work a little.
Thus, even a major overhaul of the floor is quite a doable task that can be solved on its own. The most important thing is to objectively assess the amount of work to be done, compare it with your own capabilities and do everything in accordance with the instructions. Good luck!
Didn't find the answer in the article? More information on the topic:
-

How to level the floor in a new building with your own hands?
Instructions on how to level the floor in a new building with serious drops in the horizontal surface of the base. Preparation and leveling of floors using log or cement-sand screed.
Search
Related Articles
How to cover the roof of the arbor - the choice of roofing (+ photos)
Arbor is an architectural structure that is most often used in summer. However, it is not necessary to consider this construction of little importance, because it greatly improves the landscape adja...
How to choose a punch for home or permanent work + Photos and Videos
When a house is being renovated or a house is being built, a puncher is one of the most necessary tools. With the advent of this device, capable of withstanding substantial loads, work has become ea...
drawings, instructions (photos and videos)
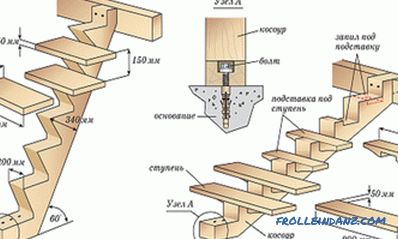
A ladder is a structure without which it is almost impossible to imagine any structure. It is used for entry, for interfloor communication, for lifting to the attic or to the roof. There is a kind...
Chipboard or OSB - which is better detailed comparison
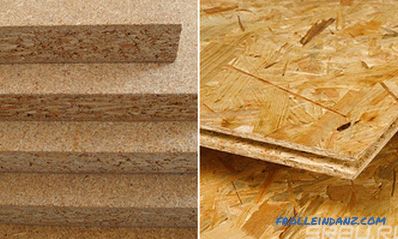
Chipboard and OSB - the materials are quite different in their parameters, so their areas of application are different, although in some cases they overlap. To understand what is better chipboard or...
Wooden chair do it yourself: a sequence of works
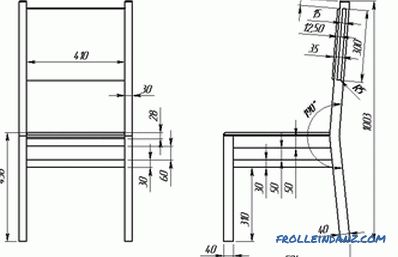
A chair is an essential attribute of the life of a modern person. These pieces of furniture have differences in size, configuration, materials and other features. A wooden chair with its own hands...