Modern city apartments are not very large, so the choice of furniture for them sometimes becomes difficult. Especially important is the right choice for the kitchen, where space is not so much, and all the furniture should be functional and comfortable. Instead of buying expensive furniture, it is quite possible to collect their own hands. To work using inexpensive materials and conventional tools. Making a table with your own hands, chairs and other attributes for the kitchen is not so difficult.
")
Drawing of the kitchen table.
Materials for making the table
To assemble the kitchen table you need to prepare:
- boards for the bottom support 19 * 100 * 965 mm - 6 pcs. ;
- boards for legs 19 * 215 * 680 mm - 4 pcs. ;
- molding for legs 19 * 38 * 470 mm - 4 pcs. ;
- boards for support under the tabletop 19 * 125 * 610 mm - 4 pcs. ;
- jumpers 19 * 140 * 1100 mm - 2 pcs. ;
- steel screed 150 mm -2 pcs. ;
- for the worktop: one large board 19 * 1020 * 1900 mm, 2 strips 19 * 19 * 1750 mm, 2 moldings 19 * 38 * 1750 mm;
- brackets for fasteners - 6 pcs . ;
- screws, washers, metal plates for screed.
")
Kitchen table tools.
You can take any material for the tabletop, but it is best to use laminated wood, as it is more durable, it is easy to work with . Today, you can find special countertops for sale, which are made under natural stone. Such countertops after installation no longer require the use of varnish or paint, the color can be chosen in full accordance with the general situation. If a plain board is taken for work, then it is possible to use paint, varnish, mosaic tiles, and special laminated films for decoration. A kitchen with such a piece of furniture will acquire a special charm.
A set of tools for work
Tools for work:
- circular saw (it is better to take combined saw blades specially designed for working with wood);
- wood saw;
- drill, drill set for work;
- jigsaw (you can take the usual hand, but since the workload is large, it is best to use jigsaw);
- milling machine, set of cutters;
- planer;
- abrasive paper;
- files;
- paint brushes, rollers;
- thin brush for applying wood glue;
- clamps.
The following materials will be used as consumables:
- solvent;
- special wood glue;
- polyurethane varnish (you can take a glossy or matt;
- fasteners (wood screws, metal plates, wooden dowels).
Instructions for making the table
")
Installation scheme of the table cover holders.
Making the table for the kitchen is not a very complicated process, but it requires accuracy. It is necessary to follow all stages of work exactly, paying special attention to ensuring that the dimensions of the structure match the dimensions in the drawing.
The stages of assembling the table for the kitchen:
- building supports for the legs;
- creating supports for the countertop;
- assembling the legs;
- creating the table top;
- the final table assembly.
For such a support, it is necessary to take 3 elements each, they are glued together. It is necessary to prepare 6 identical supports at once, the corners are rounded, and accurate straight cuts are made with a circular saw. In 2 blanks it is necessary to cut a small part in the center, the resulting groove should fall on the thorn of the leg, but it should be slightly smaller. In this case, after the assembly, the legs will not be loosened, all fastenings will be as strong and durable as possible.
Next, the wood glue supports are glued. Until complete drying, they are clamped with clamps, the lower and upper edges protrude, then all bends are cleaned with emery paper. Now it is necessary to make 4 blanks for future legs of the table, there should be 2 such blanks each. Separate elements are glued together, clamped with clamps. It is necessary to gently plan all the vertical edges, with a milling machine to process the rounding.
For each future table leg you need to cut the same spikes, their thickness will be different for the top and bottom.
The spike can be easily cut with a circular saw, while a working saw blade is best used in combination.
")
Schematic of mounting the table legs.
After that, it is necessary to cut out special moldings designed for decorating the legs, their ribs should be rounded. V-shaped grooves are made on the back, they will be used for adhesive bonding.
4 supports are cut out for the table top, 10 mm grooves are selected for them. To simplify the task, a template made of cardboard is used, then the slots will have one size. These supports stick together, and the cut should be in the center.Details are clamped, all sawn trimmed to the surface turned out smooth.
Next, you can begin assembling the legs. First, all connections should be adjusted without glue, try them on. On the sides it is necessary to leave 1.5 mm for the gaps, it will be necessary to ensure the correct process of shrinkage-swelling of the tree. After the final assembly, all gaps will be completely hidden by the prepared moldings.
Grooves and spikes should be missed with wood glue, connect supports and legs. Until the glue dries, it is necessary to drill holes, reinforce the connection of parts with a dowel of wood. The moldings are cut to the desired length, after which they are carefully glued to the legs, and the glue should be applied to the V-shaped holes.
Construction of the countertop
Now the tabletop is placed on the table, for the kitchen you can choose different design options. What next? The jumper is mounted, it must stand high, otherwise, when using the table, the sitting will kick their feet on it. It is glued from 2 strips, then decorated with molding. When the glue is dry, it is necessary to chamfer, select the holes for fasteners for the lintel.
")
Table top attachment scheme.
The kitchen worktop is cut with dimensions of 1020 * 1900 mm. At the ends should make spikes jigsaw on each side. All places saw should be carefully cleaned with a file. Along the long edges of the table top are attached strips with dimensions of 19 * 19 mm. They are glued, clamped. The table top is attached with legs with special brackets that have a base, 2 side parts. Holes for them are drilled with a diameter of 20 mm, between them is a groove cutter.
Assembling the table for the kitchen
After that, the table is fully assembled for the kitchen. All cooked parts must be laid out on a horizontal, flat surface, work best on the floor. The first front surface of the table is laid on the floor, the supports and legs are screwed to it. They are connected by a jumper for structural rigidity. All connections are made with screws on wood, metal corners and wooden dowels, used to strengthen the wood glue. A table with your own hands almost created. You can start decorating it.
There are a lot of options for decorating, the simplest is coating with varnish or paint. You can diversify the work, with no special effort or expensive materials are required. Among the methods of design of the table for the kitchen should be noted:
- Drawing pictures using a stencil. It is enough to choose a drawing, and then prepare a cardboard stencil or ready-made, which can be easily purchased in the store.
- Kitchen table decoration with mosaic tiles. This option is extremely simple, but a little patience is still necessary. After assembling the structure, a special mosaic tile should be prepared; it can be glass, plastic, even metal. The tile is glued to the surface using tile adhesive, the pattern can be made in advance. Along the edge of the tabletop you can lay out the edging of the tile in a contrasting color. All seams are treated with a special moisture-resistant grout, which is used for bathrooms.
It’s not so difficult to make a table with your own hands for the kitchen, you only need to make a drawing with all the dimensions and then select materials for the work. The assembly process itself is simple, you need to have minimal experience with wood. After the assembly is completed, the surface of the table top and the whole structure can be decorated, various materials are used for this.
Didn't find the answer in the article? More information on the topic:
-
")
How to make a corner cupboard with your own hands
Instructions on how to make a corner cabinet with your own hands. What materials can be used? The complete process from cutting to closing edging. Features of the workflow.
Search
Related Articles
How to close the joints of the laminate - processing joints

A great solution for flooring is laminate slats. Installation of laminate does not require special skills. Laminate board is an inexpensive and reliable coating that fits into almost any interior. T...
Garage of foam blocks with their own hands (+ drawings)
Construction of the garage is a responsible business. It is very important that as a result it becomes a reliable protection for your car. You can use different materials for such works, for example...
wood selection (photos and videos)
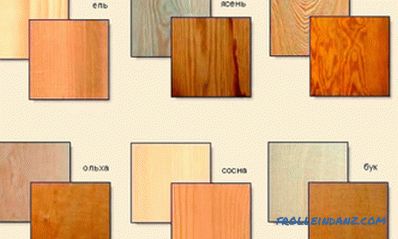
Beautiful and stylish furniture made of natural wood has always been considered the best option for any interior. It has not only an attractive appearance, but also comfort, warmth. Today, it is po...
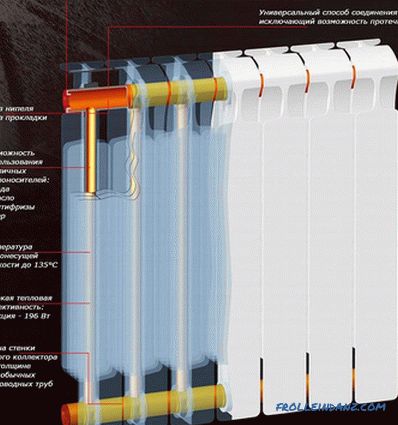
How to install a bimetallic radiator - installation of bimetallic radiators + photo
Having decided to make repairs in an apartment or in a private house, many people pay attention to the fact that old cast iron batteries do not fit into the interior. But it's not just beauty, becau...
Installation of heating pipes do it yourself

Independent installation of pipes for domestic heating is quite a complicated matter, but quite doable. The basis of the work is the welding of individual sections of the pipe into the whole heating...