Do-it-yourself furniture painting is an affordable and quick way to change a tired interior and give old furniture a new, well-groomed look. This is a simple matter, so even a beginner, if there is a great desire, can cope with it. The only thing is that the first training object is to choose a small wooden furniture - a bedside table or a coffee table, since on a small object it is easier to correct mistakes. To acquire new skills in the revival of old furniture, products from the Soviet furniture industry are suitable, which, despite their unpresentable appearance, still perfectly fulfill their immediate functions. Painting wooden furniture consists of several steps.

Painting wooden furniture is an easy, fast way to refresh and refresh the look of a room.
Preparing furniture for painting
Set aside for your experiments a separate suitable room (room), since the process will take several days. Wear a robe, work shoes, safety glasses.
For the furniture preparation procedure you will need the following materials and tools:

Before painting, the furniture must be disassembled and cleaned from dirt.
- emery paper (two types - with small and coarse fraction);
- wood putty;
- rubber spatula;
- rubber gloves;
- acrylic primer;
- brush or roller to work with acrylic primer.
To begin with, it will be necessary to completely disassemble the furniture, remove all the mounted parts, handles, repair or replace defective mechanisms. Then proceed to cleaning the surfaces of wooden furniture from the remnants of old varnish or paint.
First, we sand with large grain sandpaper, then we process all the details with fine-grained paper. We clean the settled dust with a vacuum cleaner.

After cleansing, large chips and cracks are spattered.
We proceed to the putty of all chips and cracks. For this we use putty for wood. We work with a small rubber spatula. After the putty has dried, we clean the surface again and smooth it out. Again, we remove the dust and apply with a special roller or brush an acrylic primer chosen to match the paint. Give the applied material time to dry. It should be noted that the painting tool is better to get a quality one. It will justify itself in the work, and you do not have to correct any minor flaws that have arisen due to the cheap brushes or rollers.
Painting of furniture
Thus, having prepared the furniture, we proceed to the most basic stage - its coloring. To do this, you will need:
- water-based acrylic paint;
- set of rollers or brushes for applying acrylic paint;
- adhesive tape for painting work;
- rubber gloves.

After the putty has dried, the furniture is sanded, first with a hard, then a soft sandpaper.
To paint wooden furniture we begin with a choice of paint. The most convenient to use and low toxic water-based acrylic paint. It is easily washed off with plain water, so if something does not suit you, you can always drastically change the course of work. We choose the paint of the desired tone in the store or do it ourselves by mixing tones and / or diluting with water. Opening the jar, be sure to mix the paint and, if necessary, dilute it.
If it is necessary to color various elements of furniture in different colors, then first we paint those parts that will have a lighter tone. The best way to apply paint is to use a spray gun or spray gun, which give the effect of uniform application. On the other hand, the use of these devices is more preferable in large areas of paint application and is not efficient for painting small parts. Therefore, for small furniture use a brush or roller, while applying the paint in one direction. Each new coat of paint must dry. The optimal number of layers is 2-3. When changing brushes or rollers, we do not forget to immerse the used tool in a container with water in order to avoid paint drying, because of this, painting tools will become unusable.
After the light colored parts have dried, carefully glue them over with masking tape and start painting with dark tones. Apply 2-3 layers of material. Give dry according to the instructions. Please note that the drying process may take several days. Then you can apply varnish.
Varnishing
To give the painted furniture the necessary shine it is necessary to coat the surfaces with varnish. To do this, you will need:

You can paint the furniture with a brush or a spray gun.
- acrylic lacquer;
- varnish brush or foam sponge;
- rubber gloves.
After the final drying of the paint, proceed to applying the lacquer coating.To do this, use acrylic lacquer, which is applied to wooden parts with a foam sponge or brush in one direction. Varnish should be applied in 2-3 layers.
After applying each layer, you must wait until it dries according to the instructions for use.
Decoration of furniture
Having updated the look of the furniture with a fresh color, we proceed to applying the decor. Here there are several options for decoration:

You can decorate the furniture in the modern techniques of decoupage and craquelure.
- decoupage;
- craquelure;
- painting.
So, to decorate furniture with the help of decoupage technique, you will need:
- special paper or napkins;
- PVA glue;
- acrylic lacquer.
Thus, we select the images you like, cut them out and try on how they will look on the decorated surface. It may be necessary to add or remove something. If your choice fell on a decoupage napkin, then it should simply be attached to the place of gluing and walk over the entire surface with a brush with glue. Glue the napkin should be from the center of the image to the periphery. After the picture dries, you should apply the acrylic varnish in two layers.
If you are using decoupage paper, you should first soak the selected images with water, then place them on a paper towel. After you should attach the image to the location on the furniture, walk on it with a brush with glue and smooth, starting from the center. The dried picture must be covered with two layers of acrylic lacquer. If you chose a large decoupage card for the decor, it is better to invite an assistant to evenly paste large-format paper onto furniture elements.
In addition to decoupage, there are several ways to decorate furniture. For example, you can use special varnishes for craquelure. Craquelure is a type of furniture decoration that imitates the surface of natural materials, such as marble, or signs of aging (cracks, etc.). To create the desired effect, cracking varnishes are used.
Another type of furniture decoration is the application of decorative painting. Paint the furniture by hand or using a stencil. The painting is applied with acrylic paints at the stage of painting the furniture after drying the main background.
Thus, based on the above, you have an excellent opportunity to surprise your loved ones and friends with the talent of an outstanding restorer, who gives the furniture a modern stylish look and, accordingly, a second life.
Didn't find the answer in the article? More information on the topic:
-

How to properly handle logs under the floor
How to process lags under the floor? Processing from rotting is the main type of processing of any wooden structures. It is believed that the most effective method of dealing with rot is the tool "Senezh".
Search
Related Articles
How to connect a washing machine to the water supply and sewage yourself

Even the most notorious skeptics finally realized that with an automatic washing machine, life in life becomes much more comfortable. Not necessarily long and tedious to prepare for the "big wash" -...
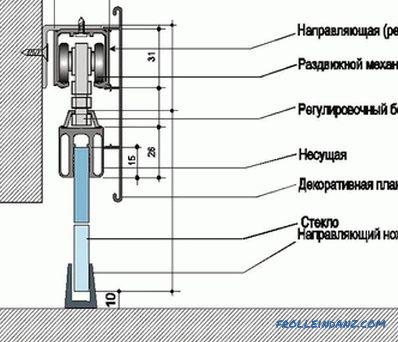
Installing doors of the wardrobe closet
Only having appeared in the market, sliding wardrobes found popularity among the majority of inhabitants of the big and small cities. In the list of furniture sales for the past many years, they con...
Laying laminate do it yourself - how to lay
Today the most attractive type of flooring is laminate. And the price of this material is affordable, and the appearance is attractive, and you can lay it yourself. Yes, and performance in many ways...
Difference between laminate and parquet: full description

There are 2 leaders on the floor covering market - laminate and parquet, and for all the visual similarity they are completely different. On the modern market, among the finishing materials f...
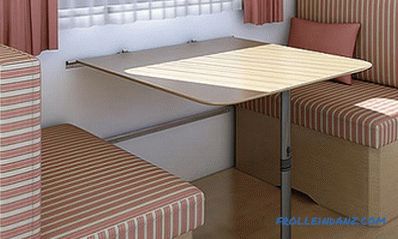
Do-it-yourself folding table: self-assembly
A folding table is an indispensable furniture in small apartments. Such a table with your own hands can be made of chipboard, MDF and wood. A folding table is an indispensable type of furnitu...