A wooden bench is an excellent attribute that can decorate either a plot - be it a garden playground, a sauna room, or a yard plot. You can create a shop yourself, taking the necessary materials, having received the necessary instructions and armed with imagination.
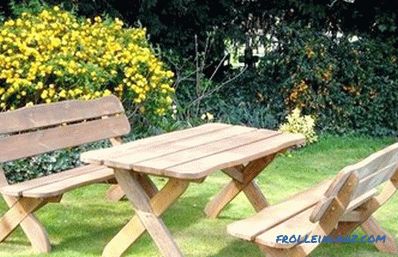
Garden benches and tables will decorate your backyard plot
Choice of material and tools
Choosing trees for the bench , should consider such a parameter as resistance to moisture. This is necessary if the bench is made with the aim of placing it in a bathhouse, where there is high humidity, and on the street, in the garden or in the courtyard. For this purpose, well suited oak, alder or birch.
To start making the bench, you need the following tools:
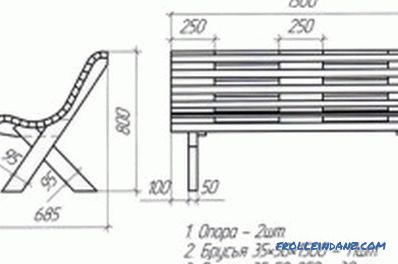
Dimensions and details of the garden bench.
- Manual router.
- Power Drill.
- Jigsaw.
- Screwdriver.
- Grinding machine.
- Hammer.
- Hacksaw for wood.
- Electric Planer.
- Clamps.
- Level.
- Roulette.
- Square.
- Ruler.
- Chisels.
As for the material for the construction of the bench, you can use both the blanks sold in the store and make them yourself . The difference is that in the first case, the total costs will be higher, so you should think about whether it makes sense to purchase ready-made materials when you can make them yourself.
For the manufacture of the bench, the following materials will be needed:
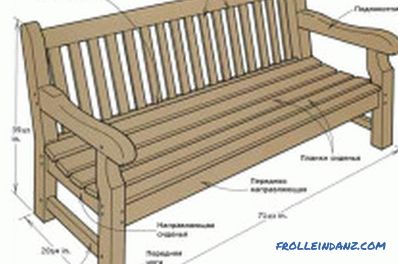
Layout of the bench
- Board for sitting ( 30x120x1500) - 3 pieces.
- Longitudinal cross member (30x120x1460) - 2 pieces.
- Sidewalls (30x120x420) - 6 pieces.
- Connecting rail for seating (10x20x1500) - 2 pieces.
- Connecting rail for the cross member (10x20x1460) - 2 pieces.
- Connecting rail for sidewalls (10x20x420) - 4 pieces.
- Furniture dowels (10 * 40) - 7 pieces.
- Self-tapping screws for thrust bearings (3 * 20) - 8 pieces.
- Self-tapping screws for sidewalls (5 * 75) - 4 pieces.
- For sidewalls - supports.
- Glue for PVA wood.
- Acrylic lacquer, water based only.
- Abrasive skins (for both fine and coarse processing).
Construction: start of construction
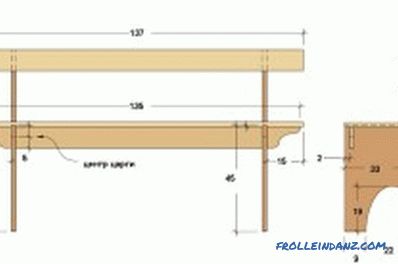
Shop design with dimensions.
The do-it-yourself shop consists of the following structure: the board-seat, located horizontally, the racks located on the sides, the connecting beam, located between the side posts and the connecting structure. Such a simple construction provides the bench with good stability.
To make the product durable, you need to use PVA glue and screws. The screws will tighten the beams located on the sides, with the ends of the longitudinal planks. The longitudinal board is placed on the edge, connecting the side elements.
The bench seat is connected to the frame with the help of dowels. It is recommended to apply PVA glue on them. At the bottom of the side elements, that is, the legs, you need to fix the heel of the plastic. This will protect the surface of the floor from damage by its shop if it is required to be moved. The whole structure should be coated with acrylic lacquer; care should be taken to use antiseptic agents.
Seat making
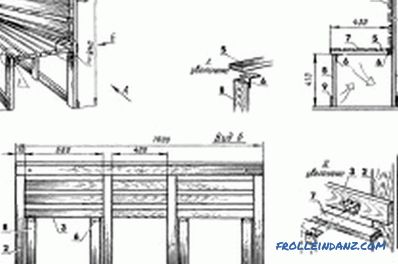
Folding wooden bench layout.
The first step is to make wooden shields. This will require 2 slats, which will be inserted into the grooves of adjacent boards. Next, 2 boards need to be laid so that they are parallel to each other. It should leave a gap that is required for the entrance cutters. The boards should be fixed with clamps. Next you need to go through the grooves of the cutter, choosing the desired size of the head. Similar actions should be carried out for the remaining boards. The width of the groove must match the thickness of the rail.
After the grooves have been manufactured, it is possible to carry out a trial assembly of the shield structure. If the result of the assembly turned out to be positive, then you can proceed to gluing the structure; otherwise, the grooves need to fit each other until they match the required dimensions.
First you should glue the rail and 1 of the boards, then take the next board and glue the rail into its groove. The design is tightened with clamps, then you must wait until the glue has completely dried. It is necessary to take into account that the shield should turn out to be flat, without gaps between the boards. In order to prevent the shield from being bent, during drying it is possible to put boards with a load on it, that is, to press the shield.
Assembly of the structure
The assembly begins with the fact that the longitudinal planks should be placed on a flat surface. Their ends are interconnected, the longitudinal plate is located between the side parts. The joints are fastened with screws, and the joints should be greased with glue. Next, the resulting structure is aligned.It should be noted that the specified parts must be perpendicular to each other.
The next stage of work is the installation of the seat. The shield manufactured earlier should be dry, only after that you can continue working. In the seat and frame it is necessary to make holes in which the furniture dowels will be placed.
Most often the main problem is the difficulty in marking the holes in the seat and frame.
In order for them to fall under each other, the following method should be used. The seat should be turned over, an inverted frame is also installed on it. The frame must be leveled with respect to the seat, after which the outline of the frame should be marked on the seat, then the frame can be removed from the shield.
After all of the above, in the intended place for the holes in the frame, you should drive in small carnations that do not have caps. The sharp side should stick out, after which you should again take the frame and gently lower it onto the seat, slightly scoring. There will be marks on the shield-seat, which will be the holes for the seats. Carnations can be removed.
After marking, holes are drilled, glue should be applied to the dowels, after which they are driven into the frame. Next, the shield-seat should be lowered onto the protruding dowels, the ends of which are greased with glue. Speakers should be trimmed. The seat is pressed, after which the bench must be left to dry completely. Thus, for the manufacture of the shop does not require special knowledge and skills, only the necessary tools, materials and some free time.
Didn't find the answer in the article? More information on the topic:
-
How to build a reliable house from boards?
A plank house is considered environmentally friendly and cozy to live in. It is built quickly, it is not necessary to acquire expensive materials. Be sure to provide insulation.
