A few years after the major overhaul of the apartment was carried out, you will notice that the coatings begin to wear out. Wallpapers fade, ceilings no longer look so white, and paint cracks. All these signs signal that it is time to start cosmetic reconstructive work.
The essence of such events is the renewal of old coatings and the replacement of materials that have served their time. In contrast to the capital, redecoration does not take too much time, it is available even for a beginner and does not require special skills. The main thing - to determine the order of the work at home.
Preparation
 Removing old wallpaper Before performing recovery operations, you must prepare the premises.
- Furniture is being taken out of the room. Otherwise, the surface of the furniture may be damaged by various compositions. Alternatively, cabinets and other heavy objects can be carefully covered with foil.
- Any repair traditionally starts from the ceiling and ends with the floor. If the floor is not planned to recover, then it must be protected sheets of dry corrugated cardboard or film. At first the corrugated cardboard is lined. From above it overlaps overlapped with film material. You should also pay attention to the plinths. If they are in good condition and do not need to be replaced, they are covered with duct tape.
- After the floor and baseboards are securely protected, it is necessary to proceed to the removal of old coatings. At this stage it is necessary to remove the paint, wash off the lime and remove the wallpaper.
Work order

When the room is ready, you can begin redecorating, but before that you need to determine the order of work.
Two principles are known that can be followed:
- repair is done from top to bottom;
- the sequence of operations must meet the requirement "from the dirtiest to the cleanest."
Both principles are true. So, traditionally, first update the ceiling, then the walls, and after that they start to work on the floor. This, however, is justified only when the decoration of the walls is dirtier than the flooring. For example, if decorative plaster is applied to the walls, and the floor is covered with parquet or laminate.
In the event that a change in the floor produces more dirt, then this stage begins immediately after the ceiling has been finished. And only then you can proceed to the walls.
Skirtings are mounted last.
Ceiling renewal
 Stretch ceiling with irregularities
The first stage is the renewal of the ceiling . You should think about what type of finish is best suited for an apartment. The former by this time has already been dismantled, and you can show creative imagination. Before you make cosmetic repairs, it is necessary to determine in advance with the materials.
If the apartment has a problem with the evenness of the ceilings, and it is almost impossible to fix it with the help of various building mixtures, then it makes sense to install a suspended ceiling. It perfectly aligns the surface and additionally protects the room from flooding.
Another option is a special tile or panel. However, this repair is already beyond the scope of cosmetic. The easiest option is to paint the ceiling with paint. It should be durable and washable. Information about the properties of paint is contained on the can with the composition
Replacing doors and windows
 Painting wooden windows
Doors and windows are better just change when finished all the rough work in the room. Surfaces must be completely plastered and level. Floor screed must be well dried, the choice of flooring is made in order to correctly determine the size of the door frame. Otherwise, the doors and windows can be installed with some errors, which will lead to their deformation.
If you install windows and doors before the rough work starts, you can seriously damage them when performing subsequent operations. If you install the windows and doors after the completion of the finishing steps, repair is likely to be damaged.
If the frames are still in good condition, then they can simply be tinted, after having been cleaned of the old coating and primed. Removing paint and polishing the surface, if required, is performed before the walls and the floor are finished, and the painting itself, if done carefully, can be done after the walls and the floor are finished. Before painting, it will be necessary to seal the perimeter of the window with masking tape and cover the floor next to the windows so that paint stains do not appear on it.
Working with the floor
 Replacing the linoleum
This is the next step. If the floor is not too damaged, then you can just update it externally. For example, varnish or replace any damaged fragments. Erased linoleum will have to be replaced completely. Working with the floor takes more time than repairing the ceiling. Because you have to wait until the varnish or paint dries.
Wall decoration
 Finishing with liquid wallpaper
After the floor, proceed to the wall decoration . It is recommended to choose liquid wallpaper as a coating. They are perfectly applied, do not create construction debris, and they are also easy to care for. If you wish, you can make decorative plaster in the apartment. This is a rather lengthy and complicated process, so it’s best to start with something simple. For example, choose a piece of wall for plaster. Such work will give a little practice for the future.
Finishing touch
At the final stage, plinths are made. Also, as a decorative ornament, you can add stucco to the image of the interior.
Other work
 Replacing sockets and switches
There are a number of jobs, about the order of which the novice does not know when he carries out redecorating the apartment. These are operations such as replacing radiators, heating pipes, installing new plumbing, conducting electrical wiring.
Immediately I must say that the conduction of electricity or the replacement of old wiring is carried out at the very first stage, immediately after the preparatory measures. Wires installed in the final stage, can significantly spoil the appearance of the room. But redecorating is carried out just to make the apartment look attractive. The same applies to the installation of new outlets. Sockets are usually removed before wallpapering walls. But at the same time it is desirable that these were new sockets. Otherwise, then replacing them can damage the wall covering.
It is better to change radiators and pipes somewhere in the middle of the apartment renovation process. Such replacements are usually carried out by specialists who are not too careful with the updated floor and walls.
As for the plumbing, it all depends on the complexity of installation. The toilet is changed before the main work, but the sink can be installed after.
We recommend:
- how to make self-leveling floors;
- how to properly glue the ceiling plinth.
Video
Search
Related Articles
Waterfall in the country with their own hands
Want to give a sound to your garden? Make it your pride and decoration of the infield? Then you should think about the construction of the soul of the garden - about the arrangement of the waterfall...
installation of cladding panels do it yourself
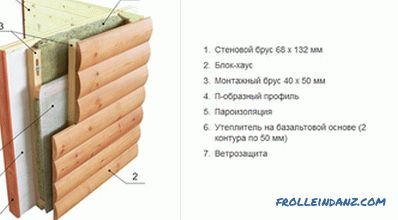
Nowadays, decorative block-type lining boards are often used in construction during the finishing works. By its appearance it resembles a rounded log, this gives the house a colorful appearance. Ma...
How to make a porch of wood

The porch is the calling card of the house. In addition to the functional purpose, this design performs a protective function, as well as decorates the facade of the building. At the same time the p...
Live gazebo do it yourself (photo)
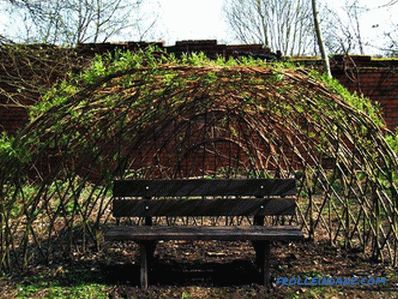
A lively gazebo can be a place for relaxation and a wonderful decoration of the exterior of landscape design. The construction of a live arbor is very different from capital construction. This is du...
work plan, list of materials and tools (video)
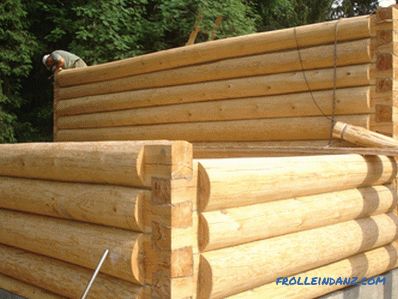
The construction of wooden houses is becoming popular again. There are several reasons for this: there is some mistrust towards modern construction materials, and their cost is too high for an aver...