Among the set of building materials that are represented on the construction market, there are universal. They can be used at any stage of work. These materials include plywood. It is used for the device foundation, plating frame house, furniture of any complexity and purpose. In addition, plywood is easy to work with, most of the products from it can be made with your own hands.

Plywood is quite strong and durable, so the house built from it serves for many years.
Her sheets can be used not only for large and high-grade construction. For example, a small country house or a house made of plywood with his hands for a child's toys. Joint construction with the baby does not take much time, but will be very useful.
Plywood dollhouse
A child will be happy if his toys have a beautiful house. It remains only to determine the material for its manufacture and technology, how to make a house. Most suitable for these purposes is plywood, the sheet thickness of which is not more than 15 mm.
To build a house of plywood, you must have the following tools and materials:
- sheet of plywood;
- decorative studs with a small hat;
- hammer ;
- sealant;
- electric jigsaw or saw with fine teeth;
- ruler and pencil.

Finishing nails and a hammer are used to assemble the plywood house.
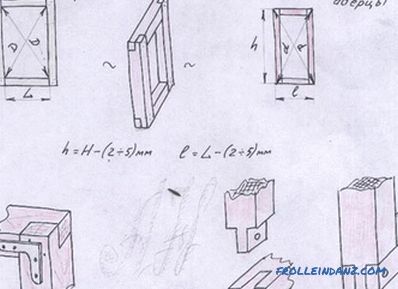
First you need to draw on paper the details of the future home. To perfectly fit all the elements of the future house to each other, you can make a model of cardboard. Subject to change. When the fit is complete, you can cut the plywood sheet. The contours of the final parts are circled with a pencil and cut out with a jigsaw. Burrs or small nicks that may have formed as a result of the incision can be leveled with sandpaper. After that, proceed to the assembly.
The fastening of parts can be made with decorative studs with small hats. As an alternative glue for wooden surfaces. If glue mixes are used, it is necessary to wait until they are completely set. When the assembly is over, the house is carefully inspected. In the presence of large gaps, using a construction gun and sealant, fill them. The excess is removed immediately, without waiting for freezing.
After the sealant finally froze, you can start painting the house. For this fit any type of paint that is available. You can use any combination of colors. Next comes the internal arrangement of the house: wallpapering, furniture manufacturing. At the end of the finishing work the plywood house is considered ready.
Country house: features
A country house, if it is planned not to live in it permanently, but to use it only in the spring-summer season, is not large. Therefore, the simplest and most accessible material for this construction are plywood sheets.

Scheme of a country house.
Before you make a house, you need to prepare materials and tools:
- concrete foundation blocks;
- cement, sand, fine crushed stone;
- timber 150x150 mm;
- board 50x150 mm;
- plywood of 2 standard sizes: 9 mm and 12 mm;
- glue;
- waterproofing and vapor barrier material;
- antiseptic solutions;
- light roofing material;
- insulation mats;
- self-tapping screws, screws, anchor bolts;
- electric or cordless screwdriver;
- electric jigsaw or saw.
Since the house will be built according to frame technology, the foundation of a heavy, cumbersome construction is not necessary. Foundation blocks are most suitable for a country house. They can be installed using a crane or manually using a system of levers and winches. It is necessary to install the blocks into a pre-excavated trench 20 cm deep. To ensure waterproofing, a trench of sand and rubble is laid in the trench, the layers of which are compacted. To these materials lay tighter in the trench, sand and rubble in the process of tamping poured water.

Diagram of the supporting pillars of a country house.
Next, blocks are placed. The resulting space between the blocks can be filled with concrete. It is made of sand, cement and fine crushed stone in a ratio of 1: 3: 2, respectively. After installation of the foundation blocks, a concrete screed of the entire floor is performed. This will be a rough flooring and will also prevent vegetation from getting inside the house. Concrete screed is performed with a solution that is made in the same way as for foundation filling.
After the screed is frozen, you can continue construction. Performing strapping do a bar, which is placed on top of the foundation. The blocks must be covered with waterproofing material. Ruberoid is suitable for this.Strapping bars are fixed with anchor bolts, pre-cutting the desired size. They are interconnected by long screws.
The skeleton of the walls is made of boards. Installation of the wall unit can be done in a horizontal position, and then install and fix the blocks. Cut off the required size of the boards and fasten together with screws or screws. The size of such a block is approximately 60x2500 cm.

Scheme of assembling the walls of a frame house.
When the blocks are assembled, it is necessary to consider the location of the windows and the door. Therefore, blocks with these elements are performed according to the size of the windows and the door. To frame the frame had additional rigidity, fasten the transverse boards. After all the blocks are folded, they are consistently lifted and fastened together. Coupling is done with staples or long screws. All blocks must be set strictly on the level. For their fixation, use stubs, which will subsequently be removed.
After that, wall cladding is performed. At the same time it is necessary to ensure that the window and door openings are not closed. Plywood is fixed with screws using a screwdriver. When the whole house is sheathed with plywood, strings can be removed.
A waterproofing film is fixed on the plywood from the inside. At the same time it is fixed both on the bars and on the plywood. Fastening occurs with a stapler. The material is laid overlapped, but it is desirable to glue the joints with additional tape.
Continuation of the process: practical recommendations

The process of insulating the walls of a country house.
After that, the insulation between the boards is laid. It is fixed with the help of special nails with large caps. This allows it not to slide down as a result of operation. On top of the laid insulation mats, another layer of vapor barrier is fixed, aiming it with a construction stapler on the brackets. Plywood sheets are screwed onto the screws using a screwdriver. Non-waterproof 9 mm plywood is suitable for interior plating.
The floor is laid on logs. They are fixed in the bottom strapping. Crossbars are fixed between the lags, which will allow the floor not to sag and make it stiff. If the floor is planned to be made warm, then its device will differ little from the wall one. That is, plywood sheets cut to size are laid on the floor crate between the lags.
The resulting construction is covered with a waterproofing film, which is overlapped with staples using a construction stapler. After that, insulating mats are laid, which are cut to size. Above is a layer of vapor barrier, fastened with brackets. On it sexual plywood keeps within. This will be a clean floor. It can be laid finishing flooring, for example, linoleum, laminate flooring. To make the floor even stronger, you can lay the plywood in 2 layers, while the joints of plywood sheets should not intersect.
Completion: arrangement of the roof and ceiling
For the construction of the roof, timber is used as a rafter.

Roof scheme of a frame house.
It should be fastened with clips to the top trim. For rigidity, you can use the strut. Rafters must be installed strictly on the level, otherwise the roof will be skewed. After they are installed, perform the crate. It can be made boards of poor quality. This crate will give the required rigidity. After that, screw the sheets of plywood on the screws. A waterproofing material is placed on top of it, which protects it from moisture.
This material may be roofing material. It is laid in 2 layers, the joints between the layers do not intersect. This will provide additional protection. Lightweight roofing material is laid on the roofing material, for example, shingles. Its installation is quite simple with good performance. After that sheathe the gable of the house.
The ceiling is made by trimming the beams with plywood. Beams are located in the top trim and secured with brackets. The distance between the beams is 60 cm. This allows the use of rolled insulation and securely fasten the plywood sheets. To beams on screws secure plywood.
A heater is being rolled onto it. Over it put a layer of waterproofing. Over it plywood sheets. Sheets should be staggered so that the joints from the bottom and top do not coincide and there is no gradual destruction of the insulating material.
Didn't find the answer in the article? More information on the topic:
Search
Related Articles
Wardrobe from own lining without much difficulty
For storing things most often used cabinets that are made with your own hands. Many people think that it is very difficult to make a closet with your own hands and this is only possible for people...
Technology of building a house from glued timber: features of work
Since ancient times, the most popular building material has been wood. It was used in almost any area where it was necessary to build something. But in some cases, for special architectural ideas,...
creation using step-by-step instructions, drawings (photos and videos)
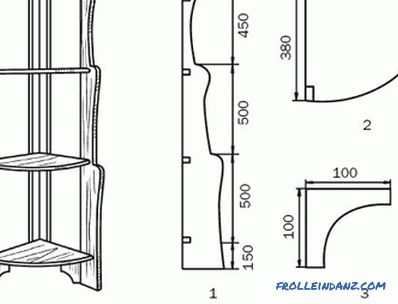
Corner shelves save space, so this design solution is a godsend for small areas. Such an element of furniture can be made independently, because it does not require special knowledge, expensive equ...
Curtains in the interior - a combination of colors, selection rules, photo ideas
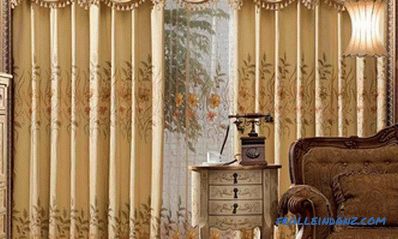
When designing the room, experts pay attention to the fact that curtains in the interior play the final role. They give the image and style of the room a final look. The right curtain is a harmoniou...
How to insulate the ceiling in the garage

Garages are most often erected from bricks, cinder blocks, foam blocks or reinforced concrete structures. All these materials have high strength, but do not retain heat at all indoors. To create com...