The floor of linoleum, of course, very practical. It looks, of course, simpler than the currently fashionable laminate, but it does not get wet and is not afraid of scratches. Yes, and it is much cheaper than laminated flooring, and lay it simply enough on their own, without attracting hired workers. This will save money in your wallet, allowing them to spend on something more necessary and useful. Then you can read how the linoleum is laid with your own hands, and what you need to prepare for this. The main thing is to cut the material so that it matches the configuration of the room.

First of all we prepare the base
In order for the linoleum not to rub fast, it must lie on a flat plane. After all, even small bumps or pits can give the floor a non-aesthetic look. In addition, the elastic linoleum in these places will either stretch or sag, quickly wearing out, which is not very good.
Before laying the linoleum coating, you must carefully remove all the plinth - because linoleum must lie flush with the walls. Sometimes the baseboards are still quite fit, and they can be put back. In this case, removing them, you should try not to damage. In order not to confuse where to what to attach, each strip of plinths, removing, must be numbered. At the bottom of the wall we put the same number - such a simple way will save a lot of time.
1. First consider how to lay linoleum on a wooden surface. This may be, for example, parquet that has lost its appearance with parquet flooring, or painted flooring from boards that have become wavy with time. Basically there are exactly these two types of wooden bases for linoleum. They, alas, cannot boast of smoothness, therefore laying linoleum on them requires compulsory leveling of the base. There are several options for this:
- Wood floors can be treated with a plane or a grinder. All cracks and irregularities are covered with putty, and then polished.
- A new covering can be laid on the floor above, it can be a hardboard, chipboard or multi-layer plywood.
- Planks of the parquet, which are missing, can be restored, and then ottsiklevat parquet.
- A perfectly flat surface can be achieved using a self-leveling floor technology. To do this, use a special composition, called leveling.
2. The base of concrete also requires leveling. Other methods are used.
- The base is covered with plywood flooring (chipboard or fibreboard can also be used for this purpose).
- A concrete screed with self-leveling properties is used.
3. If the linoleum is to be laid where the carpet was, then it is necessary not only to remove this coating, but also to clean the base well from lint and dirt. Those places where the floor is not very smooth, it is necessary to process a special solution until the proper result is achieved.
4. Ceramic tiles before laying linoleum, on the contrary, do not need to be removed. But if a few tiles had time to fall, they should be glued into place. After that, the surface is poured with a mixture for leveling, which has good adhesion properties.
5. Linoleum coating can be put on the old similar one. But only under the condition that there are no holes and cracks on it, and also if it is not too thick. The main thing - well degrease all the old linoleum, and then dry the glue completely. If you see that the old coating is very worn, then it is better to remove it, and then level the base.
Remember the main thing: whatever the foundation, be it wood, concrete, parquet or tile, you need to dry it well before covering it with a piece of linoleum. After all, moisture cannot evaporate through this hermetic material. And therefore, an undiluted base, being wet for a long time, may well become moldy or fungus-coated.
And again: do not neglect to thoroughly clean the base before laying the floor. After all, even tiny pebbles, grains of sand or other debris can accelerate the process of wear coating. Especially if people constantly walk in these places. The same applies to small hollows and protrusions on the surface of the base - try not to leave them.
Stocking up tools and preparing material for laying
It is best to lay linoleum at a temperature of from + 15 to + 25 degrees. After all, in the cold, this material turns from elastic into brittle, and it is easy to damage. Therefore, in winter, do not unfold the cold linoleum roll immediately, but let it sit at room temperature for 12 hours, no less. And before laying this flooring, roll it on the floor and leave it alone again for a while. Now it is necessary to avoid waviness.
While the rolled roll of linoleum is lying on the floor and leveling, it's time to prepare the necessary tools. We list what we need.
- Shoe knife, well-ground or any other knife with a short blade;
- a simple pencil;
- scissors;
- tape measure;
- long-length ruler, which can be replaced with a flat rail or building level.
Stele linoleum correctly
In rooms up to 25 square meters linoleum creeps without the use of glue. Naturally, this is permissible only if there are no more than two pieces of this material. In this case, it will be enough to fix the flooring with baseboards. And in those places where the joint will turn out, it will be necessary to use double-sided tape.
Step 1. So, we see that the unrolled roll of linoleum was lying a lot, and no waves were visible on it. We lay a sheet of linoleum almost abutting against one of the walls - the gap between them should be from 3 to 5 millimeters. As for the other three walls of the room, we put the linoleum so that he came over them a little overlap. If the room is uneven distance between the walls, then overlap should be done on each wall.

Distributed linoleum with the necessary overlap on the walls.
Step 2. Now let's talk about how to lay linoleum in a room with a large area, where there will be several joints between the sheets. First, it will be necessary to adjust these joints nicely and carefully, and only then lay the pieces of linoleum around the perimeter (again with a slight overlap).
When this flooring has a pattern or an ornament, there is a need for an additional operation - combining this pattern. First, try to combine the pattern at the joints between the sheets in the middle of the room. And if this pattern is repeated in the next room, it is necessary to achieve the maximum coincidence of the ornament in the doorway. To do this, move one sheet of linoleum relative to another until we get the desired result.
Step 3. Next, a few words about the pattern itself. Often it mimics parquet or tile, and consists of straight lines. To make the floor look neat, keep in mind that these lines should not cross the walls of the room at an angle. If they are parallel to the walls of the room, the picture is really pleasing to the eye. Try to achieve this by slightly turning the sheets of linoleum, either clockwise or against it.
Step 4. Fitting linoleum to different niches or projections. As a rule, there is a niche in almost every room in the sub-window space and in the corridor near the entrance doors. And before proceeding with the trimming of the material, it is necessary to accurately measure the depth of the niche to make the appropriate overlap.
Example with a corridor:
To begin with, an overlap is made from the side of the entrance door, the size of the overlap must correspond to the depth of the niche. Just wrap and measure the required piece of linoleum, and then cut from one side and the other side of the slope. Unfortunately, I didn’t have a photo with an overlap left, a single object where I was laying linoleum in the corridor. But there is a photo on which I just cut the required size under the niche. I hope you understand what I mean. Similarly, trimming is done for the niche under the window. First and foremost, always start marking and trimming from these areas.

Marking and initial trimming of linoleum.
Kitchen example:
The second example, the kitchen in which there is a ledge. To accurately measure the linoleum in such a situation, you need to put it to the ledge and tuck. After that, change the depth of the protrusion and postpone the necessary distance on the linoleum. Then make trimming.

Linoleum marking under the ledge.
Step 5. Next we have to trim the rest of the material in a circle. Before trimming, bend a sheet of linoleum along the wall so that it comes closer to the wall. Armed with a knife, neatly on the ruler, flat rail or just on the wall, cut the material. I recommend cutting along the wall especially if linoleum is laid in apartments built in the Soviet Union. There are very often curved walls. The main thing - do not overdo it and do not cut off the excess! It is better to do this operation several times a little, than once with excess.

Trimming linoleum along the wall.
Step 6. To well join the joint between two pieces of linoleum, we use double-sided tape. To do this, you can draw a line along one of the pieces. Then, put a scotch tape exactly in the middle of this line. After that, remove the protective paper with adhesive tape and glue first one and then another sheet.
Step 7. Now you can replace the old baseboards, or mount new ones. The sheet of linoleum perfectly pressed them, and it does not need to stick.Of course, if you plan to constantly move heavy furniture around the room, it may be worth using glue. Although such loads can not withstand well taped flooring.
In some sources it is possible to find the opinion that linoleum should lie without baseboards for a long time, a month or even more. In fact, modern PVC linoleums do not shrink, so linoleum can be laid and skirting installed on the same day.
When mastic or glue
is used for laying linoleum in various non-residential areas, it is better to glue the linoleum. And even if this room is quite small. But in apartments and houses gluing this flooring requires only rooms with an area of more than 25 square meters. In this case, you must first very well clean the base.
Before you start applying glue a sheet of linoleum is rolled into a roller, but not completely, but approximately to the middle of the room. This is done from one side and the other.
Mastics and adhesives for materials such as linoleum, are available in a large selection in the construction market. Try to pick them right. For example, if you chose this flooring on a warmed base, then buy the appropriate adhesive mass: for a material that has a fleecy base. On the packaging of glue is usually indicated which layer it should be applied. The most convenient way to do this is with a notched trowel, the teeth of which are the higher, the larger layer of glue is needed. Apply glue to the base in the direction from the center to the walls.

Applying glue with a spatula to glue the linoleum.
Next, we begin to slowly roll our video. After the roll is necessary to produce rolling over the entire length of the sheets, it is necessary to move from the center of the room to the walls. Thanks to such actions, all the excess air between the base and the floor covering is squeezed out, and the adhesive mass is distributed evenly.

Rolling and gluing linoleum.
When joining two or more sheets of linoleum, a welding method is applied, which can be either cold or hot. Which of them to choose in this case, determine such parameters as the complexity of the joint and the type of linoleum coating. Consider these two ways in more detail.
Hot welding is a more reliable and durable connection. It is advisable to apply where large loads are assumed on the floor. It requires a torch for welding, a compressor and rods of various profiles, which are melted by the torch and fill the joints. You can weld pieces of linoleum a day after it was laid.
Cold-type welding does not require special equipment, perfectly suited for domestic needs. All you need is glue. If the linoleum bedded just that, then take a more liquid adhesive type A. For the repair of the floor covering, which has lain for a long time, use the adhesive type C, which has a thicker consistency. Since there can be a large gap between the sheets of linoleum (a few millimeters), liquid glue will not work.
Search
Related Articles
Whitewashing the ceiling with their own hands with chalk or water-based paint + Video
Repair, especially capital and design, is a very time-consuming business, financial and nervous system condition. In the absolute majority of cases, for the implementation of high-quality repairs, s...
How to make a basement - features of construction
The ground floor is a fully or partially recessed floor of a building below ground level. As a rule, in such a room equip utility rooms or a garage for the car. However, individual projects of house...
How to lay a massive board: tools, materials, technology
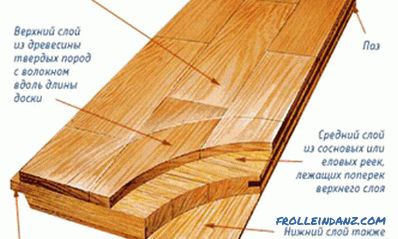
A massive board resembles a parquet according to its external characteristics and acts as one of the most durable materials used to decorate the floor covering. The array is different from the parq...
Do-it-yourself vertical siding installation
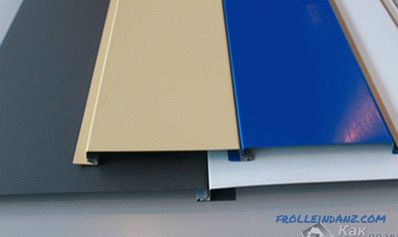
Many of their private homeowners are likely to have an idea of using siding as a finishing material, so they should also be aware of a variety of them, such as vertical metal siding. The specified...
Which generator to choose for home or giving

The use of autonomous generators is a widespread practice - in general, these are fairly simple devices and there are no problems with their acquisition. The more acute is the question of which gene...