Repair, especially capital and design, is a very time-consuming business, financial and nervous system condition. In the absolute majority of cases, for the implementation of high-quality repairs, special knowledge and skills are necessary, therefore it is impossible to do without hired labor.
Whitewashing the ceiling with your own hands the work is not difficult, and any man or even woman can do it. Therefore, in the event that you decide to only slightly “refresh” the existing interior (cosmetic whitewash, painting carpentry, minor repairs, etc.), it is quite possible to save on workers' wages. Actually, everything starts with whitewashing the ceiling, and we will talk about it.

Cleaning and preparing the ceiling
Before whitewashing, the ceiling surface must be properly prepared, that is, the layer of the old whitewash must be removed. This task is technically simple, but very laborious and dirty. Therefore, first of all, everything that is possible and what cannot be taken out of the room should be “packed” tightly in polyethylene and ensure that there are no gaps. The doorway must also be lined with polyethylene or a damp cloth.
Now we need the following:
- soap solution;
- sponge;
- natural bristle brush or large brush ;
- spatula;
- small pallet.
We prepare a solution of warm water and laundry soap. When the solution is ready, we begin to wet the surface with a brush. No need to wet the entire ceiling at once. While you clean one small area, the rest of the surface will dry out and you will need to moisten again. The most convenient way to handle the surface is "squares".
We clean the wet whitewash with a hard trowel. It is very desirable with the other hand to hold the pallet, which will crumble pieces of whitewash. So you will minimize the "dirty" part of the procedure.
Having processed the entire surface of the ceiling in this way, we proceed to the "clean" wash. To do this, we moisten the sponge in a soap solution and step by step wash off the remnants of the old whitewash.
Video: How to remove whitewash from the ceiling
Choose a material for whitewashing
By and large, there are three materials for an ordinary whitewash ceiling: chalk, lime and water-based paint. Consider their advantages and disadvantages.
Chalk
+ Benefits: cheap, easy to apply, “breathes”.
- Disadvantages: due to micro shedding, it becomes an additional source of dust, it "smears", it is afraid of moisture.
Lime
+ Advantages: cheap, easy to apply, almost no "smeared", "breathes", has antibacterial properties.
- Disadvantages: can significantly lower the humidity in the room, irritate the mucous membranes, rarely ideally white.
Aqueous emulsion paint
+ Advantages: it is sold in ready-to-use form, gives a nearly perfectly uniform surface tint, is resistant abrasion resistant, easy to apply.
- Disadvantages: not breathing, significantly more expensive than chalk and lime.
In general, we can confidently say that "water-based emulsion" from a practical point of view is ideal, but you decide in any case.
Preparation of the solution
Whitewashing of the ceiling with water-based paint involves the purchase of a ready-made solution, with which there is no need for any additional manipulations. A chalk or lime solutions for whitewashing need to be prepared. We describe the process in detail.
Preparation of chalk solution
To obtain a solution of the desired consistency, it is necessary to dissolve the chalk in water in the correct proportions. We will build on the conditional 10 square meters. m surface.
In this area you need to take 5 liters of warm water and 3 kg of chalk. Chalk before this must sift. Pour chalk into water, add 15-20 grams of blue and 30 grams of wood glue. Stir well.
Checking whether everything turned out as it should be very easy. To do this, dip a smooth metal object, such as a knife, into the solution. If the solution drains from the metal surface, leaving almost no traces, it means that the chalk is not enough. In this case, add a little chalk and stir, periodically checking the density.
Preparation of lime mortar
3 kg of hydrated lime diluted in a liter of water. In the resulting solution add pre-soaked salt (500-100 g) and 150-200 g of aluminum alum. With continuous stirring, add warm water smoothly and so bring the volume of the solution to 10 liters.
Methods of applying the solution on the ceiling
Whitewashing can be applied to the ceiling in various ways and means: with a brush, roller or spray (spray gun). Each of the options is good in its own way, but there are nuances.
It is advisable to use the spray gun when it is necessary to paint a really large room. Otherwise, in addition to the ceiling will be painted a lot of "extra" surface.In most cases, brush or roller is enough.
Whitewashing the ceiling with your own hands using a roller has serious advantages over the brush:
- the bristles do not climb from the roller; divorces like a brush;
- saves paint;
- you can do without a stepladder by attaching a roller to a long handle;
- with a roller with higher overall performance, especially on large areas.
However, the brush will be necessary, since only with its help it is possible to paint over corners and fine details (if there are any).
Technology of applying the solution
Before lime whitewashing the ceiling, it is necessary to moisten the surface with a brush. This is done so that the painted surface retains moisture for some time. During this time, the whitewash will be carbonized (pick up carbon dioxide from the air) and after drying it will become more durable.
The technology of applying all three types of solutions is generally very similar. First, with a brush, paint over the joints and corners where the ceiling connects to the walls. Then proceed to painting the entire surface.
Begin to apply the first layer from the window, and make strokes perpendicular to the light rays from the window. After painting to the opposite side of the ceiling, let the surface dry. After that we put the second layer, but now it is perpendicular to the first layer of processing. Apply an overlap of about 5 cm to eliminate undrilled strips.
As a result, you should have a uniform surface without streaks and stains. If you add a dye to the solution, do not forget that after drying the shade becomes significantly lighter.
Video: Detailed instructions on how to qualitatively paint the ceiling
Search
Related Articles
Do-it-yourself washing machine installation
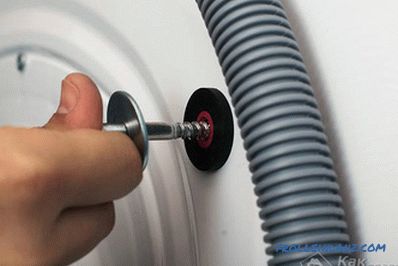
Today it is difficult to find housing in which there would be no washing machine. If you are faced with the problem of connecting the washing machine, then this article is for you. Preparing for i...
Garden furniture with their own hands from wood, pallets + photos, drawings, diagrams
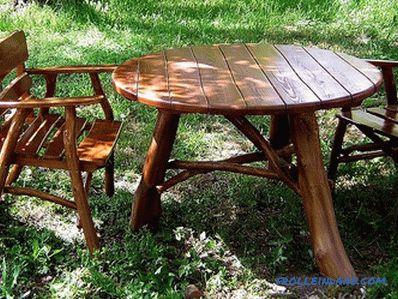
Even the most modern exterior can become much more comfortable if it has garden furniture. Undoubtedly, the country furniture has differences with the pieces of furniture intended for arranging resi...
Do-it-yourself wooden flooring (video and photo)
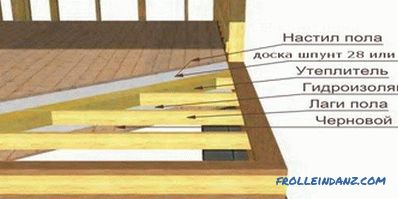
Wood flooring is currently very popular because it uses environmentally friendly materials. Such coverage is established not only in country houses, but also in city apartments. Therefore, many own...
How to choose a safe for your home - expert advice
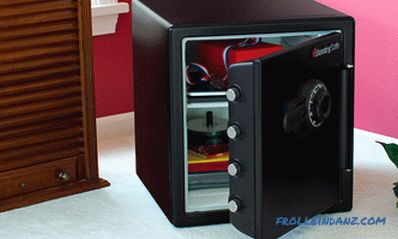
In almost every home there is valuable property that may be of interest to thieves. First of all, we are talking about cash, jewelry, some important documents, family heirlooms. To ensure their safe...
How to put parquet (photo and video)
Parquet is a beautiful and durable finishing material that perfectly retains heat indoors and gives a pleasant tactile sensation, allowing you to achieve a cozy and comfortable stay in the house....