Any bath is not just a plumber, but a place where a person is used to relaxing and relaxing as much as possible from difficult everyday life. It is not surprising that with intensive use the bath loses its decorative properties as well as its technical characteristics due to the destruction of the enameled layer. Unfortunately, not everyone has the opportunity to purchase a new bath, and in some cases you want to leave the one that already exists, for example, if it is a cast-iron bath that retains heat well. In the article we will describe how the restoration of the bath is done with your own hands with liquid acrylic and enamel, how to restore the enamel of the cast-iron bath at home.
Brush enamel
This method is suitable only for those cases when after the destruction of the enamel a little time passed and the deformation did not have time to touch the base layer of the bath. Enameling a bath with a brush is the most economical way to restore it, and therefore it can be called the most popular. This method does not require the purchase of special tools, nor the presence of any special skills.
 Brush-on
So, you first need to clean the bath as much as possible. Under the cleaning should be understood not only washing, but also the removal of all layers of dirt, grease and sediment, which eventually settle on the surface of any bath. For capital cleaning of the bath from lime deposits it is better to use special means, since the durability of the enameling procedure itself depends on the quality of cleaning.
After cleaning, you must wait until the bath is completely dry. Even water droplets should not remain on it, because otherwise the enamel simply will not settle on some part of the surface.
Now you can apply enamel with a brush. You should not make too thick a layer, because there should be several such layers, and each time the enamel will have to dry completely. The layers of enamel can be, for example, three. By the way, enameling a bath with your own hands makes it possible to change the color of the bath and to choose a shade to match the color of the interior. After the last layer dries, the bathroom can be used only after a day.
It should be noted that the subsequent cleaning of the bath should be carried out by gentle methods, that is, no abrasive materials.
Using the spray gun
 Using the spray gun
This method is very similar to the previous one, with the only difference being that a spray gun is used here instead of a brush. It is believed that the spray is optimal to use because it covers the surface with an even layer of enamel. The restoration of enamel baths in this way should be carried out only in a protective suit and always using a respirator. On sale there are special professional sprayers that evenly spray any liquid, however, enamels from cans can also be used to restore the bath.
Acrylic Liner
 Mounting an Acrylic Liner
This method of restoration is one of the most expensive, but the result will be durable. In addition, environmental friendliness is important to many. And in this case, the acrylic liner also wins over the enamel applied by spraying or a brush.
The acrylic liner is a kind of bath in the bath, that is, the bottom layer of the bath remains the same, but the upper one is completely updated. In order to create an acrylic liner, the master will need to measure the bath in all places, including the headboard and sides. The production method will be a manufactured bath, which in its size will almost completely repeat what the premises owner already has. Installing an acrylic liner will not take more than two hours, and it certainly will last more than ten years.
Bulk acrylic bath
 Bulk acrylic
This method is also not very cheap, but the new bath will not only look like a new one, it will also have new properties for it. For example, tactile sensations will be incomparably better than before. In addition, there are almost no pores on the acrylic coating, which, albeit in small quantities, are still present on the enamelled bath. Sometimes when using this method, the owners of the bath want to completely change its color, under the shade of the updated design of the bathroom. In addition, liquid acrylic has the ability to absorb sounds, and therefore now the pastime in the bath will become even more pleasant.
 Remove the top layer of the coating
So, first you need to prepare the surface. It is best to use special tools for this, which are able to clean even deep lime deposits. Now you need to clean the surface of the sandpaper to such a state until the enamel is removed. The surface must be completely matte.
It may be necessary to do such cleanings several times and constantly wash off particles of enamel with water. At the end you need to degrease the surface and completely dry it.
 Preparation of acrylic composition
In order to create a composition for bath restoration with bulk acrylic, It is necessary to purchase a base and hardener. The proportions must be fully observed so that the composition fully possesses the necessary properties. It is necessary to mix the base of the composition with the hardener until they are completely mixed, 5-10 minutes. Now you can apply the composition. This should be done very carefully. It is necessary to start from the side, gradually going down.
If there is a clear thickening of the layer in one place, then it is better to smear it with a brush as gently as possible, since after drying the bath will always remain in this form.
This process is best connected to those people who can work meticulously and carefully.
 Restoration process
The composition will thicken in about an hour, but it is recommended to use the bathroom only after day, and it is better to wait even when the inner layer is completely connected to the old surface of the bath.
Video
See below for detailed instructions on the restoration of the bath with bulk acrylic:
Search
Related Articles
Cotton curtains in the interior - varieties, selection rules, methods of decorating, photo

Cotton curtains in the interior create a special festive, romantic or ultramodern atmosphere, no matter what type of curtains you choose to decorate - solid wiring with wooden segments, transparent...
Do-it-yourself pumping station installation

The supply of irrigation and drinking water to suburban households is traditionally considered one of the most important tasks in creating a full-fledged life support system for them. In preparing t...
Wooden arbor designs: inexpensive garden designs
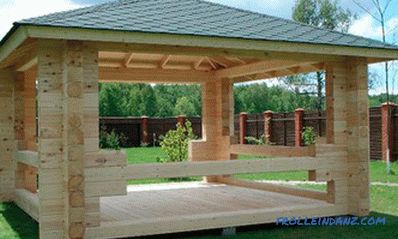
Today, not a single landscape improvement project near a house territory is complete without the construction of a wooden arbor. Light structures are in perfect harmony with the natural environment...
how to ramp up timber or boards

There are two main goals at the roof of the house: protecting the house from adverse weather conditions and maintaining heat inside the house. The basis of the carrying capacity of the roof, which...
calculation of the beam section and the step between them
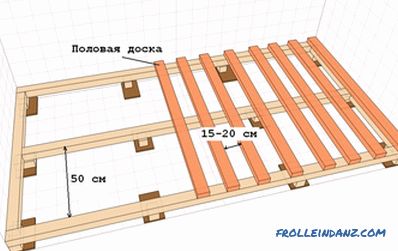
Many owners of summer cottages choose wooden floors when building houses. This is due to the fact that wood is an environmentally friendly material that has aesthetic appeal and natural naturalness...