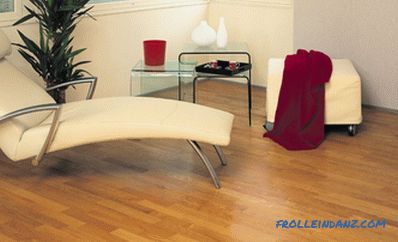
The floor of the tree is a safe flooring, but not at all eternal, and sooner or later it will be necessary to dismantle the wooden floor. If the installation is done correctly, then its operation can last more than 50 years, but sometimes it is necessary to do repairs, and after many years of service, and completely replace the wooden floor.

Lagging of the wooden floor.
Preparing for the demolition of a wooden coating
There are various reasons for dismantling floors:
- long service life;
- damage by fungus or small pests;
- various damages and defects;
- increased humidity.
Dismantling of old wooden floors can be done with your own hands, economically and without help. Although one assistant still does not hurt. When planning the scrapping of a wooden floor, you need to consider that there will be noise and rumble, so all work is better to do in the daytime and not on weekends, so as not to disturb neighbors and relatives. You also need to consider that there will be a lot of dust that will fall everywhere, even on the ceiling. To protect yourself, you need to prepare some headgear, gloves, mask and working clothing.
In advance, you need to prepare a place for storing garbage and containers (garbage bags, crates, wagons), find a transport for garbage disposal.
After completing the preparatory procedures, you can begin disassembling the wooden floor with your own hands. To do this, you will need tools:

Device of the sub-floor.
- hammer;
- pincers;
- nail-catcher;
- screwdriver set;
- hatchet or crowbar;
- a handsaw or jigsaw for sawing boards into smaller pieces;
- chisel.
We start the work. First you need to completely clean the room from furniture and decor items. Then work should be carried out in the following order:
- start with dismantling the old plinth;
- then remove the grilles for ventilation (if any);
- remove the top floor covering ;
- to completely remove the subfloor;
- to maximally free the room from accumulated litter;
- to do a wet room cleaning, taking into account that dust after disassembling the old wooden floor will even on the ceiling.
You can, of course, invite professionals who know how to properly demolish and dismantle, and all the above-mentioned wooden floor dismantling work will be done, but you can save money and make floor scrapping with your own hands.
Work related to the dismantling of wooden floors may vary depending on whether old materials are reused or not planned. If it is not planned, then using a nail puller and other tools, everything is done as quickly as possible: plinths are hooked by a nail puller, torn off, then one by one they tear off the floor boards in the places of their fasteners. No need to be cautious, try to keep the whole board or plinth. All materials are simply recycled. If reuse of materials is planned, then this somewhat complicates dismantling.
Dismantling with the reuse of materials
Disassembly of baseboards

Scheme of insulation of wooden floors on the ground.
In order to be able to reuse all materials after disassembling a wooden floor, you need to number all the boards so that when re-laying down, the order of the original arrangement is not disturbed. Then remove the plinth around the perimeter of the room. It happens that during the dismantling of the plinth it breaks down or there are too long nails that, after passing through the plinth, remain in the floor after removing the latter. To completely extract such a nail, you need to put some wooden block or board under the nail puller.
In order to avoid damage to the baseboard, it is better to start disassembling from the end. Find the first hammered nail and lift the baseboard at the attachment point 1-3 cm from the floor, then do the same with the second mount, and act in such a sequence until the baseboard is removed. The closer to insert the nail puller from the nail hammered into the plinth, the greater the chance that it will be safe and sound.
When you cannot remove a nail without damaging the surface of the plinth, you can remove the wood near the nail using a chisel and then try to pull it out by hooking it with the head of the nail puller. During this procedure, you need to put a wooden bar under the nail puller.
Usually the first baseboard mount is located 10-20 cm from its beginning. If it is reinforced with screws, then a screwdriver is used instead of a nail puller. If the plinth is attached to the wall and not to the floor boards, then the principle of operation does not change, but the wall will be the support for the nail puller.
Features of the dismantling of floor boards
Dismantling the baseboard, proceed to the floorboards.When laying a wooden floor, the initial board is laid with a spike against the wall, which means that disassembly must be started from floorboards with a groove or from the narrowest (trimmed) board.
In the case of fixing the boards with screws there are no problems, just unscrew the screws and remove the floorboards one by one. If the boards were fastened with nails, then everything becomes more complicated. The dismantling of the first floorboard starts from the wall: a nail puller is inserted into the crevice between the wall and the floor, between the crossbar and the board, and rises so that the floorboard rises by 1-3 cm. Then, with a hammer, the floorboard should be laid in place, but under the nail heads, place a piece plywood If everything is done correctly, then after the board is seated in place, the stud heads should rise above the floorboard by 1.0 -1. 5 cm. A thin block is placed under the nail puller and the nails are pulled out. The same manipulations are done with other boards.
With a neat job, that is, if you do not undermine the boards too high, the spikes of the floorboards remain undamaged, and this makes it possible to reuse the removed floorboards for laying the new floor.
After removing the nails, carefully insert the chisel between the floorboards into the crack between the floorboards and the spike of the board to be removed comes out of the groove of another pinned board. The floorboard can be removed. It is much easier to tear off the remaining boards, since now it is much more convenient to insert a nail puller.
It must be remembered that the spike of the floorboard to be dismantled and the groove of the nearby floorboard are the most vulnerable points when disassembling a wooden floor, so you should not highly undermine the boards to avoid the breakage of grooves and spikes. However, this cannot be completely ruled out. If the spike suddenly cracked, the worst thing that can happen if there are a shortage of several spikes when flooring is repeated is squeaking, but if there is a small distance between the crossbars, then this will not happen. The same applies to the grooves. When laying a new floor, the broken off or naked part should be nailed with small nails or glued with white glue.
If the crevice between the wall and the floorboard is too small and makes it impossible to insert a nail puller there, you can try to beat off a piece of plaster where the crossbar is attached to the wall.
You can also drill or gouge a piece of floorboard with a chisel near the wall so that you can insert a nail puller into the hole that appears, but make the opening small so that it can be closed with a plinth later.
If all this does not work, you can knock the wood around the nails using a chisel and a hammer to free their caps and then act with a nail puller. When reusing boards, chisels can be puttied with acrylic sealant.
When carrying out repairs, it is advisable to solve all the problems with the floor right away, rather than hiding them under the new surface. Do not take the time for this, the more carefully everything is done, the longer the floor will last.
Didn't find the answer in the article? More information on the topic:
-

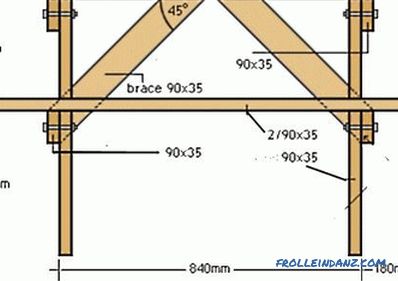
Types of mounting for rafters
Varieties of rafters. Rafters and plates for their fastening. Features truss-beams. Original truss mounts.
-

How to correctly level the wooden floor
How to level a wooden floor with your own hands without using complicated technologies? For wood flooring, fiberglass leveling compounds are the best and practical option.
Search
Related Articles
Clinker brick - what it is, sizes, types and characteristics

Clinker brick, what it is, what its main characteristics and purpose are - the topic of this article. Separate elements of buildings experience high static loads and are built from materials with ap...
Laying floorboard: preparatory and installation work
Laying of floorboard is made on an even and dry basis. The floorboard deserves people's love due to the fact that it has an aesthetic appearance and is easy to install. Parquet boards are...
Extension to a wooden house: erection technology, necessary documentation
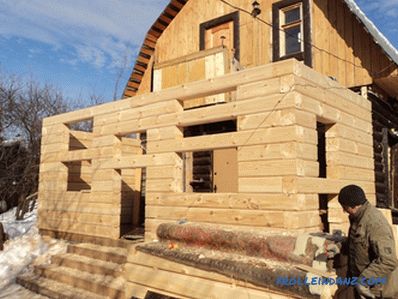
Sooner or later, many owners of private houses visit the desire to increase their area. This is achieved by completing the construction of additional premises. In its essence, the technology of suc...
How to paint glass wallpaper - painting glass wall paper

The world of finishing materials is constantly being improved and modernized, thanks to which designers implement a variety of ideas and ideas. Most materials are also versatile, and anyone who is w...
How to make a wooden table with your own hands: drawings (photos and videos)
The table at the cottage plays a very important role. No lunch or picnic can do without it. If there is no table on the plot, you can solve this problem in 2 ways: buy it or make it yourself....