For a car enthusiast, a garage is a second home. It stores not only the car, but also the mass of the necessary tools that are used during repairs. Each owner tries to equip his garage so that it is convenient to work in it.
")
A workbench in the garage is necessary for storing various tools.
Design features
The owner of the car, who prefers to repair his “iron horse” on his own, does not represent his garage without a bench. This is a durable, comfortable table designed for processing metal or wooden parts.
")
Size chart of the future workbench.
There are two types of workbenches: locksmith and carpentry. Joiner is a frame made of wood or metal with a wooden top. It is poorly suited for machining metal parts. On its surface there will be traces of engine oil, which is quite difficult to get rid of. In addition, metal chips can damage the surface of the table, and its service life will be short.
A bench work bench is most suitable for working in the garage. This is a universal model. His tabletop is made of metal, so it is ideal for processing metal and wooden parts. It can perform a variety of operations: grind, saw, sharpen, cut. In addition, this design is more stable, which is very important when working with metal parts, because during the work there can be a lot of pressure on the surface of the table top. Shelves should be provided for storing tools, so that everything needed by the master is at hand.
Defining construction parameters
A garage owner can make a workbench with his own hands. Before starting work, it is necessary to determine the size of the future design, its configuration and make a detailed drawing. The diagram should indicate the size not only of the tabletop, but also of each shelf.
")
Tools for making a workbench.
When equipping the garage with your own hands, it is important to choose the right place to install the workbench. The best option is the part of the garage where there are electrical outlets and good lighting. Should take into account the direction of natural lighting. Light should fall straight or from the left. With this arrangement, the work surface will not be shaded.
As for the length of the tabletop, it should be such that it can easily accommodate large parts and most of the tools needed for work. Width should not exceed 50-60 cm. This will allow to reach freely to the opposite edge. On one side can be equipped with a place to work with an electric cutting tool: jigsaw, circular saw or other. For this purpose, a plate is fixed, which should protrude 200-300 mm beyond the edge of the workbench.
Before making a workbench with his own hands, the owner must decide on one more important parameter - his height.
After all, the ease of work will depend on how correctly the height of the table is determined. To determine the height of the owner should be straight, bend his elbows and imagine that he is leaning on an imaginary table. The distance between the bent arms and the floor will be the ideal height for the future workbench.
To make a workbench for the garage, you need to prepare. The following materials and tools will be needed for the work:
")
Attachment scheme for clamps and supports for the workbench.
- The metal corner (at least 3 mm thick).
- Metal profile (at least 3 mm thick).
- Sheets of metal (galvanized or stainless).
- Metal strip (thickness not less than 3 mm).
- Dry boards (at least 50 mm thick and 100-150 mm wide).
- Welding machine.
- Bulgarian.
- Drill.
- Roulette.
- Level.
- Antiseptic composition for wood processing.
- Paint on metal, primer and brush.
A structure made entirely of metal will be more durable and reliable. However, the tabletop can be made of dry planks, which are then upholstered with a metal sheet. Boards are also suitable for making niches and shelves on which tools will be placed.
Metal strips will be needed to create the sides on the working surface of the table. One strip should be the same length as the desktop, and the length of the other two should be equal to the width of the table.
Assembling the workbench
Starting to make the frame for the workbench in the garage with your own hands should be with cutting parts. On the pre-prepared corners and profile, mark the required dimensions and cut the blanks with a grinder.
Then you should decide how the elements of the workbench will be fastened. For connecting parts there are two ways: threaded and by welding.Threaded connections allow you to end up with a more mobile design that can be disassembled at any time and moved to another location. Typically, this method of attachment is used to make a small table. In the case when a large metal workbench is made in the garage with your own hands, it is better to use electric arc welding to connect parts.
")
Workbench assembly scheme.
For greater strength, the frame should be reinforced with stiffeners. To do this, use the same corner as the frame. They should be welded on the rear legs at a distance of 100 mm down from the table top and at a height of 100 mm from the floor. You can install an additional stiffener in the center. Holes made on them will make it possible to attach the workbench to the wall with anchors. In some cases it is allowed to screw the table legs to the floor. This will further strengthen the design, and it will not stagger during the execution of the work.
After the frame is assembled, you can proceed to the next stage of work - making the worktop. First you need to make a frame from a metal angle of 40x40 or 50x50 mm. In the length and width of the frame should be more than 100-200 mm than the base of the frame on which it will be welded. These overhangs will later be used to install a vise, clamps or other working tool. For fixing the boards used screws with a secret washer. Holes for them should be prepared in advance.
In order for the workbench being constructed with own hands to be as reliable as possible, metal plates must be fastened to the back of the tabletop. Attach the plate under each board. They must be the same length as the frame. They need to pre-drill holes to secure the board.
The wood table top is covered with galvanized or stainless metal sheets. This will save it from damage. The wood on the surface of the table can also be painted. Previously, it must be treated with special antiseptic compounds.
The final stage of work is the processing of metal parts to protect them from corrosion. All metal elements must be coated with a primer and special paint for metal. This will significantly increase the life of the workbench.
For easy storage of tools and other equipment, you need to arrange several shelves under the table top.
Didn't find the answer in the article? More information on the topic:
-
")
How to choose the right drill driver?
How to choose a power screwdriver so that it works long and reliably. What are the batteries for the specified tool, their main advantages and disadvantages.
Search
Related Articles
How to install the stairs to the second floor of the building? (video)
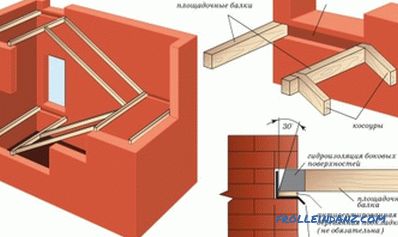
In our own house with 2 floors and more, as well as in a two-level apartment, the staircase to the second floor and above can not be done. It is possible to attract specialists to their constructi...
Laying laminate on a concrete floor with your own hands
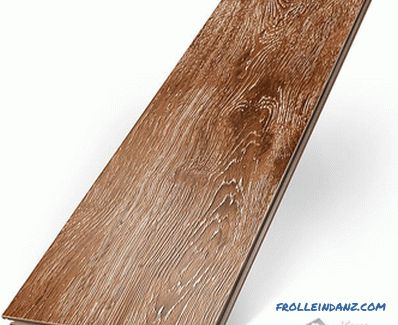
Laminate flooring is very popular for laying on the floor in residential and office buildings. And all thanks to the excellent aesthetic perception, ease of installation and quite excellent performa...
what to choose for home and professional use

More and more specialized devices are being produced by manufacturers for domestic or professional use, besides convenience, adding a new problem to customers - which device to purchase. There are n...
How to choose a building dryer for home or work + Video
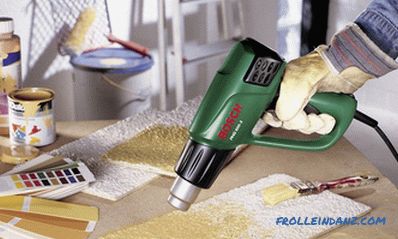
Although this device is called a building hairdryer, it is not intended for drying hair; it is too powerful for that. But to weld linoleum, solder, melt soft tiles and cut roofing felt a good heat g...
materials and tools, work order (video)

The squeak of natural wood floor leaves no one indifferent. Even the most inveterate lyricists, who consider the creaking to be music at home, will eventually lose their temper. Not surprising, bec...