In the construction of residential buildings, natural materials are increasingly being used, among which lining is popular. Upholstery it allows you to create the presence of nature in the house, providing an excellent microclimate. Fastening of this material can be made by a horizontal or vertical method at will.
")
Layout of a clapboard.
They choose lining due to its naturalness: the products may contain, for example, pine or larch. However, plastic may be preferred as a material for lining.
The basis for the panels can be selected based on the purpose of the room. For rooms with high humidity, including bathrooms, kitchens or balconies, it is recommended to use plastic lining. For the rest of the building you can use wood cladding panels. The choice of wood is also important, because the walls of the bath should not be sheathed products, which are based on pine wood. This is due to the fact that when heated, the material will release resin, which will damage the room. If you want to make wall cladding, but do not want to burden yourself with caring for the surface of the skin, then you should choose plastic, which is also easier to install. But this material is easier to damage, and its service life is much shorter than wood.
Preparation for plating
")
Siding panel layout.
Wall cladding using clapboard should be made after surface preparation and the material itself, which must be treated with a bioprotective agent that can prevent the deterioration of wood. Processing can be done with azure or wood stain: these compounds will not only protect the surface of the wall panel, but also give it the desired shade.
After processing, the panels should dry out well, for which they need to be brought into the house for 24 hours.
Upholstery should be done on a pre-cracked system prepared in advance. Its elements with self-tapping screws or screws should be fixed to the wall, while respecting the step of 50-60 cm. The crate should be installed on the level and plumb.
The upholstery of the walls with finishing material can be made after the implementation of insulation.
This will also enhance their sound insulation qualities. After laying the insulator it is necessary to protect its surface with a vapor barrier. Then another set of crates is to be installed, on which the lining itself will be mounted. If the skin does not involve the use of insulation, you should install only one row of crates. Elements of the frame system is recommended to treat the primer, which will prevent the formation of fungus and mold.
Installation of lining
")
Lining fastening patterns.
The installation of the wall paneling can be done externally or in secret by means of nails, decorative screws, clamps or a stapler. In order to ensure accurate fixation and decoration of the nail head in the body of wood, a dobet should be used. It is important to avoid chipping the groove, otherwise the fasteners will be weak.
If clapboard trimming is performed using the method of flush mounting, then the products should be nailed or screwed to the system of the batten from the side of the groove, in the place where it fits with the spike. When mounted externally, the product can be fixed with nails that have small caps. They must be installed at the same time, scattering fasteners on the lining. The latter method will allow you to complete the process faster. It is easier to implement, but the appearance of the skin will not be as aesthetic as when using the hidden method of fasteners.
The plating process should provide better fixing of the products; for this, steel clamps designed for lining should be used. These fastening clamps are composed of galvanized sheet. On the one hand, the teeth should be embedded in the grooves of the product, on the other hand, they should be strengthened by fastening or nailing to the crate.
Even before the construction of the supporting structure, represented by the crate, it is necessary to decide what the direction of the finishing material will be. This is explained by the fact that the elements of the batten should be installed perpendicular to the finishing skin. If you want to visually expand the room, you should choose a horizontal arrangement of the skin, but a vertical mount will visually raise the line of the low ceiling.
")
Tools for working with clapboard.
To work on cladding walls with clapboard, whether it is exterior cladding or finishing in the interior of the premises, you will need the following materials and tools:
- circular saw;
- nails;
- insulation;
- level;
- self-tapping screws;
- bioprotective agent;
- wood for the manufacture of the frame;
- lining;
- stain;
- vapor barrier.
Features of horizontal wall cladding with clapboard
Wall clapboard with clapboard should start from the ceiling line and move towards the floor, with the recommended slots pointing downwards. This will guarantee that moisture and debris will not be able to fall and be held in the grooves of the product. This indicates that destructive processes during operation will not prematurely affect the skin.
Wall cladding with clapboard using the horizontal layout of boards is done using cleats, which must be installed in the recess of the previous board. You can use nails or screws that are attached to the system of battens.
The wall cladding will be performed qualitatively if, after every 10 products, the master analyzes the evenness of the finish coating with a level or plumb.
")
Schematic of horizontal mounting of the wall panel to the wall panel.
Fixing the final cladding board should be done after adjusting its width, during which you should use a circular saw or a hacksaw. After that, the board must be strengthened with nails, and the resulting groove should be closed with a plinth.
If, when used in wall cladding, wall paneling is a block house type that simulates a rounded log, then the mounting should be started by turning the product with the groove upwards (this will hide the joining points). There will be no gaps between the boards, if they are installed closely with a hammer. So that the panel does not turn out to be damaged, adjustment should be carried out using trimming the panel.
The wall cladding of the block house is done by installing the elements to the crate with self-tapping screws, which are driven at a 45 ° angle. Hats will be hidden under the groove of the next panel. To decorate the angle between the panels, you need to install the finished timber, this will allow to strip the gap. It is not necessary to paint with such a finish, since the naturalness of wood can give the room a natural flavor and comfort. It is enough to free the surface of the cladding from dust.
Features of vertical cladding with clapboard walls
If the cladding will have a vertical direction, work must be started from the corner. On the back wall of the board in the groove, you need to strengthen the clapboard for clapboard, nailed to the batten system.
The launch board is fixed with nails, the caps of which should be covered with a decorative corner. If there are no decorative slats, you can get rid of fastener caps with side cutters. If the clamping method is chosen, the fasteners must tightly press the panels together and build a single web.
The trim at the last stage involves fixing the last panel with nails. In order for the appearance of the walls to be finished, the trim can be decorated with slats. Each joint, external and internal corners must be closed with special decorative slats, corners and baseboards.
Wall paneling of the room with clapboard is able to give the finish an amazing appearance, which brings a sense of coziness and unique natural heat to the house. The house, which is based on brick, stone and other building materials, has strong walls, but its beauty is cold. The appearance of such a building can be changed by using lining as the finishing material of the external walls, which will allow to obtain ventilated and warmed facades. Sheathing will help give the house a log cabin look.
We sheathe clapboard walls, extending the life of the finish. To do this, with a frequency of 2-3 years, the surface of the walls must be treated with special fire and bioprotective compositions, the characteristics of which are able to provide maximum protection against external aggressive influences.
Didn't find the answer in the article? More information on the topic:
-
")
How to properly heat a log house
Instructions and detailed description of the process: how to insulate a log house. Practical recommendations. The device ventilated facade technology log house insulation.
-
")
How is it better to level the wooden floor?
How can you level the wooden floor: methods. Determination of the state of the wooden floor. Wet screed, sanding, putty and PVA glue, using plywood to level the floor.
Search
Related Articles
Where to install a gas boiler - installation of a gas boiler
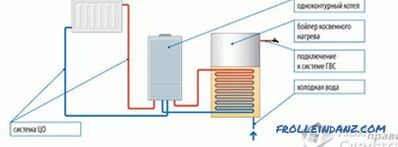
Currently, in many houses and apartments geysers and boilers are often installed. Thanks to them, both the heating of cold water and the heating of dwellings takes place. Advantageously, separate de...
Empire style in the interior - features of the Empire style (+ photos)
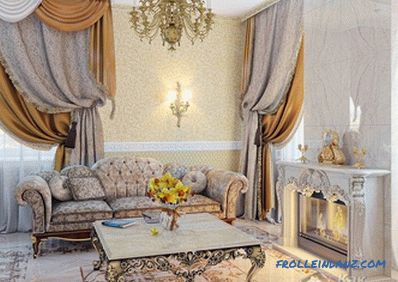
Having gained wide popularity at the beginning of the 19th century, the interior of the Empire style represents the ceremonial military triumphal celebration of the imperial style in all its glory....
Glazing of a balcony with your own hands + photo
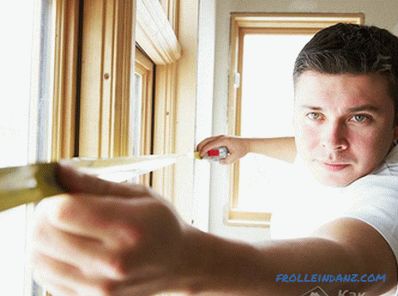
Living in a city apartment has certain features, one of which is the lack of useful space inside the room. Its expansion is possible due to the accession of the balcony. However, this is not always...
How to make emery do it yourself
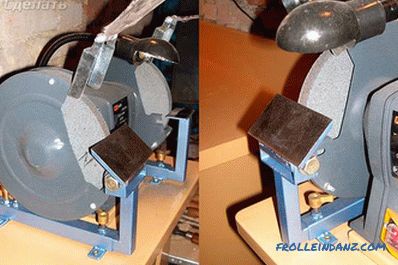
There is a constant need in the household to sharpen knives and other household items. Some turn to paid services for help, while others find an original solution by making their own emery. How to m...
Filter jug for water: which one is better to choose for home or garden
Drinking clean water that does not smell of bleach is not only tasty, but also good for our health. Therefore, most people are trying to expose the water from the tap to clean. Today we will discuss...