Computer computer tables made of wood are durable furniture that is easily made at home. First you need to make a drawing table of natural wood.
")
A computer desk made of wood is characterized by high durability and high durability.
The diagram indicates the parameters of each element. Natural wood of the desired size can be ordered at the sawmill.
Components
")
Schematic design and dimensions of the computer desk.
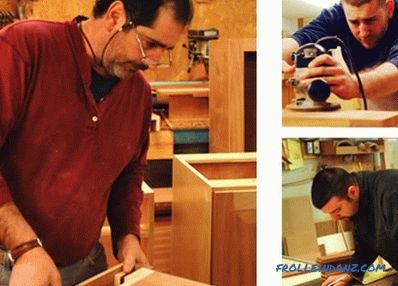
Such a wooden table is a compact and multi-functional furniture that is designed to accommodate a computer and its components. From a constructive point of view, such solid wood furniture should have a tabletop, 2 shelves and a cabinet with drawers. In the manufactured model under the table top there is a shelf for installing the system unit, an open niche for storing various trifles and a sliding stand for the keyboard.
A computer table made of natural wood can be made with a mobile, added or built-in pedestal. It can be done in several versions. It can be made with an open or closed niche, with drawers and in a suspended state. The size of the cabinet and its appearance depend on the personal preferences of the user. The length of the product varies between 350-430 mm, and the depth depends on the similar parameter of the table itself. For the lower pedestal base, the height is 50-60 mm. The best option is the manufacture of cabinets from solid wood with a length of 400 mm and a height of the facade drawers 160 mm.
A computer desk can be made from an array with an added pedestal, which is an autonomous design. This model is attached to the frame of the main product. The height of the side bollard must be the same as that of the table - 750 mm. The standard length of the cabinet with a compartment for the system unit is 700 mm.
The computer desk can be equipped with a mobile pedestal. This autonomous part is equipped with wheel bearings, which allows it to move freely relative to the main structure. The product in question is equipped with drawers, shelves and other cells that are designed to store office supplies and other accessories. The length of a standard mobile cabinet reaches 400 mm, depth - 500 mm, and height - 575 mm. Such a product can be installed under the table or next to it.
Preparatory work
To make a computer desk with your own hands, you will need the following materials:
")
To assemble a computer desk you will need pine furniture shields.
- pine furniture panels;
- board 6.2 m long;
- plywood sheet (6x1525x1525 mm);
- emery paper;
- varnish.
For the manufacture of a computer desk, you will need special fittings and fasteners. Experts recommend buying 3 sets of ball or roller guides with a length of 500 mm. The latter type is different from the ball analogue low price. From a technical point of view, roller guides are not advanced. They are fragile and quickly fail. For a sliding stand you will need to buy 1 set of guide rail 400 mm long. From fittings and fasteners you will need:
- dowels;
- 50 self-tapping screws (5x60 mm);
- 3 handles for drawers.
The production process is carried out with a hacksaw, drill, drill bit, screwdriver, square, chisel, tape measure, grinding machine. Pre-make the markup and cut out the main parts of the table: tabletop, 3 walls, bottom and pedestal cover. At the walls you will need to cut off the fragments of the upper front corners in 2x2 cm. Each saw cut is rounded off with the help of emery cloth.
A sampling with a width of 200 mm and a depth of 18 mm is made at the rear edge of the central wall, and the height from the floor level of 265 mm is observed. In this place is set transverse panel, made of shield. Its parameters are 18x200 mm. It is designed to connect 3 vertical sides. To the 2nd side pads the board is screwed on with the help of screws.
A computer table, which is equipped with a cross bar, has considerable rigidity. The next step involves drilling the corresponding holes in the right places. The bottom frame is assembled with screws.
The process of making the table
")
Scheme of assembling elements of a computer desk.
To make a stationary shelf for installing the system unit, you will need to cut a horizontal niche and a side small wall. To do this, you need to cut off the front upper corner of the side piece, rounding it with emery paper. Similarly, do with the rear bottom corner (for the plinth). The small side is screwed to the shelf and to the back panel. Then the first part is fixed to the large sidewall. The lower openings provided for under the shelf and the cabinet are covered with base panels.For their fixing apply dowels without glue.
The next stage involves the construction of the superstructure. Pre-prepared template. Holes are drilled in its ends and applied to the lid of the computer desk. To properly make a computer desk, use the square. It is designed to check the geometry of the structure. Screws are screwed into the cover. Pre-holes in the table top are aligned with the sockets in the sides.
Then make the markup, cut the shield size 400x2000 mm. The following parts are obtained:
- upper shelf with a width of 315 mm;
- cross bar.
The vertical middle wall is cut out of the 200x2000 mm shield. It is screwed to the tabletop with screws. Pre-prepare the template and make holes.
The linearity of each connection is controlled by a square.
The next step is to install the rear rail. The upper shelf is laid on the end of the central wall, aligned and screwed with screws to the sides, and then to the end of the middle bar. The left shelf is cut out of the shield with a width of 200 mm.
Drawer walls are made from 12x120 mm boards. The bottom of the niches cut out of plywood. The received preparations twist self-tapping screws, the bottom is sewn. The guides are fixed to the bottom, while making indentation of 18 mm from the front edge of the sides.
Then the keyboard stand is made of an array. The computer table is disassembled, each part of it is ground and varnished. Details are dried. Furniture is going. If necessary, the compounds strengthen wood glue. Then cut out 3 face plates. Make a markup and drill holes in them (for pens). Hardware screws at the same time will be fasteners between the walls of the niches and cladding. To expose the panel in the opening thumbs, use wedge. Markup is done. Handles with long screws. Additionally, you can screw screws. Computer desk is ready for operation.
Didn't find the answer in the article? More information on the topic:
Search
Related Articles
Making a kitchen set own hands (photos and videos)
The independent production of the headset will not only save on its assembly by experts, but also get a beautiful and functional kitchen that satisfies all needs and differs little from factory-mad...
Boiler for working out with their own hands (waste oil)

The waste oil boiler is one of the most efficient and affordable heating devices. They can be equipped with various rooms of various purposes. Used oil, used during boiler operation, is not only cha...
Laying a water pipe in the ground - we lay the water supply system

Arrangement of a private plot for permanent or seasonal residence includes, among other things, equipment for the water supply system of the house. The most successful solution to this issue is the...
URSA heaters - technical characteristics of various types + Video

Thermal insulation materials called URSA are quite popular. They not only carry out traditional warming of roofs and walls, but also isolate ventilation pipes and other communications. And with thei...
Wooden garage do it yourself - how to make + schemes, photo
Garage made of wood in many regions of our country is the best option for construction, due to the affordable cost of materials, ease of installation and beautiful appearance of the finished structu...