Do it yourself? - Is quite real! To do this, it is not necessary to be a master furniture maker. Although the ability to hold a tool in hand, of course, is useful. The ability to clearly visualize the final result, draw up a diagram and make simple geometric calculations will also be useful.
The main question in this matter is “why?”
Why do you make furniture yourself?
Mass production is not always and not everyone is satisfied with its products. And this causes displeasure to some, and to others it gives an impetus for creativity.
What does a home craftsman get as a result of the trouble of hand-made furniture?
- Savings. Any work costs money. Doing this job eliminates the need to pay for it.
- Full freedom in planning the premises and creating functional furnishings.
- Maximum compliance with your requests. Independent production of furniture allows you to build a furniture complex that meets your own needs and ideas about comfort and functionality.
- The joy of shaping your living space. Here we move away from rational motives and fall into the realm of creativity.

Concept and Design
Creating a crib begins with the answer to a number of questions:
- For what age do you need a bed ?
- Do you need a bed to be transformed for different ages?
- How many beds do you need?
- Need a fixed or folding design?
- Will it be just a bed or a complex with various functions?
The answers to these questions determine the size of the future product, material preferences and many other design solutions.
For the youngest
The bed for newborns should provide safety to the infant and the comfort of his mother. There are mainly two options:
- a separate bed with sides and a bed of at least 500-600 mm from the floor;
- a side bed, the bed of which is located at the same height as the mother’s bed , and the sides limit it only from three sides.

The added bed should not be made longer than 800-1000 mm, but the separate bed should have a length of 1200-1400 mm and a removable side.

In it, the child will be comfortable up to 3 years old, and maybe longer. It should immediately provide the possibility of rearrangement of the bed, so you can lower it below when the baby grows up.
Bed for outgrowth
Another interesting variant of the “outgrowth” design is a transforming bed. This is the realization of the idea of universal furniture, which is transformed according to needs.
The crib has a modular design, and its purpose is changed by the permutation of the modules. In the original layout, it is adapted for the newborn and, in addition to the place for the child, contains a changing table and drawers for storing clothes and other useful things.

As the baby grows, it becomes cramped in the “nest” of only about 800 mm in length. Then the changing table is removed from the lower body and becomes a separate pedestal. The bed for the newborn is also removed, it can be used in the play area. And the remaining design - this is the new version of the bed, which will last up to 5-7 years.
The design of the transformer is clear from the diagram below.

Please note! Hereinafter, dimensions are indicated only in millimeters. This may seem inconvenient and unusual, but the use of millimeters eliminates fractional numbers, which are not immediately gazed, longer pronounced and more difficult to perceive by ear. Measure in millimeters, this will reduce the likelihood of error!
Not just a bed
In the simplest version, a bed is just a bed with sides, mounted on legs or other supports. Here is a drawing of a classic chipboard design.

To realize it in the material, you only need to cut out the parts of the desired size and correctly connect them. This is not difficult, especially if you use the tips given below in this article.
But a baby bed does not have to perform only a utilitarian function. For children can and should make interesting furniture. Even for a simple thing, a small person is able to come up with a dozen uses not envisaged by her design. It is necessary to enter the world of children's imagination and make the child's room a field for games and research.
Bed toy
The bed can take any form. Only the bed area and the safety of the furniture remain mandatory. A good example of interesting furniture is the bed-machine.

The simplicity of its construction is visible from the given framework diagram.

In this design, elastic lamellae made of plywood are used as the basis for the mattress, which can be purchased from companies selling furniture components.But you can do without them, putting a rigid bed made of chipboard or plywood 10 mm thick on the support slats.
The bright patterns on the panels are quite simple to make. For this you need:
- to find a suitable image in electronic form;
- to find a printing or advertising company that will adjust the design to the required dimensions, print it on a vinyl film and cut through the contours;
- Apply film on blanks, mark contours, cut out parts and process their edges;
- Stick on film.
The same approach is applicable to other elements of furniture, for example, for the facades of the cabinet. For this, you can use both full-color printing and one-two-three-color applications from self-adhesive films of different shades.
Composition of functions: a bed as part of a household, work or play complex
A non-boring bed of interesting shape will surely please your child. This effect gives the furniture-toy furniture-tale. But you can refer to the idea of transformer and combine the functions of the bed and other furniture. This will make the bed interesting and save space, which is never too much in the nursery.
Functional content is determined by the age of the child and the type of occupation. The bed can and should be combined with a wardrobe, toy boxes, bookshelves, a computer desk or a place to study. At the same time, the separation of functions at different levels, as well as folding elements and movable modules are actively used.
 Bed with a built-in locker and a sliding module
And it even looks solid!


Such an attic bed combines several functions and, with its originality, creates conditions for the full development of the child.
A complex at first glance construction will become simpler and clearer if presented in the form of a drawing or a diagram.

Here is a simplified version, without a side-ladder module. Both the figure and the drawing show the back wall, which serves as a support for the bed and the table, as well as, which is very important, a longitudinal stiffener.
Bunk and other variants of "multi-bed"
If there are two or more children in a family, then it makes sense to combine their sleeping places in one complex. The most obvious and familiar solution is a bunk bed. When creating such a bed, the convenience of access to the second tier is provided. Ladders are made for this or other solutions are applied.

In this drawing, a bunk bed made of chipboard it is clearly seen that all the details are connected so that they form rigid box-shaped structures. Side racks provide rigidity in the transverse direction, the rear wall - in the longitudinal, and the bed sets the squareness of the structure in the plan.
The arrangement of parts in three planes is a crucially important point when designing furniture from sheet materials.
By observing this simple rule, you can give free rein to your imagination and create very interesting and reliable furniture.
 Bed with
 Bed-working corner
 The cardinal solution for several beds in a limited area
All these constructions can be made of wood, and it is possible from more convenient plate and sheet materials made on the basis of wood.
A little about materials
Modern furniture in the overwhelming majority is made of plate materials, which are made of wood chips and small fibers.
Chipboard - the basis of furniture.
The main structural material used for furniture is a laminated chipboard, often called simply chipboard. Products from it do not require any additional processing and almost no maintenance. The surface decor is set at the plate production stage, and the assortment makes it possible to choose from several dozen options.

Chipboard is made from small wood shavings using urea-formaldehyde resins, because of which the material causes a wary attitude to itself. But the furniture plates produced today are approved for use in residential premises and in children's institutions. Most of them have an emission class of E1, and some, such as the Egger cooker, have E0. They are reasonably considered harmless.
Chipboard - quite plastic material. Screws with a diameter of 3-4.5 mm are twisted into a slab without prior drilling, and when installing fasteners, door hinges and other accessories, fixing points are allowed, although this is undesirable because it reduces the holding capacity of the screw.
When creating structures made of chipboard, it should be borne in mind that even a seemingly strong stiffener from a bar 50-60 mm high, under load, can "crawl" and arch with time, which at first glance seems impossible.Any bending force elements must have a cross section in the direction of bending of at least 100 mm.
Fiberboard - auxiliary material
Fiberboard is a fiberboard. Despite the word "plate" in the title, it is still a flexible sheet, which most often has a thickness of 3.2 mm. For furniture used laminated fiberboard. It is used as the back wall of cabinets, bollards and as the bottom of drawers. Fiberboard is a "rear" membrane and performs an important function - it gives rigidity to box-shaped structures, which without it could not keep their shape.
Facades and other "special" elements
Parts with special requirements in terms of design and aesthetics are made of Medium Density Fiberboard fine fiber board (MDF). This plate differs in higher density and durability, than a chipboard. The front parts of it are decorated with curly milling, and it is veneered with vinyl film or paint. From it are made the doors of lockers, end and side (front) guards of the bed, table tops.

Wood
Natural wood is a material that in recent decades has been overgrown with an almost magical aura of "environmental friendliness". No doubt, wood is indeed more pleasant to touch, smell, and taste than any of the composites. However, comparing it with other materials, it should be borne in mind that parts of furniture made of wood are treated with stains, antiseptics, varnishes. In their manufacture and assembly of products used adhesives. That is, naturalness is obtained not so absolute, in the work this material is much more complicated, and in operation it is more capricious than the same chipboard. And yet, wood is used in modern furniture production. These are mainly products and structures that require high strength with a minimum cross-section of parts or special aesthetics. These are:
- stairs, rungs and steps of stairs;
- bearing beams, light construction stands;
- front parts - doors, shields, facade panels, handrails.
 Lightweight constructions - only from wood
The most commonly used hardwoods are oak, beech, ash. Less often - a pine or an alder. Such a choice is due to the fact that hard rocks hold sanding better and, with good processing, do not create a danger of splinters. In addition, these rocks are less prone to warping with seasonal changes in humidity.
Features of furniture production and self-production of furniture
The principle of simple work with complex components is applied in furniture production. Chipboard or wooden beam, fittings and fasteners are made at enterprises that have everything they need and provide low prices at the expense of mass.
For the manufacture of high-quality furniture it is not necessary to have sophisticated equipment and production space. All high-tech, but routine operations can be trusted to those who specialize in this, and most concentrate on creativity and on getting the final result.
Making furniture is reduced to assembling products from finished parts and fittings. This is how small furniture companies work, and the lack of their own production facilities does not bother them at all. The same can be done at home. To do this, it is enough to have the simplest power tools of the economic class.

Getting Started
The algorithm described below is designed to ensure that all work requiring the use of special equipment will be entrusted to specialized companies.
Design and project
First you need to come up with a bed design and make a drawing. Begin with overall dimensions and general views. Then the details are specified step by step. Below is a sketch with which you can already work.

The dimensions, on the basis of which the detailing is made, are specified in sufficient detail. Unmarked dimensions are calculated based on the indicated and material thickness. If any details are not clear from the general sketch, then additional drawings should be made, showing individual nodes or views in more detail.
For complex parts, such as the table top in this sketch, the overall dimensions, the dimensions of key elements, and rounding radii are indicated.
The project should take into account the maximum possible dimensions of the parts, which are limited by the format of the chipboard sheet. As a rule, it is 2750 * 1830 mm minus 10‑20 mm for trimming edges. Specify specific restrictions in the company where the material is ordered and cut it into parts.
The slab is cut on a special cutting machine that provides cutting accuracy and clean cut. It is better not to try to do it with a hand tool. The savings thus obtained do not justify the loss of time and deterioration.
Detailing
After drawing up detailed drawings, detailing is done - a list of parts with their overall dimensions and an indication of additional processing.Below for an example the fragment of detailing is shown.
| No. | Detail | Length | Width | Number of | Rotate |
| 1 | Racks 1 | 1355 | 834 | 2 | no |
| 2 | Racks 2 | 1360 | 830 | 2 | no |
| 3 | Side | 1822 | 296 | 2 | yes |
| 4 | The front of the cabinet | 1500 | 396 | 2 | no |
| 5 | Front of the bollard | 550 | 396 | 1 | no |
The size of the first is indicated structure of the picture on the chipboard. The second - across. The last column indicates whether the part can be rotated when cutting. For example, if “yes” is indicated in the “Facade of the cabinet” line, the pattern on one door may turn out to be vertical, and on the other - horizontal.
In addition, you need to specify which sides of the parts are pasted with edge banding. This is indicated by underlining the corresponding figure. One underscore - one side, two - both along parallel edges. The underscore of two digits means the edges are edged in both sizes.
Important! When determining the dimensions, one should take into account the thickness of the particle board. Usually it is 16 or 18 mm. Choosing the color of the material, you need to immediately specify in what thickness it is available. When determining the size of the facades, use the following rules.
- For overhead facades that are superimposed on the ends of cabinet parts or cabinets, the size is taken 4 millimeters smaller than the module size or the geometric design space under the facade.
- For interior facades that enter the opening, the size is taken 5-6 mm less than the dimensions of the opening on each side. For large parts, it is necessary to provide for gaps along the entire perimeter of at least 3 mm.
- The facades of the drawers are calculated so that there is a gap of 3 mm between them.
- If it is planned to trim the ends with an edging tape with a thickness of more than 0.5 mm, then it is taken into account when calculating the dimensions of parts.
According to the detailing table in the company selling chipboard, they will map the cut, determine the required number of sheets, cut them into parts and revet the ends with edging tape.
Processing of complex parts must be specified separately, in the form of sketches with the designation of rounding points and their radii. If the form is not described only by dimensions and radii, then the contours can be set using the coordinate grid or independently cut a template from fiberboard and put it into work.
However, if there is an electric jigsaw and a belt grinder at home, complex parts can be made by yourself. For the jigsaw, you need to use a carbide saw "tooth up", make a cut at a distance of 3-5 mm from the finishing contour, and then remove the excess material with a belt sander. With self-processing of complex parts, you will have to transport them separately to the edge or glue the ends yourself.
Important! When self-polishing the ends of complex shape, it is necessary to ensure their perpendicularity. Otherwise, when pasting, the edge band will not lay down over the entire length, but will go to the side.
When designing curved parts for PVC edge with a thickness of 2 mm, it is necessary to provide external roundings with a radius of at least 50 mm, and internal roundings with a radius of not less than what the used tool allows. For a manual grinder, this is usually not less than 300 mm.
 Thin and thick plastic edges
At home, the plastic edge of PVC is 0 thick, 4-0.5 mm glued with contact adhesive "Nairit" or similar. The protruding edges are carefully cut with a sharp knife, and the resulting angle is smoothed with a thin sandpaper and polished with felt.
 Cutting the edges of the edges
The melamine “paper” edge is easier to glue. It is smoothed with a hot iron and additionally pressed against a flat bar with a piece of felt or other thick fabric.
The edges of parts that often experience increased loads, such as the edge of the table top, steps of the ladder, and the upper edge of the side should be covered with plastic tape 2 mm thick. This is done only on a special machine with a thermoplastic adhesive, and the edges are machined with a router.
Assembly
When assembling furniture from a chipboard, the main operation is to fix the end of one part to the face of another with a through screw - confirmator. This is not the only type of fastener, but it is the easiest to use and is not too picky about the accuracy and qualification of the assembler.

The hole is drilled with the special confirmat drill with a working part of 4.5-5 mm.

Without having the skill, do not try to drill the canal in one pass.It is better to first make a narrow hole in the plate, and then, pressing the butt of another part, finish drilling and immediately install the fasteners.
Important! Marking of installation sites of parts and attachment points is from one edge. It is impossible to mark part of the points on one side, and the other part from the opposite edge of the part. A small inaccuracy of cutting and the error of the roulette will certainly give a noticeable mistake. Select the reference planes from which all measurements will be made on all parts. A theoretical floor is recommended - the bottom edge of the uprights and the rear wall plane are the rear ends of the parts.
Where it is inconvenient to place confirmatics, or they spoil the view, for example, on the table top, they use corners.

Shelves of cabinets are removable and put on shelf supports in the form of pins with a diameter of 5 mm. Under them in the side walls are drilled blind holes with a diameter of 4.8 mm. One or two shelves of the cabinet are fixed rigidly to strengthen the side walls. These are usually shelves on which two facades meet, one above the other.
After the modules have been assembled, before installing the back walls of fiberboard on them, it is imperative to check the equality of the diagonals. The size of the back wall is taken 5-6 mm less than the dimensions of the module.
Manufacturing and installation of drawers
Different types of guides are used for drawers. Here we consider the installation on roller guides.

Boxes are made of chipboard, and their bottom is of fiberboard. The dimensions are determined by the size of the section where they are installed, the length of the guides and the number of boxes.
- The length is taken equal to the length of the guides used or more, within 50 mm. But in any case, at least 3-5 mm less than the depth of the section (thumbs).
- The width should be 25 mm less than the internal width of the stand.
- The height of the boxes should leave at least 20 mm free space above the edge of the sidewall (between the sidewall and the top drawer, between the sidewall and the table top or the mounting plate).
Important! When assembling the boxes, you need to ensure that they are not led by the "screw", and when installing the bottom carefully monitor the equality of the diagonals.
 Installation diagram of the guides
It is more convenient to sew the guides on the side walls of the module before assembling it. The bottom rail is mounted no closer than 20 mm from the floor of the pedestal (along the axis of the fasteners). Each next - with a step equal to the step of the facades, that is, the height of the facade plus the gap.

Installing the fronts of drawers
The facades of the drawers are installed only after all the guides are mounted, the module is assembled, the drawers are installed, they move easily and do not “dance” ".
Important! Be sure to number the boxes. Do not count on their interchangeability! Number can be applied to the bottom of the bottom.
Installation of facades is carried out sequentially from bottom to top. For convenience, all drawers, except the bottom, are removed, and work begins with it.
- In the facades holes for screws of handles with a diameter of 4 mm are drilled.
- The facade is placed in the calculated position and pressed against the front wall of the box. You can hold the facade with your hand, but it is better to use light clamps.
- Through the screw holes of the handle, the facade is attached to the box with two 4 * 30 self-tapping screws. After that, the clamps are removed and checked the correct position of the facade. If necessary, you can release the screws half a turn and correct the part.
- The exposed facade is finally fixed with four 4 * 30 self-tapping screws from inside the drawer. After that, you need to remove the temporary fasteners, drill through the screw holes of the handle and install the handle with the fastening on the long screws. "Native" are designed for thickness up to 18 mm and in this case are not suitable.
The work on setting up the facade is simplified if you use the bearing inserts for it, corresponding to the width of the gap.
Before the final fixation of the facade, it is better to drill the holes with a diameter of 2 mm and a depth of no more than the thickness of a chipboard at the fixing points. On the surface you need to gently countersink a drill under a screw head.
Installation of hinged facades
Hinged facades (doors) are installed on special hinges.

The furniture industry produces a large number of kinds of loops. The figure below shows three types of loops that differ in the position of the facade. They all have the same base angle - 90 degrees.

There are loops designed for facades located at angles of 0, 45, 135 degrees, and this does not limit their variety. In addition, the hinges vary in angle of opening. The standard is 90 degrees, but there are 110 and 175.
All of them are mounted according to the same scheme:
- In the rear plane of the facade at a distance of 21‑22 mm from the edge drilled under the hinge cup.
- The loop is attached to the facade.
- On the wall where the door will be attached, a vertical marking is made at a distance of 37 mm from the inner edge of the facade in the closed position.
- The door is set in place and the hinge mounting strips are fastened with self-tapping screws.
Hinges should be placed at a distance of 70-120 mm from the top and bottom edges of the facade. With a door height of more than 900 mm, 3 hinges are installed, with a height of more than 1,500 - four.
The video below is a demonstration of the “set and secure” installation method. It does not require markings for hinge plates on the wall of the cabinet and works even if the hinges have a non-standard mounting size.
It is only necessary to remember to install all the hinge adjustments in the middle position before installation, and when installing to keep the facade 0.5-1 mm above the calculated level. This difference does not need to measure. It is easily determined by touch. It is only necessary to keep fingers at the junction of the lower edge of the facade and the furniture body.
Important! When distributing hinges on the height of the door, make sure that they do not fall on the shelves.
To deepen under the hinge cup, you will need an end mill - Forstner’s 35 mm diameter drill bit. The drill should be with carbide cutters and a short "nose." Such a tool will make an even hole of the desired depth and will not spoil the front side of the facade.

About fasteners
The main fasteners for assembly are self-tapping screws. For fastening of loops, guides and other accessories use galvanized self-tapping screws of 4 * 16 size. If you need increased strength, you can increase the diameter to 4.5 mm. In some cases, the cap of the 4-mm screw is too big and looks ugly. Where it is important, use screws 3,5 * 16.
For fastening accessories with mounting plates 4 mm or more thick, self-tapping screws 20 mm long can be used. But you should always be careful not to spoil the outside of the part.
For fastening two parts with overlapping, as in the case of drawer fronts, feel free to use 4 * 30 self-tapping screws. They can be used to sew separate sections together, sew reinforcement bars, etc.
You can use nails or self-tapping screws 3 mm in diameter to attach the fiberboard.
For reliable work with galvanized screws, use a screwdriver with a magnetic nozzle and PZ bits. The magnet in the nozzle should hold the screw on the bit well. To check, lower the holder with the bat into a can of 4 * 16 self-tapping screws. If one or two screws hang on a bit, the holder is bad. Take one that will keep at least four of them.
About fittings
For the manufacture of furniture there is a huge amount of accessories. Before you make a project, familiarize yourself with the possibilities that the furniture gives. It can be rollers for mobile pedestals, swivel racks for folding tables, extendable baskets and much more.
In fact, furniture is the "soul" of furniture. It defines its convenience and functionality. Therefore, do not hesitate to "get" hardware sellers by asking for more to show, explain, offer.
Search
Related Articles
How to fix the wall paneling to the ceiling
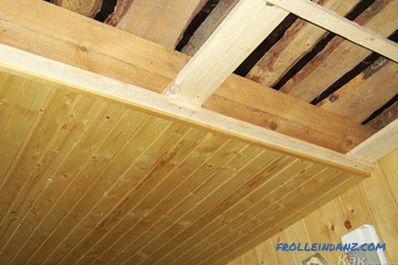
Different materials are used for interior decoration. But, despite all modern developments, popularity of lining does not decrease. This material has many advantages. This is the ease of installatio...
How to get rid of mold in the apartment with their own hands

Mold - this is a fairly common phenomenon. Constantly growing spots not only look unaesthetic. Mold brings many more problems: unpleasant smell and harm to health. In this article we will describe t...
pitch dependence on flooring
In order for the floor to be properly laid, even and strong, in 9 out of 10 it is laid on logs. Without a log, it is very difficult to level and reinforce the floor surface so that it does not bend...
repair of rotten logs (photos and video)
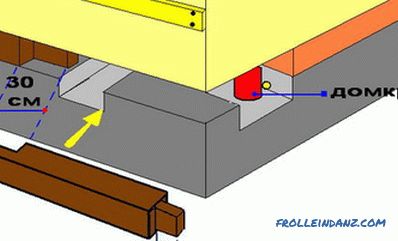
Wood as a building material has undoubtedly many advantages. However, the peculiarity of the tree is that it can rot over time. As a rule, lower, fixed rims in a wooden house are most often affecte...
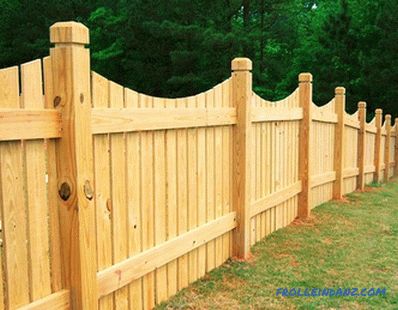
Poles for the fence do it yourself
Which fence posts should I choose? Mainly, it depends on the amount of finance you are willing to invest, and of course on aesthetic preferences. Assortment: what materials are made of You can m...