In order for the floor to be properly laid, even and strong, in 9 out of 10 it is laid on logs. Without a log, it is very difficult to level and reinforce the floor surface so that it does not bend under the weight of the furniture, creak or vibrate when walking.
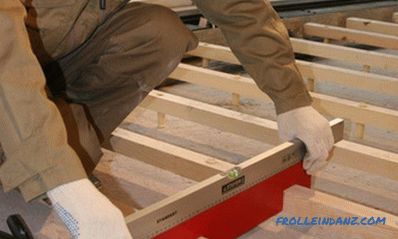
Proper laying of the lag aligns and strengthens the floor surface so that it will not sag under the weight of furniture, creak or vibrate when walking.
Theoretically, any material can be used as a lag. The main thing is that they are smooth, durable and have a small deformation coefficient under load. Metal, reinforced concrete, plastic and wood meet these requirements. However, in practice, in most cases a wooden block is used for the device lag, since it is much cheaper than similar plastic products, not to mention metal.
Sizes of installed lag
Reliability is directly dependent on the correct choice of sizing of lag for a floor. With the length of the lag everything is relatively simple: depending on the direction of laying the floor, it should correspond to the length or width of the room. More precisely, it should be less by 25-30 mm to avoid deformation during temperature changes.
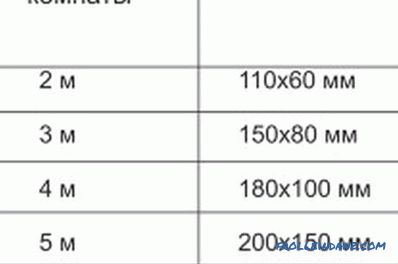
Dimensions of the cross section lag depending on the size of the span.
The ideal installation option is a lag - mounting them from whole bars. But sometimes a situation arises that the length of the bar is not enough to install them. In this case, use splicing two bars. Splicing is done in half-wood. Galvanized linings may be used.
Such a merging is not a particularly complicated process, but in its implementation it is necessary to follow 2 basic rules. First, there must necessarily be some kind of support under the splicing point - a supporting column is better, but a strong lining will also work. Secondly, if two adjacent lags are spliced, then their points of fusion should be located with a minimum offset of 1 m relative to each other. If these rules are not followed, then there is a big risk of getting insufficient rigidity of the floor in this place.
The situation is more complicated with determining the required thickness of the installed lag. Most often for log log rectangular section is used. But under certain circumstances, for example, arranging the floor on the second floor, iron or reinforced concrete floor beams can be used as a log.
The thickness (cross section) of the installed lag depends on three factors: the material lag, the maximum design load on the floor surface and the size of the span between the two points of support of the lag. It is considered that the maximum load on the floor in a residential area does not exceed 300 kg / m². With such a surface load, the minimum lag thickness, depending on the length of the span, should be:
- 110x60 mm - with a span of 2 m;
- 150x80 mm - with a span of 3 m;
- 180x100 mm - with a span of 4 m;
- 200x150 mm - with a span of 5 m;
- 220x180 mm - with a span of 6 m.
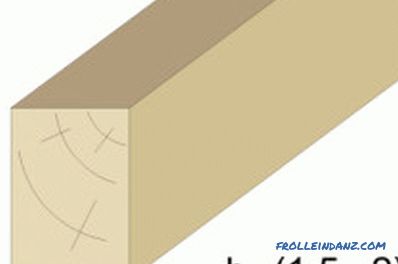
The optimum ratio of the height and width of the log.
In order for lags to withstand pressure, a rectangular beam is usually put "on the edge", since it is with this method of installation that the maximum rigidity of the beam to be installed is obtained with its minimum volume.
When used as a lag for flooring metal or reinforced concrete beams, their cross section may be half as large. The reason is simple: iron and reinforced concrete beams are much more resistant to deflection than wood.
But it should be understood that this is the minimum thickness for the lag and for greater reliability no one forbids installing lags of a larger section. Such an increase in thickness is sometimes even vital, for example, in the case of thermal insulation, when the thickness of the insulation layer exceeds the minimum lag thickness.
The optimal step size is lag
If the thickness of the lag depends on the length of the span, then the step size (the distance between two adjacent logs) is directly dependent on the thickness of the flooring.
The general rule is this: the greater the thickness of the flooring, the larger the lag can be made.
This is explained simply: the thicker the board, the less it is subject to deflection. In this case, the step of the installed lag does not depend on the selected material.
The ratio of the thickness of the floor covering to the step will be as follows:
- with a board thickness of 20 mm, the maximum lag pitch must be within 30 cm;
- with a board thickness of 25 mm the maximum pitch should not exceed 40 cm;
- with a board thickness of 30 mm the maximum pitch increases to 50 cm;
- with a board thickness of 35 mm the maximum pitch is taken 60 cm;
- with a board thickness of 40 mm, the pitch should not exceed 70 cm.
As you can see, with an increase in the thickness of the floorboard by 5 mm, the pitch increases 10 cm. This is a ratio with stored in the future.
Features of the choice of pitch for the floor of plywood or OSB
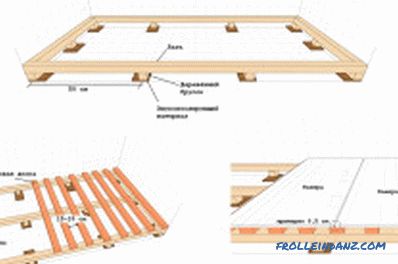
The device floor of plywood on logs.
These values refer only to the boardwalk. They are not quite suitable for determining the pitch of the lag when constructing plywood or OSB flooring, since these materials, with a smaller thickness, have greater rigidity for deflection. Therefore, with a floor thickness of 15-18 mm, the maximum pitch is within 40 cm. With an increase in the thickness of the floor to 22-24 mm, it can be increased to 60 cm.
If the plywood floor will serve as a subfloor for the subsequent laying of parquet or laminate, the minimum plywood sheet thickness should be 12 mm, and the corresponding lag step should be no more than 30 cm. The same pitch size remains for OSB, but the minimum thickness of this coating will be 18 mm.
However, when arranging the floor according to lags of plywood or OSB, there is another feature that must be taken into account. When calculating a step, you need to remember that the sheets laid must be fastened to at least 3 lags: in the middle and along the edges of the sheet. At the same time, the edge of the sheet, with the exception of sheets laid along the walls, does not fit the entire lag, but only on its half.
How to lay logs on the base?
Wooden logs can be attached to any base. But, regardless of the type of foundation, there are general rules that must be observed. To install them you will need the following tools:
- jigsaw or hand saw;
- level;
- rule;
- shuropovert.
Besides these basic ones, additional tools may be required depending on the base. For installation on concrete or on the ground (provided brick or block walls of the house), in addition to fixing the log, you will need a manual punch.
First, observing the necessary step, lags are laid out, after which they must be set in the same horizontal. To facilitate this task, two extreme lags are first placed in the horizontal, then between them 2 thin nylon threads are stretched, along which the remaining lags are set. The horizontal is aligned with the level and, if necessary, adjusted with the help of linings, for which pieces of timber or pieces of plywood can be used.
Studying the theory, it is possible to find recommendations that during installation the lag is allowed a distance from the walls equal to the selected step. But at the same time the step is calculated on the basis of two points of attachment of the floor covering. There is only one attachment point to the lag at the floor near the walls.
If the end of the board has a second point of support in the form of a building base, then a theory can be followed. But in practice, the end of the board very often does not have any support, therefore in this case usually they indent 15-20 cm from the wall, setting one additional lag.
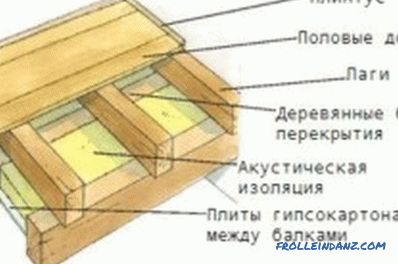
Lagging of the wooden floor.
When using sheets of plywood or OSB as a floor covering, it is better not to even make this indent, since these materials have an unpleasant property to break off at the ends. Therefore, it is better to lay the logs directly to the wall, making a compensation indent of 2-3 cm.
Expose all the laid logs on one level. If three randomly selected triples of bars are set on the same horizontal line, then the installation of the log is correct. The evenness of the horizontal of such triples is not difficult to verify with the rule.
When laying on a concrete base for wooden logs, waterproofing is necessary. Usually it is made of plastic film, but recently its substitute, folgoisol, has appeared. This is also polyethylene, but not ordinary, but foamed, besides having a foil layer. Laying side coated with foil in the direction of a warm house, it works on the principle of a reflector, significantly reducing heat loss.
After reaching the horizontal, in order to avoid displacement, the bar must be attached to the base. It is better to fix it to the concrete base with the help of anchors: with this method, one can without fear of drilling a hole directly through the wood and there is no need to heat the nuts. But there is an alternative: to attach wooden stands to the concrete base and to attach the exposed bars to these stands with self-tapping screws.
If the base for the log is wooden beams (or flooring), then after placing them in a single horizontal bar they are fastened to them with ordinary self-tapping screws. The main thing is that they have sufficient length. When mounted on beams, as an alternative, logs can be placed not on the top, but on the side of the beams, to minimize the reduction in the height of the room. For low spaces this can be very important, since the usual installation of the floor on the logs takes at least 10 cm of the height of the walls.
When installing the lag directly on the ground they are placed on the supporting pillars. For this, a markup is made on the ground, corresponding to the lag. Then, the required length of the girder is measured along the marking lines, and the support columns are displayed in these places.
To expel them, a hole is dug at least 10 cm deep under each support pole. The pit is covered with sand and is poured abundantly with water to make the sand more densely seated. On top of the sand pit is covered with plastic wrap. A mortar is put on this film, it should be enough to put two bricks on top of it. Typically, the support column is driven to a height of 2, a maximum of 3 bricks. When distilling the posts, you need to carefully follow the bricks of their upper rows to go perpendicular to the direction of laying the log.
To align the columns to a common level, use a screed from mortar. After the mortar has dried, the columns are covered with roofing felt, and the bar is laid on top of the columns without any fixation. If the house itself is wooden, the logs are stacked on the grillage or attached to the lower crown of the log house. If the walls of the house are brick or panel, then the logs should be hemmed to the walls with the help of galvanized corners.
If the optimum cross-section and lag pitch are observed, their installation and fixing of the flooring to them are correctly performed, the floor will be even, beautiful and will not sag or creak. Therefore, even if you have never done this kind of work before, do not give up. If you study the theory well, then in practice you will succeed.
Good luck! Flat floors to your home!
