A bathhouse on a household or dacha plot is a place not only for hygienic procedures, but also for rest after working days. A visit to a well-heated bathhouse will raise your spirits and help relieve stress, provide an opportunity to recuperate and even to restore shaky health.

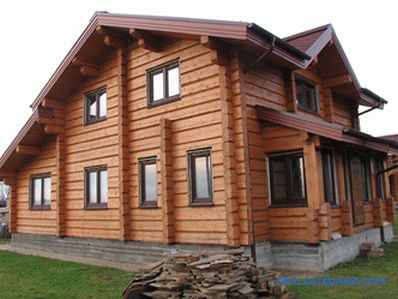
Drawing of a wooden bath.
Wood is considered to be the best material for building a bath. Moisture-resistant wood species: pine, larch, cedar make walls and floors in the bath, but the shelves and necessary equipment in the form of gangs and ladles are best made of hardwood. When interacting with the hot air of the steam room, resinous substances of coniferous wood evaporate, filling the entire room of the bath with a pleasant and useful aroma.
Where to put a bath on the site?
Owners of the site, allowing you to choose a place to taste, should prefer the backyard, away from residential and farm buildings. The territory adjacent to the bath is better to isolate from the rest of the site with the help of decorative fences or pergolas, place a pool or a reservoir on it, near which you can relax after visiting the steam room.
If the site is relatively small, the choice of a place for a bath is limited by the convenience of its location for the owners themselves and the observance of fire and sanitary gaps between buildings.

Figure 1. Schemes of connecting bars.
The dimensions of the building can be derived from the calculation of approximately 3-4 square meters. m. total area per visitor baths. If there are plans to receive a large number of guests who will be there at the same time, then it is worth building a bath of at least 15 square meters. m. For the personal needs of a small family will be quite sufficient wooden bath area of 6-9 square meters.
The exit is best located on the south side of the building, so that in the spring, at the entrance, the snow could first melt and dry the ground or the ground. The distance to natural water bodies should not be less than 15-30 m, so that there is no danger of flooding the bath.
What is needed for building a bath?
It will take quite a lot of materials, because you have to build a full-fledged building of the bath with your own hands from the foundation to the roof:
- cement, sand and crushed stone for foundation;
- roofing felt for waterproofing;
- floor board: cut, softwood, 150x50 mm;
- board or lining for the ceiling, at least 2 cm thick;
- timber, rounded log or round timber for the walls of the bath;
- mineral wool;
- asbestos sheets;
- timber; board for roof truss system;
- roofing materials.

Laying scheme for timber.
In addition to building material, tools are also required:
- shovel;
- ax;
- electric or gasoline saw, circular saw;
- hammer;
- fastener: nails, staples, etc.;
- measuring tool, plumb and level construction.
How to build a foundation for a bath?
The choice of the type of foundation depends entirely on the nature of the soil on the site for construction and the size of the building. For a small bathhouse, it will be sufficient to erect a columnar or pile-screw foundation. To fill the pillars, they dig up or drill holes up to 1.5 m in depth. A cushion of sand is poured at the bottom of them and an asbestos-cement pipe is placed in each well, into which a solution of 1 part of cement, 3 parts of sand and 4 parts of rubble is poured. Above the surface of the soil such pipes should rise to 0.5 m. The pillars can be laid out of brick or rubble.
For a more massive construction, a strip foundation is suitable, for which a perimeter of a future bath is being dug trenches up to 1.5 m deep and slightly wider than the thickness of the building’s walls. At the bottom lay out a sand cushion up to 20 cm thick, ram and pour the solution to the level of the soil. For the formation of the basement, formwork is built from boards of the required height and filled with the same solution for the foundation (1: 3: 4). Under the washing room and the steam room you can pour the slab foundation by pre-planning the holes for water flow.
In any case, when planning, it should be taken into account that the bath stove must be on a specially-flooded foundation specially for it.

Layout of rafters for overlapping the roof of the bath.
It is marked in a suitable place for the furnace, taking into account the desired placement in the room, and is built according to the general rules for all foundations:
- depth - below the level of soil freezing;
- the dimensions are slightly larger than the dimensions of the kiln itself;
- the composition of the mortar: 1: 3: 4 parts of cement, sand and rubble, respectively.
After removing the upper part of the foundation below the level, to ensure a strictly horizontal plane on the concrete base, a waterproofing layer of 1-2 layers of roofing material is arranged. After that, you can proceed to the construction of the walls of the bath.
How to build a bathhouse?
You can build the walls of a bath from a bar or round wood. The technology of building walls of these materials has its own characteristics, so we consider them separately from each other.
A log house with a bar with your own hands
The first crown of a log house should be soaked from the underside with used engine oil or any means to protect the wood from rotting (antiseptic). After that, the bars are laid on the prepared foundation, as shown in fig. 1. Between the elements of the wall fasten steel brackets. The principle of laying the following rims is clear from the same pattern: during construction, the dressing of rows in the corners of the building and in the joints of the bars is observed, if the length of the wall exceeds the length of the material. It is possible to connect the crowns with each other with the help of staples or wooden dowels (pins). For the latter, half-depth holes are drilled. In neighboring crowns, the holes and dowels are positioned so that they are not on top of each other. The pitch between fasteners should be approximately 60 cm.
Roundwood frame

Figure 4. Layouts of the furnace and partitions.
If you chose a rounded log or round timber for building the walls of the bath, proceed differently:
- The log house is cut into the bowl by stepping back from the edge of the log 30-40 cm and taking out part of the wood so that the width of the notch was equal to the diameter of the log intended for laying in it. The depth of the notch is half the diameter. The entire length of the logs makes a shallow recess so that the neighboring crowns adjoin each other as closely as possible. Crowns fasten dowels or staples.
- The “paw” method consists in forming a joint at the very edge of the log. For the simplest connection, the ends of the logs are cut off to form a parallelepiped with a length of 1-1.5 diameters of a joined log, with a width and height of approximately 0.75 diameters of the log, which is processed. To form a dovetail spike, it is additionally narrowed to the body of the log and to the outer corner of the building. Fastening between the crowns are pins or staples.
How to cover the roof and insulate the ceiling?
In the upper crown of the walls on 2 opposite sides of the building, they are made to cut the ceiling beams as shown in the diagram. After mounting the beams go to the construction of the roof.
A 1-pitched or 2-pitched roof is suitable for a bath:
- When a 1-pitched roof is built, sections of a log or bar are reinforced on its raised edge so that the slope of the roof was sufficient for the runoff of water falling on the roof during rain and snow melting. Rafters strengthen one end on the vertical racks, the other is based on the upper crown of the opposite wall. The distance between the rafters should be 50-70 cm. After the trussing system is installed, the sheathing is made from unedged board. A vapor barrier material and a roof covering are attached to the batten. The material for the roof can serve as slate, metal profiles, ondulin and others.
- The gable roof is more complicated to install and requires the creation of roof trusses: timber structures, resembling the letter “A”. They are collected from a 10x10 cm bar on the ground, after which they are raised and strengthened in increments of 50-70 cm. It is desirable to combine the top points of all the farms with the help of a common ridge bar. Then, sheathing, vapor barrier and roofing material are laid.
A ceiling board or wall paneling is attached to the ceiling beams from inside the room, steam and moisture insulating materials are spread on the side of the attic, a layer of mineral wool is placed to prevent heat leakage and another layer of vapor barrier. Additionally, you can fill the attic area with a layer of expanded clay or slag.
The gables and lateral open parts of the 1-pitched roof are sewn up with clapboard or edged board.
After the roof of the bath is covered, the floor is laid inside it, window and door openings are made, the furnace is installed and interior decoration is carried out: the walls are sheathed with clapboard, shelves are arranged. The length of the shelf for lying should be about 1.9 m, width - not less than a meter. Shelves for seating make a width of about 40 cm, and their length is dictated by the size of the bath and the desires of the owners. Partitions inside the bath make the boards. Variants of placement of the furnace and partitions are shown in fig. 4.
When the furnace is located near one of the walls, the wooden surface must be sheathed with sheets of asbestos, and a sheet of metal should be fixed on the floor in front of the furnace to prevent the wood from burning if it overheats or hits burning coal. Compliance with fire regulations will make rest in the bath safe and for many years will provide a pleasant pastime for the owners and guests of the house.
Didn't find the answer in the article? More information on the topic:
-

How to install rafters for the bath
How to install rafters for a bath, the choice of roof configuration, design and installation of truss system.Processing of a rafter bar by means of biological and fire-resistant protection.
-

How beautiful it is to decorate the table with your own hands
How to decorate a table with your own hands? The technology of decoupage the table involves the preparatory work - a thorough surface treatment by thoroughly cleaning it, removing dust.
Search
Related Articles
Rococo style in the interior - the rules of design and photo ideas embodiment

The Rococo style in the interior appeared in the middle of the 18th century as a natural continuation of the development of the Baroque style. In the Rococo style, interiors of the palace premises w...
Which brick to choose for laying the furnace and what types of bricks for this use
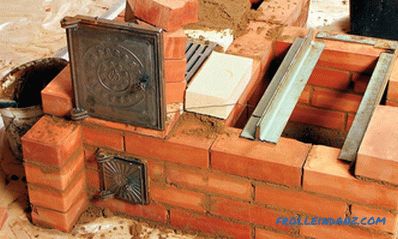
Ceramic bricks are widely used for the construction of heating furnaces in individual residential buildings. The construction industry produces a wide range of bricks for the furnace masonry, but wh...
Floorboard how to choose and on what criteria to rely + Video
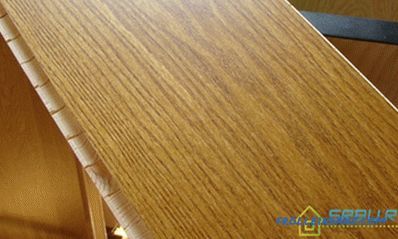
It would seem that the floorboard is not difficult to pick up. It is enough to love the material and the pattern, and the trick is in the hat. But no - it turns out, you need a little bit, but to un...
What is a carriage in construction: the use of Norwegian technology
Today, the construction of houses from a carriage, which is a two-sided timber, is becoming popular: ideally processed pine logs with a diameter of 330-350 mm, from which walls and internal partiti...