No matter how much they talk about current trends in furniture production, and no matter how many different modern materials are used in this process, solid wood furniture will never be an alternative. Whether such a close relationship between a man and a tree exists, or some other mystery, not told to us by the ancient druids, this material has, but the fact remains - wooden furniture attracts a person.
For the manufacture of the chair, it is recommended to use such wood species: oak, pine or beech.
Every man from an early age tried to make something from this material. But few of us, modern men, tried to make something worthwhile out of wood. Why not catch up? It’s not so difficult to make simple country-house furniture out of wood with your own hands. Complicated things are better not to start designing, since lack of experience will not allow creating something elegant. It is better to try to make a chair first.
Necessary tools and materials
Not sure how to make a chair? There would be a desire and the necessary tools and materials. And to be precise, for this you will need:

Tools for making wooden chair.
- pieces of wooden edged boards;
- wooden bars (4 pieces) with a section of 50 x 50 mm;
- hacksaw;
- square ;
- construction level;
- planer (any can be done);
- kiyanka;
- chisel;
- drill;
- emery paper;
- stain (it is better to take a tinting impregnation);
- a colorless matt varnish.
Workflow
To begin with, the boards will have to be trimmed and give the side part a certain profiling for tight connection of the elements. The thickness of the boards should be after processing about 20 mm. We combine them into a single shield in any way you know. Ideally, they will be "landing" on glue with subsequent compression in the clamp.

The construction of a simple wooden chair.
Such a billet should dry for at least 48 hours. Currently, this method of connection, few people use. More often across the boards at a distance of 8 cm from the end of the boards make two parallel cuts to a depth equal to half the thickness of the board. The distance between the cuts should be about 2 cm. All wood between the cuts is removed with a chisel. In the recess to be pressed into the wooden bar, which should protrude above the level of the boards at 3 cm.
The whole procedure is to be done on the other side of the chair. It makes no sense to recommend the width between the pressed planks, since everything will depend on the size of the chair itself (table top). For strength, many craftsmen recommend fixing the upper part on the bars with fine-pitch screws. This can be done if the chair is trimmed with a veneer (or otherwise) that will hide the heads of the screws. In other cases, additional fasteners are installed from the side of the bar. But with this option to produce the specified fasteners should be the last.
Designing and manufacturing of legs
The most beautiful part of a wooden chair is its legs (for good reason, clumsy chairs are called coiled legs). Make the chair an unusual work of art will help the imagination and artistic taste of the artist. For this reason, you need to think about the design of the legs. If you have a wood lathe available (or access to such a machine), then the wood for the legs can be very elegantly ground. It turns out not just beautiful, but also exclusive.

Scheme of assembly of the chair.
The same applies to carved legs. By the way, make them even easier than on a lathe. It is enough only to think over the design, cut a pattern from a dense cardboard and cut four legs from the boards using a jigsaw. Well, if there is no desire, no time to engage in such creativity, then we will return to making the classic version of the legs. For their production, it is necessary to measure a distance of 20 cm from the edge on wooden blanks. From the resulting mark of the workpiece, you need to grind off two adjacent planes in such a way as to reduce the thickness to the end by 5 mm. We cut the blanks by the same distance from the back side so that their length equals the desired height of the chair.
The order of fastening the blanks
We assume that you have done all the blanks correctly. Now from all this you need to make a chair in its final version. First you need to connect the legs together and prepare their profiling to connect with the upper part of the chair. We also choose classic connections: with the help of wooden slats. To do this, you need to drill all wooden blanks at a distance of about 35 cm from the bottom edge. We take two wooden bars with a length of 35 cm and round the two edges of this bar.As a result, you should have a wooden billet that has cylindrical endings 5 cm long.
Seat seating fastening scheme.
The diameter of these endings must be equal to the diameter of the holes in the blanks for the legs. You guessed it, that a pair of legs should be worn on the end. When planting the legs, use a mallet. You can use the hammer, but the blows should be applied through a wooden plank so as not to damage the wood on the product. If a part of the transverse billets sticks out a little above the plane of the leg, then this disadvantage must be removed (in other words, cut with a hacksaw).
Chairs made of wood should be reliable, so the connection points must be wedged. To do this, we split the cylindrical part of the interposer with a chisel and drive wedges made of dry oak into the resulting hole. Hold such fasteners will be no worse than any nails. As a result of all the actions you should have two H-shaped structures. Now they have to be interconnected into a single case.

For cutting parts for a chair, use an electric jigsaw.
Follow the same procedure, only make holes for fasteners at least 5 cm higher (or lower) from the existing fasteners. The chair body should be stable (all legs should be on the floor surface). Perhaps you have to cut one of the legs. There is no need to hurry here, as a rule, “measure seven times - cut once” nobody has yet canceled. When the design is ready, you can already attach it to the table top.
Wooden chairs are made in this case to be connected to wooden studs, but such fasteners are not the most reliable. It will be much safer if the entire chair made of wood has the connections that you have chosen to fasten the legs together.
Final processing of the product
The whole procedure can be repeated with the bars that you have prepared for the table top. Planting the bars on the frame of the chair and fixing the table top on them is not the final part of the whole work. There is still to clean the entire tabletop with sandpaper, carefully process all its edges and carry out finishing procedures.
In practice, it is more often used for this staining followed by varnishing. So the tree will look very beautiful. But the impregnation with the effect of coloring gives an even greater effect: the tree will not be subject to damage and will acquire a richer shade. Give the impregnated product to dry, and it can be varnished (2-3 layers).
Veneering the surface of the tabletop will allow you to hide all the flaws, so you cannot categorically refuse it.
If there is a veneer available, it is still recommended to try yourself in this craft before finishing work, although veneering is not an obligatory type of work.
As you can see, making a chair out of wood is not so difficult. And having gained experience, you can make other, more complex and more beautiful things. It may not be as easy as making a chair, but you will definitely get pleasure from the results of your work.
Didn't find the answer in the article? More information on the topic:
Search
Related Articles
load, section and spacing between beams
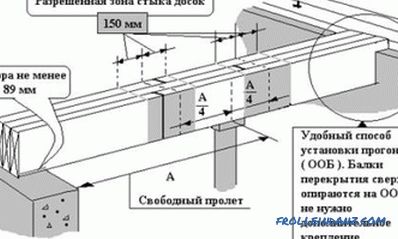
Before constructing a durable and reliable hardwood floor, a number of calculations must be performed to determine the parameters of the structure. The main purpose of the calculation is to calcula...
How to choose a drilling machine - comparison of drilling machines
Thanks to modern technology, it’s not difficult to drill a hole in a metal or wood. Drill with a suitable drill is suitable for most household tasks. Indeed, at home, a similar power tool is often u...
Adjustable floors on logs with their own hands
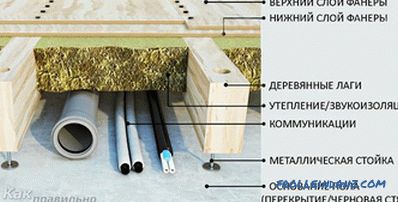
As one of the possible options for arranging rough flooring today, quite often, specific designs, called adjustable floors, are chosen. Arrangement of such structures involves the use of a lag syste...
How to make lighting the facade of the house

Facade lighting emphasizes the architecture and design of the house, highlights the individual elements. In this article, you will learn the difference between the types of lighting and how to make...
How to make a home from OSB do it yourself
How to make an OSB house with your own hands, without losing in quality and saving money? After all, with the same area, the cost of construction depending on the materials used can vary greatly. An...