Starting the construction of your own garage, you need to take care of waterproofing floors. Many people try to save on something. But this is not the case, and over time you will be able to verify this. This is due to increased humidity due to temperature fluctuations and groundwater levels. And moisture, as you understand, negatively affects the metal parts of your car. Therefore, it is better to invest once in waterproofing floors at the beginning of construction, than to constantly incur expensive expenses on car repairs. Especially since you only have to spend money on materials, and you can do the work yourself. Waterproofing the floor of the garage with your own hands is a simple matter and every person can do it.
Waterproofing nuances
 Waterproofing before concreting
Waterproofing protects the foundation and walls of the garage from moisture penetration. At any size of the foundation, waterproofing is placed above the ground by 25 cm. This distance is enough not to let the moisture inside the garage. A large percentage in the success of waterproofing play materials selected for the construction of the garage.
Before construction, take care of the soil on which the construction will be carried out. It must be well compacted and covered with sand. This will save the floor from sinking under the weight of concrete slabs and the weight of the car. Geotextiles and a waterproofing membrane are laid on the sand. This is discussed in detail below. For the construction of walls is better not to use foam blocks and aerocrete. Silicate brick is also not the best option for construction. All these materials absorb moisture and collapse. The best option for your walls will be concrete, and for waterproofing the floor - materials based on bitumen. Their term of service is from 10 to 15 years. But if you decide to perform waterproofing once and for all, apply polymeric materials.
 Self-Adhesive Membrane Waterproofing
But the membrane for insulation alone is unlikely to work. It requires experience and special equipment. For this work, it is better to invite people who specialize in doing this kind of work. But make sure that the material from which the membrane is made has a thickness of at least 2 mm. All very thin materials for membranes are not suitable for good floor waterproofing.
More information about waterproofing
 Bitumen mastic
So, your decision is not to save on waterproofing takes effect, and you proceed to work. Depending on the type of garage, waterproofing is of two types: vertical and horizontal. This is due to the presence of a basement, or its absence. Let's take a look at each view separately.
Horizontal waterproofing
 Liquid waterproofing
This type of insulation is performed in a garage without basement room. In the finished garage, this process is performed using ruberoid. Cover the finished concrete floor with hot bitumen and stick two layers of roofing material on it. Each layer must be separately smeared with bitumen. Over the entire area of the garage, you make a mesh of reinforcement and place it on the roofing felt, placing the linings so that the mesh does not lay on the waterproofing. Now fill this framework with a concrete solution 15 cm thick, compact it with a vibrator or a stick and let it harden.
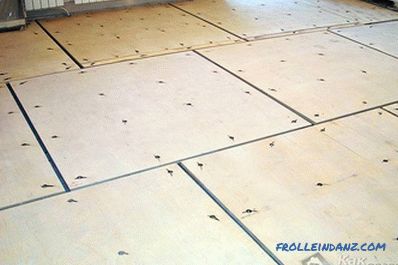
Starting waterproofing in a garage that is not yet built, start by compacting the ground at the site of the future construction. Pour a 10 cm thick sand cushion on top of the ground, and again you can ram well. Next comes the main work. On the sand lay geotextile canvas. From above a cloth you lay a heater. And finally, the last layer again covered with a geotextile canvas. So you made a layer cake. At the last stage, you fill the floors with concrete, having previously laid a grid of reinforcement. The thickness of the concrete must be at least 15 cm.
To protect the lower part of the wall from moisture, glue the roofing material with hot bitumen at the junction of the wall with the foundation. Roofing material is glued in two layers around the perimeter of the garage. The main thing is to have insulation higher than ground level.
Vertical waterproofing
 Internal waterproofing of the inspection well
 Exterior waterproofing of the viewing well
In the garage with a basement, it is also necessary to carry out vertical waterproofing. It will prevent groundwater from entering the basement. For this purpose, dig a trench around the garage to the bottom of the foundation. Clean the walls of dirt and apply cement plaster from the bottom of the foundation to the top of the outer walls of the garage. It should be connected to the upper waterproofing of the walls and pre-laid insulation for the foundation. After drying the solution, the entire plaster is treated with hot mastic.
The next job is in the basement of the garage.On a concrete floor, make a 10 cm thick screed and level the entire surface. With hot bitumen, you glue two layers of roofing material so that its edges are glued together with the insulation previously laid under the foundation. Thus, you have a basement in the form of an isolated container into which moisture and groundwater will not seep anywhere. For additional disposal of the basement of moisture, you can install ventilation.
 Garage after repair
In this article we looked at how to properly waterproof the floor her ways. A conscientious job will save your garage from destruction, and the car will always be in a dry room.
Video
Learn about new material that can reliably seal the inspection pit and garage foundation:
Search
Related Articles
Laying laminate do it yourself - how to lay
Today the most attractive type of flooring is laminate. And the price of this material is affordable, and the appearance is attractive, and you can lay it yourself. Yes, and performance in many ways...
wood selection (photos and videos)
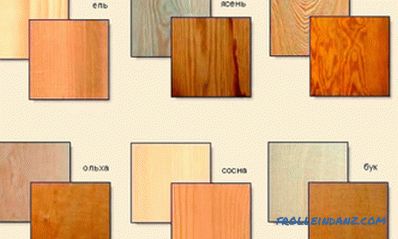
Beautiful and stylish furniture made of natural wood has always been considered the best option for any interior. It has not only an attractive appearance, but also comfort, warmth. Today, it is po...
What are the best poles for the fence
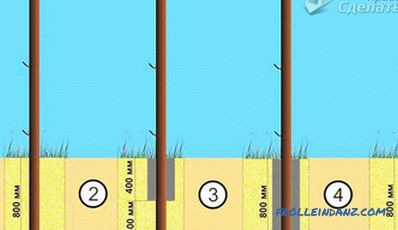
All elements of the fence must be distinguished by durability, resistance to significant climatic loads and to possible mechanical damage. In the article we will understand from what material to cho...
Monolithic polycarbonate properties, uses and specifications
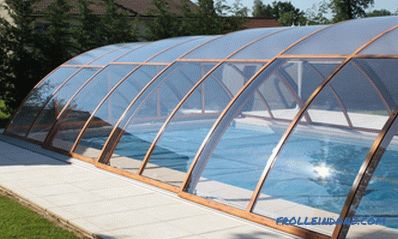
In modern construction, transparent materials are widely used, often completely forming the appearance of buildings. Along with the usual glass, monolithic polycarbonate properties have become wide...
blanks and installation (photo and video)
Who will deny that not only the theater, but also any apartment starts with a hanger? It is difficult to find a more demanded element of the interior than a hanger. In response to high demand, desi...