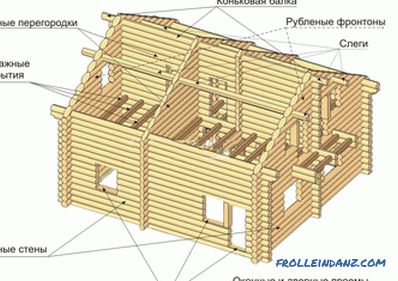
For a long time in Russia the main material for building houses was wood. The most interesting is that such buildings are still preserved. Despite the fact that today there are different technologies and materials for the construction of houses, they still could not press the tree. There are many reasons for this. The tree is a "living", natural and environmentally friendly material, created by nature itself. Wood has high heat-saving properties and is able to accumulate and release moisture, so living in such a house is much more comfortable, and breathing is much more pleasant.
One of the important advantages is the economic factor, since the construction of such a house can be cheaper than brick or stone. The fact is that finishing work for such a house is not needed, it is enough just to polish the tree, which has a nice color and appearance. Moreover, if you compare a wooden house with a similar house of stone or brick, it will be much easier. In this case, you can save on the foundation device. In the end, such a house looks very beautiful. Based on the foregoing, let's consider how you can make a house out of a log with your own hands.
Rounded or planed log?

 Types of processing logs If you want to build a wooden house , you should know that there are 3 types of wood processing, which is now used in construction:
- construction from natural logs;
- construction from rounded or profiled logs;
- construction from simple, profiled or glued timber.
Generally houses are built from natural or rounded logs. The first option is a regular chopped tree, which is cut off manually, freed from the bark. In this case, the customized size of the tree and make the grooves have to manually. But due to the fact that the upper layers of wood were not affected, the design is reliable, resistant to moisture, mold and fungus.
Procurement of material by hand is a difficult and time-consuming task, since the logs have a different diameter, and the design must be smooth and durable. That is why log houses are considered elite. After all, services for the construction of such structures are much more expensive.
The disadvantage of this technology is that after the construction of the house, it must stand for 1-1.5 years in order to dry. During this time, the building should shrink. It is possible to install windows, doors, carry out communications only after shrinkage.
 Peeled log house
This was the method our grandfathers and great-grandfathers used. But modern technologies allow to avoid all these inconveniences. Purchased logs can be processed in industrial conditions with the help of special machines. As a result, logs of ideal cylindrical shape, length, and also, according to the project, all grooves and connections are made, are obtained. Everything is done to the millimeter. In this case, it is much easier to build your own house, it is enough to fold it as a designer for the drawings and instructions. Such logs are called rounded, they are more convenient to use.
The only downside is that when processing a log, the upper layer was lost due to which it was protected from external factors. Therefore, before work, such logs must be covered with a special antiseptic, antifungal and anti-rotten remedy. But despite this, his advantages are obvious:
- Simplicity in work.
- Thanks to the machining, all the trunks are perfectly even and grooves are made in them.
- Based on your project, the logs are fitted. You are only required to fill the foundation and build the house.
 A house made of logs
If you plan to build your house yourself, it is much easier and it is more efficient to use rounded log. Let's look at how you can turn your plans into reality.
Where to start?
 Project of a wooden house
The first thing you you need to do - the project of the future home. Here you have two ways: do it yourself or resort to the help of specialists. If your knowledge of design is not very deep, it is better not to try to conduct experiments. Errors in the design can cost you dearly, and what's worse, such a dwelling may be uninhabitable. What to do in this case?
A lot of ready-made room designs can be found in the “world wide web”. Some of them can be obtained free of charge, others are available only for money. If you are not sure about the reliability of such sources, you can turn to specialized companies that will think through the details of your home project.
Next you need to choose from which tree the house will be built. These are mainly such species: pine, spruce, larch, cedar, aspen, oak and ash.Often for such purposes they use wood from coniferous species, since their trunks are fairly smooth, and the wood itself is easily processed. Moreover, pine and spruce can be purchased at an affordable price. And thanks to the resin, which is impregnated with wood, provides moisture resistance and a pleasant smell.
It is better to purchase logs in the winter, since then moisture resistance is highest.
After that, you need to order a cut of wood for a finished project in a company that provides such services. After discussing all the issues, a whole set of logs for your house, floor beams, rafters and logs will be made at the factory. To make sure that everything is done as it should, the house is first collected at the factory for the first time. After verification, it is disassembled and delivered to you.
Now your participation is required. You inspect a set of wood for quality and prepare the place where you will store the material for future work.
To prevent the tree from getting wet when it rains, the storage area should be equipped with a canopy.
This completes all the preparatory work, you can proceed to the next step.
We lay the foundation for the future house
 Types of foundation for a wooden house
None for whom it is no secret that the foundation for any construction is the foundation. It is thanks to him that the whole building will stand securely for many years. How exactly your foundation will be depends on the height of the building and its size. Since wood is a relatively light material, it is not necessary to deepen the foundation by 2 m and make it massive. This is one of the advantages of wood over brick. The foundation device can be diverse, but the main thing to remember is to do it according to all standards of reliability and durability. To make the foundation, you can use several options that are suitable for a wooden house:
- finely recessed strip foundation;
- pile foundation;
- slab foundation.
Basically, a strip foundation is selected for the foundation. But the pile foundation is also often used. And if the soil on the site is wet and loose, then resort to the manufacture of slab foundation. To choose the right foundation, you first need to analyze the ground.
 The strip foundation for a wooden house
For example, you chose a strip foundation. Due to its design, it is quite reliable, as it repeats all the contours of the building: the load-bearing walls and the walls between them. To do all the work, you need:
- Mark the plot according to the project of the house, transfer it from paper to ground. To do this, you need to hammer the stakes in the corners of the building and in places where there will be walls, and stretch a rope between them. Thus, you will make for yourself a guideline for further work.
- Dig a trench based on the intended guide.
- Make formwork for pouring concrete. It can be both from plywood, so from simple boards. The main thing is to do everything without gaps, holes and securely fasten it so that the concrete does not overwhelm the concrete with its weight.
- In the trench, a pillow should be made of fine gravel, stones or sand. Recommended pillow height 50 mm. It is necessary to tamp it well.
- If the load on the foundation is large, then you can make a skeleton of reinforcement.
- Directly pour the foundation with concrete. It is important that the pouring takes place quickly and in several layers throughout the foundation. If you make only separate vertical sections or partially fill the concrete, there is a chance that in those places the concrete may crack.
- Expel air from concrete with a deep vibrator.
- Level the surface and leave to dry for a month.
After pouring, it is important to carefully check the surface at a hydraulic level so that it is level. The difference can be up to 10 mm. If it is more, those places need to be leveled with mortar or waterproofing. After all the work, the concrete will dry out in a week, but it is necessary to continue the work in a month, when it is fully strengthened.
As practice shows, if you live in a climate with severe winters, where the snow can stand knee-deep, the building's base should be high, about 500 mm. If it is made smaller, the first two crowns or logs, which at the base, will constantly be under the snow, which will negatively affect their properties and future suitability.
Construction of the walls of the future dwelling

Now you have moved to the main type of work - the construction of walls and the formation of the frame of the future house. But before laying the first crown, it is important to ensure good waterproofing of the material, especially when it comes to wood. As if just putting the first mortgage log directly on the foundation, it will quickly become worthless. Therefore, the first thing you need to smear the concrete with molten bitumen.After that, 2-3 layers of waterproofing (roofing material or waterproofing) should be laid on the foundation. Then you need to put the laying board. It is better to choose linden timber with a thickness of 50-100 mm and a width of at least 150 mm. After that, another 1 layer of waterproofing is placed on the board so that it extends beyond the edge of the foundation by 250 mm on each side. Due to this, the first stowing log will be protected from moisture and will serve you for many years.
Now, you can safely proceed to the assembly of walls of rounded logs.
- First of all, it is necessary to install two embedments of the crown. They are installed in parallel on two opposite sides of the foundation. It is important to carefully check whether they are flat.
-
 Fixing with a stapler insulation On all the logs that will be stacked on top of each other, you need to fix the insulation. This will require a construction stapler and insulation (tow, jute canvas or moss). Laying insulation should be in the grooves and notches of the log bowl. To do this, you can use a canvas that corresponds to the width of the groove or slightly larger so that the insulation hangs down by 50 mm. Spread insulation along the length and fix it with a stapler.
 - On the transverse sides, you need to install the following two logs, which will be based on the fixed rim. Then the bowls will gently connect, forming a secure connection. After that, you need to check the angle between the logs and the horizontal surface.
- The remaining logs are set in the same way. We can recall how in childhood we built a house from a designer or from matches. The principle is the same, only on a larger scale and you need to act according to the instructions.
- To make the house even stronger, in addition to grooves and bowls, technologies offer fastening the logs together with each other. To do this, you need to drill a hole in the log that is more than one log deep. Nagel is hammered into it.
- The last two crowns should not be fixed to ensure proper shrinkage.
 We hammer the dowel into the log
All logs must be treated with an antiseptic to they did not rot in the first winter.
During the construction of the walls, it is important to constantly check whether the installation is done correctly. It is important to ensure the horizontalness of the logs and strict vertical log house. Since there are holes in your house for door and window openings, you need to carefully lay the short logs, carefully securing them.
That's all, now you can see the result of your work - the house is almost ready. But note that it will not be possible to do everything yourself. Logs must be raised to a certain height. Therefore, ask for help from relatives, friends or neighbors.
Roof over head
 The rafter system of a wooden house
You should know that log walls should not be left uncovered, so do not hesitate to install the roof. Floor beams and rafters should be included with your home. It is possible to install rafters both directly on the upper logs and on the laid mauerlat (special timber for rafters).
If there is a veranda in the project, then a special shrinkage compensator should be inserted into the vertical log supporting the structure. After all, logs laid horizontally will shrink and dry, and logs laid vertically will not. Therefore, to avoid skewing the house, each vertical log should be equipped with a compensator.
 The shrinkage compensator for a log house
The ridge logs must be joined with metal pins. Rafters must be installed in 600 mm increments. For this, a wooden bar of 50 * 200 mm is used. To the last log of laying trusses need to be fixed on the sliding supports. After that a waterproofing film is laid on the rafters. Depending on the roofing material, lath is fastened. And in the end the roofing material chosen by you is laid.
 Ready-made roofing made of natural tile
If you left 50 mm of insulation during masonry that hangs from logs, you need to gently caulk it. To do this, use a special caulker, wrapping the insulation down and pushing it inside the gaps between the logs.
The final stage is the installation of windows, doors, the floor and the installation of the ceiling
 Installation of windows and doors
Although you used rounded logs for construction, which were dried and there was not enough moisture left in them, the house still needs time to shrink. Immediately proceed to the installation of windows and doors can not.
When the house has shrunk, you can make the final touches. Install windows and doors in the right place. Please note that you can not insert them immediately into the opening. First you need to install a casing wooden box with compensatory mount. Only then should doors and windows be installed.Why, you ask? Since the tree has the ability to expand from moisture and dry out in its absence, it can critically affect the windows and doors, they can be deformed and completely destroyed. And thanks to the casing box, the window and the opening become independent.
 A beautiful house made of logs
The construction is completed. Now you know how to build your own wooden house. If you did everything right, your "fabulous" home will serve you for many years. Such natural material has a beneficial effect on health and well-being.
Video
This video shows how to build a house from a rounded log:
Search
Related Articles
Laying a turf do-it-yourself
Every owner of a large area wants to put it in order and give him a minimum of time, while he must always be in good condition. One of these options is the lawn, but for independent sowing and culti...
Folding grill with their own hands (+ photos)
Cooking high-quality kebabs is impossible without special devices made in the form of a brazier and called barbecues by the people. Barbecue grills are particularly popular with meat lovers, as they...
Shelves for flowers do it yourself from wood, chipboard
What kind of housewife wouldn’t want to transform the look of her room with the bright colors of blooming violets, begonias or geraniums? It is aesthetically pleasing, a little refreshing, and gener...
Do-it-yourself log house repair: tools and materials
A wooden house always brings some sense of calm and stability. To have such a home away from the bustle of the city - the highest pleasure. But let's not talk here about the beauty of nature and ex...
Do-it-yourself facade repair - repairing the facade
Periodic renewal of the facades of suburban buildings (at least once every 25 years) aims to replace worn out and degraded finishing elements with new ones. Making repairs to the facade with your ow...