A wooden house always brings some sense of calm and stability. To have such a home away from the bustle of the city - the highest pleasure. But let's not talk here about the beauty of nature and excellent rest. Let's leave all the lyrical moments to the poets and writers and look at the log house purely from a practical point of view. He, like any structure, requires careful maintenance, proper repair and, possibly, reconstruction. But in this respect, log houses have a huge advantage over the same panel or brick buildings. Yes, and make the entire repair of the old log house can two or three masterovityh people in a short period of time.

Scheme of a wooden frame.
External inspection of the wooden structure
We start with a thorough inspection of the building and making a list of necessary repairs. Do not be afraid that houses made of wood are quickly dilapidated and their repair can result in a very decent amount. Far from it. After all, houses were built with the expectation that it would serve more than one generation of descendants. Everything was done for himself, marriage or hack work during the construction was absolutely not allowed: everything was soundly and thoroughly. The need for repairs in such houses can exist only because of the violation of the integrity of the material. This is what you need to pay attention to when inspecting the building.
Danger of moisture in the attic of

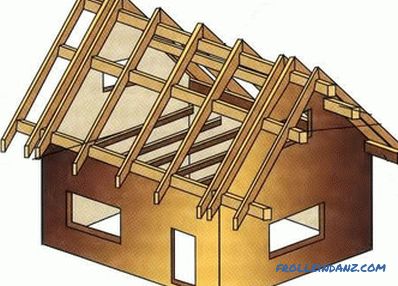
Layout of the roof of a log house.
We start the inspection from the roof of the house. The first thing that shouldn’t make you particularly happy or alert is the humidity of the air. Dry air in the attic of a timbered house indicates that moisture did not get here and the entire roof supporting structure is in perfect order. But it is worth it to err: a visual inspection and rapping of the rafters should confirm your hopes. As a rule, wooden structures in the attic of the house should have almost the appearance of fresh sawn timber. There is no direct sunlight here, so wood has such an appearance. Humid air in the attic always indicates that moisture gets here.
Finding a "weak" place is not difficult: you will be prompted by its darkened rafters, lathing, insulation, or a fungus that has appeared. If the fungus is present, then you have to reconstruct the entire roof and replace (possibly) part of the ceiling. This procedure is not simple, but it cannot be ignored, since such a house will last only a couple of years.
The log house and its walls
Tools required for work: hammer, building level, chisels, jacks, stepladder.
Next we inspect the walls. Strong log logs have a long sound when struck. Dilapidated do not sound at all. Yes, and without knocking them, it is easy to notice by the external differences from the general texture of the log house. Most often dilapidated walls in places of contact of the log house with the foundation or under the window openings. They are something to be replaced. For all the proposed works you will need the following tools and materials:
- lumber and round timber;
- chainsaw;
- ax;
- brackets;
- jacks;
- cement, rubble and sand;
- chisels;
- hammer;
- construction level;
- ruberoid;
- stepladder.
Repair of an old log house should also be started from the roof, if necessary. However, do not rush to firmly secure the slate or other coating. When walls are displaced during the replacement of log wreaths, it is even good if the nails slightly loosely press the slate to the rafters.
The procedure for replacing logs

Seal of cracks in logs.
It is better to start changing the logs in the walls of the house from the bottom of the wall. There are two ways to replace logs. The first method involves disassembling part of the foundation in the place where it is necessary to replace the log. Do not be afraid that the log house "lead" wall. The design of the walls is such that all the logs in it are connected tightly and represent a monolith. Just the load in this case will be for the most part distributed to the rest of the foundation. The foundation to be disassembled is not all: it is enough to reduce its height by a quarter of a brick. Further, the failed log needs to be cut in several places and pulled out.
According to the size of the wall, it is necessary to choose a new log of a suitable diameter and give it an appropriate profiling. Do not forget that the use of fresh wood for construction is not recommended. Under load, it can easily be deformed. Yes, and the moisture content of wood can lead to the fact that very soon a new wall repair will be required.
If there are fresh logs in stock, then after their preparation, drying in a darkened and well-ventilated place is expected. The process is long, so the preparation of the material must be taken care of long before the repair. You can work with dry material almost immediately.It is not always possible to fit a log into the wall at the first attempt. Arm yourself with patience and attention: a new log in the wall should ideally lie down, without holes and bulges. And only after that you can begin to restore the foundation.
Repair of the foundation of a wooden house

Types of a columnar foundation for a wooden house.
We make brick laying in the usual way with an ordinary mortar. Do not forget that between the foundation and the log house should be a reliable layer of waterproofing. For these purposes, the usual ruberoid (3-4 layers) is used. Repair does not end there. You still need to caulk the seam in the place of the wall where the log was replaced.
The described method of repairing the foundation is simple, but not the most optimal. The disadvantage is that after a short period of time between the foundation and the wall, a small gap may appear, which is already undesirable, since cold and moisture will get into the house. Therefore, it is necessary to consider another way to replace the log in the lower part of the log walls. In this case, jacks will be used to repair the house with their own hands.
The jacks are located at a distance of about a meter from the corner of the house. If the length of the house is very large, then we use more jacks. They must have a reliable support and be placed vertically, otherwise at the most inopportune moment a heavy house will simply squeeze them out from under itself. We raise the house to a height of 1 to 5 cm. Log houses, even old log houses, are ready to withstand a greater rise, but you do not need such extreme sports. Well, then, again, we prepare the necessary log, put it in the right position (for waterproofing) and lower the house.
The severity of the whole structure will not allow gaps to appear, and the house is guaranteed to be warm and dry. Do not forget only to cut the seams of the walls. By the way, dry moss is recommended for this. No wonder that only this material has always been used in the walls of log houses.
Window and door openings
The wall of a log house may have leaky portions of a log house near window or door openings. Here repair can be carried out much easier. It is enough to calculate the size of future windows and make window openings for them, removing the weak parts.
The frame must be preserved in integrity, therefore, when cutting a window opening, you can use metal clips.

Replacing the rims of the log house.
After installing the windows, these brackets should simply be removed.
After replacing the logs (or even a few wreaths), the wall will look somewhat ambiguous, so you will need an appropriate finish to the outside. This is especially important if carried out a more detailed reconstruction. Different materials can be used for home decoration. It is believed that the wooden lining for this is best suited. It makes no sense to insist, since each person can ennoble his own felling according to his personal desire and taste. But more tightly fasten the slate on the roof of the house you will definitely: after the repair described earlier, all fasteners may not be very connected at the joints.
Final repair work
Any repair of the walls and any reconstruction of houses should end with the finishing and insulation of the foundation and the formation of a good blind area. Near the foundations of houses, a layer of earth is removed to a depth of about 10 cm and at least 30 cm wide, and the resulting trench is poured with concrete. It is impossible to say that this is the most important stage of reconstruction, but you should not forget about it either. Such a measure greatly enhances the foundation, protects it from rapid freezing and can resist moisture.
For log houses this is very important. A wall that is not exposed to excessive moisture will last much longer. Such concrete pouring near the foundation is destroyed by moisture, so you should take care that rainwater or melt water from the roof is diverted from the foundation. But the casting itself is subjected to fermentation: on wet concrete we apply dry cement with a brush. Durability will be guaranteed.
It is clear that the reconstruction of the outer part of the houses has never done without redecorating inside the room. But this process can be carried out slowly at any time. The main thing is that during the reconstruction you received a reliable log house, and the house was warm and cozy.
Didn't find the answer in the article? More information on the topic:
-

How to arrange a block house angles
Block house: you can arrange corners in several ways. The use of additional bars and wooden corners. Methods of joining panels using zapilivaniya. Photos and installation tips.
-

Balcony interior decoration block house
Decorating the walls of the balcony block house. Features of the material for cladding.Methods of fastening panels and used for lining fasteners.
Search
Related Articles
What bimetallic radiators are better
Bimetallic radiators - they are installed without problems, they give plenty of heat, and they can boast of a beautiful design. The stores sell bimetallic radiators of different design and technical...
Laying wooden floor technology with lags (video)
With a large number of modern, beautiful and resistant materials, of which floors are currently being constructed, the demand for wooden floors does not disappear, but at least remains at the same...
The device and the principle of operation of the air conditioner
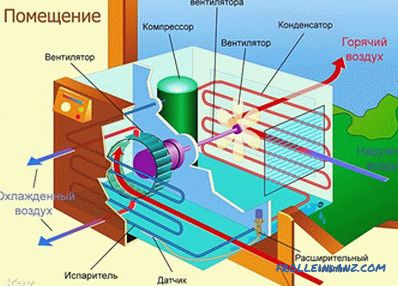
The design and operation of various air conditioners are similar. These systems have a common structure and purpose. The difference between them lies only in the location of the system in the house...
Silicate brick - the pros and cons of building material + Video
Of the widely used building materials (excluding polymers), silicate brick is one of the youngest. Its technology was developed in the late 19th century, but mass production and use began in the mid...
Hanging rafters do it yourself (photo)
The main bearing roofing elements are laminated or hanging rafters. The total weight of the entire load on the roofing system allows you to divide them into types of permanent and temporary (short-...