Wood flooring has always been considered good. Even despite the lack of resistance to damp and strong mechanical stress, they always remained the most popular and comfortable. The main advantages of such floors are their environmental friendliness, relative ease of installation, the ability to repair and change color and texture if necessary.
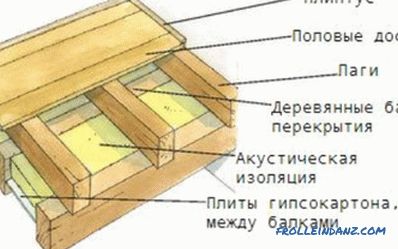
Floor installation scheme by lags.
To date, there are several options for the construction of wooden floors by logs. They all have their own installation features, but the basic techniques remain the same. From which scheme a particular type of floor belongs to the logs, the lag design, the functional features of the base coat, the presence of heat insulation and other things depend.
As a rule, each type of room and material level of the owners corresponds to its own type of floors. Therefore, we consider in more detail all the options.
Definition of the need for a subfield
So, it is common to divide all types of floors into lags into two main groups: into floors with and without a subfield.
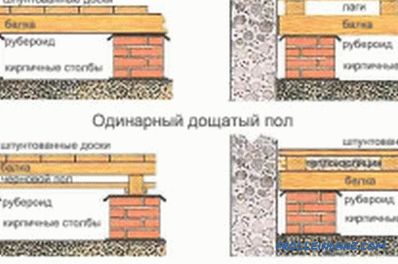
Variants of the plank floor.
In this case, the absence of a subfield, although it presupposes the coldness of the coating, it can be insulated in other ways. The necessity of having a subfield may not be justified in all cases.
The main indicator is the level of groundwater. Naturally, this applies only to the first floors of the premises. Consequently, all rooms that are above the ground floor can freely do without the installation of a subfloor. And if the room is on the first floor, then there are already two options.
Option One - when a subfield device is a must. This is necessary when the water table is rather high. Then you must first build brick columns of a certain height, concrete the space between them, put rough logs, and only then start directly on finishing the finishing floor option.
The second option is when the groundwater level is low. In this case, there is no need to do the coating with columns and a thick layer of concrete. It is advisable to only slightly cement the floor, put the rough lags and above them a clean floor. This will be quite enough if from time to time during the cold season the room is heated to prevent the floor from damp.
Variants of the device of different types of floors on lags
So, now we turn to the consideration of the main options for floors with lags. These options include: cold floor, heated floor, as well as a warm floor option with a cold subfield. The first option is usually attributed to the second group (floors without a subfield), the second option is intermediate, and the third completely belongs to the first group.
Cold floors without underground base
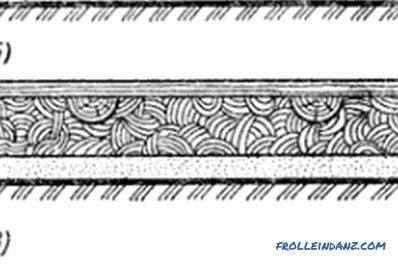
Cold boardwalk without underground (on the ground): a - logs (plates) and boards sunk into calcined sand; b - logs and boards embedded in a layer of rammed clay or slag; in-wooden checkers, smeared with bitumen on the basis of sand, concrete, clay.
The simplest option is to construct the floor according to logs without a subfield. Installation of the coating is carried out directly on dry ground. This is the most budget and practical floor for rooms where the floors are dry and do not suffer from excess moisture. Technology devices of this type of floor is quite feasible, even if you are not a professional in this field and get to work for the first time.
First you need to completely clear the soil of debris and large pieces of earth with stones. Then you need to cover well tamped. It is best to use a special rink. A flatness of the floor to check a large building level. Tamping is necessary until the surface is as close to as flat as possible.
After that we fall asleep sand or small crushed stone with a layer of 5-10 mm. Again make tamper. But now it is not necessary to use the rink. You can do heavy plank of wood or metal. And it is convenient to tie it to the cable, so that it was convenient to work.
After that go to the second stage of backfill. Here, it is good to use burnt dense clay, calcined building sand, or fine granulated slag as a cushion. Experts also advise even to mix these three components, but only so that most of all was burnt clay.
After backfilling, the floor is rammed. Now you need to prepare thin draft logs: treat them with antiseptic and dry thoroughly. Then immerse the lags next to each other in the layer of the second pillow so that their front part is visible, but at the same time they were flush with the backfill. Once again finally tamp the floor.
Now get to the floor. You can put butt-logs, connecting them with grooves that are usually already provided. And you can plant on cement mortar.
Only while working, try not to smear the front parts of the boards; place the boards lying next to each other so that the annual rings are in opposite directions. And do not forget to check all the level and immediately correct the emerging irregularities. After setting, you can begin to nail the baseboards.
Insulated floor to ground
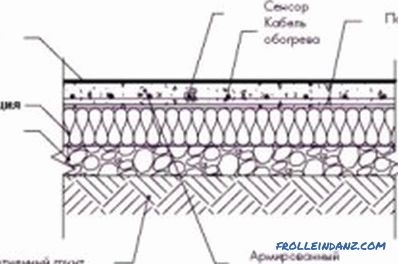
Scheme of the "pie" of floor insulation on the ground.
Now consider the process of laying the insulated floor on the ground. The construction of a wooden floor on logs of this type does not imply a cement layer. But here you need to make a few pillows, which will provide in the future the warmth of the coating. This is a big laboriousness and cost of material means.
First, the floor is covered with an insulating film, which can also be successfully replaced by large plastic bags made from building materials. Then pour a 5 cm layer of rubble, which is poured lime milk, while immediately ramming.
When everything grasps, a thin layer of roofing material spreads on which the fiberboard is put. The thickness of the board should be about 2.5 cm. A further 5 cm layer of rubble is poured on top, after which the floor is compacted and checked again by level. Yes, and experts recommend checking each layer with a level and immediately correcting defects using a roller, a hammer, or an additional padding pad.
But that's not all. Now you need to knead the so-called skinny solution, which for the most part consists of fine sand, to which is added a little cement and enough water for density. The fill should be small. And when it dries, the floor is additionally covered with sand about 1.5-2 cm thick. Further, fine wooden logs are placed, as already described a little higher.
Heat-insulated floor on a cold underground and vice versa
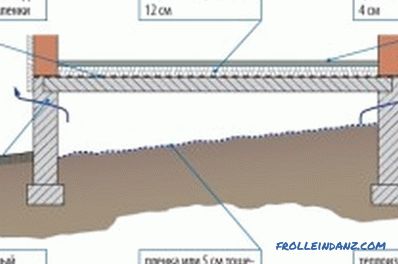
Heat-insulated floor on a cold underground.
The third option is a heated floor with a cold subfield. The peculiarity of such a structure is that the main part of the insulation will be located in the frame of the underground, and not fit between the layers of pillows. This is a great option for cold rooms.
First, a small concrete filling of the base of the floor is made, and then immediately, until the mortar has set, a wooden lath is planted around the perimeter of the room, which will determine the insulation cushion. When the solution hardens, the coating is covered with a layer of polyethylene, and then covered with a layer of expanded clay. Mineral wool is put on the clay, on top of which the clay is poured.
On top of all this is a vapor barrier film. But you shouldn’t stretch it too much, as you need a small gap for air intake, so that the floor “breathes”. Sand is poured over the film, after which fine lags are placed.
The fourth option is a cold floor, the underground of which is insulated. Perhaps this option is the most popular and practical. There will also be several pillows at the same time with brick columns.
First, the construction of posts of heavy solid brick, then fill the floor (as described in the first embodiment). And then go to the device in turn, each of the pillows, as described for the second floor option. When all this is done, go to the device clean lag.
Tips for laying the lag
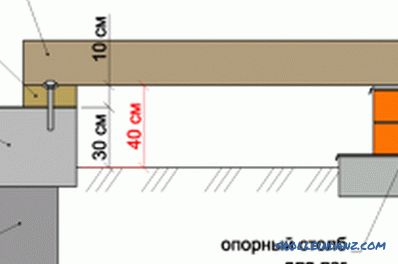
Layout of the lag on the ground.
But laying wooden floor in logs is not as easy as it may seem initially. After all, it is extremely important that they lie flat and not be deformed over time. Therefore, we consider the 3 basic basic tips for laying finishing lags.
- If in front of the finishing lags you put a draft board version, then the finishing lags are put across. This will ensure the rigidity of the coating. Do not forget about the alternation of wood fibers to avoid deformation.
- While you put the lags on the floor, be sure to leave about 3-5 cm of gaps around the wall. This is necessary so that the main lags in the middle of the room can be freely moved. At the end of the main device, lags near the wall are also laid out
- Always lay wooden floor logs with a groove-joint connection. It does not depend on whether pouring is done under the floor or not. Such a connection will provide a good degree of adhesion of the lag to each other, and significantly increase the life of the floor.
So, the process of laying a wooden floor on the logs with your own hands is fully considered on the example of several of the most common and practical methods. Which one of these methods to choose is up to you, taking into account the particularities of the premises and your financial situation.
