Kitchen - a room for cooking and eating. Here, they often spend tea with the whole family to discuss the latest news. The overall concept of the room should be comfortable and relaxing, since each family member spends a lot of time here. The appearance of the ceiling plays an important role in the interior of the room, especially in a small kitchen.
Not every material can be used as a ceiling covering. Durability - the main criterion for the choice of materials, but not the only one. The ceiling must be moisture resistant, as the kitchen is constantly high humidity. It is necessary that it is easy to wash off, because all surfaces in this room are contaminated rather quickly. Ceiling buyers also look at the cost of the material, as the ceiling in the kitchen is not always cheap.
Types of ceilings
There are several ceiling coatings, and each of the options presented has its own subspecies. Materials differ in color, texture and appearance. It turns out that making the ceiling in the kitchen with your own hands is much easier than it seems. The main thing is to choose the correct ceiling covering, which will improve the appearance of the room. Let's now focus on the most popular types of ceiling.
Polystyrene plates
 Sticking tiles
This material allows you to make repairs quickly and without extra costs. In order to keep the polystyrene plates on the ceiling, it is enough to apply a special solution on the previously leveled surface. The thickness of the material and its elasticity will help to hide small irregularities or cracks.
The ceiling coating is fairly cheap, so finishing with this material would be appropriate for owners with a limited budget.
 The ceiling of polystyrene foam plates
Tools:
- tile,
- cutter thread,
- glue,
- brush,
- colored chalk.
Before gluing polystyrene foam boards, it is necessary to clean the base from the previous finish - putty, paint, wallpaper. Then it is necessary to determine the center of the ceiling, for which we use a chopping thread. Stretch the thread from corner to corner, slightly pull back and release - there will be a trace on the ceiling. Now we perform the same operation with opposite corners.
 How to glue the tiles
Center the premises will be where the lanes crossed. Now take the four tiles and glue them around the intersection. When this is done, you can safely continue to work .
Learn how to glue quickly:
Plastic ceilings
 The ceiling of plastic panels in the kitchen
In this section, you can safely add and slatted ceilings. On the ceiling, they look great, although their value is several times more. From plastic panels the excellent ceiling turns out. These ceiling coverings are one of the varieties of suspended ceilings, inheriting their pros and cons.
Tools required for installation:
- punch,
- wooden slats,
- plastic dowels,
- construction stapler ,
- saw on wood,
- screwdrivers,
- tape measure,
- screws.
 Rack ceiling
With a pencil, make notes every two feet, marking the attachment points reek Wooden slats sawed into pieces. The length of the material ready for sticking should be equal to the width of the room minus a couple of centimeters. We fix the finished products to their places.
 Rack ceiling installation scheme
For a high-quality installation of the rack ceilings, you need a plastic guide that attaches to any from the walls. Now you can begin cutting the ceiling covering and mounting it on the ceiling. When laying guided on the guide. We continue to install the panels to the end, the last product is attached directly to the rail itself.
 Finishing scheme for plastic panels
The ceiling made of plastic panels is suitable for both small and and large rooms.
Benefits:
- No scrupulous base alignment is required.
- Communications perfectly hide behind structural elements.
- Quick installation.
- The design allows you to mount spotlights.
Disadvantages:
- Any room with such ceilings becomes like an office.
- The ceiling height is reduced by 7 cm.
Gypsum plasterboard construction
It is also called podshivnym and is often compared with suspended structures. Gypsum ceiling does not require preparation of the base, thanks to the design, you can hide communications, embed lighting and ventilation.
The height of the room, as well as in the previous case, will decrease.
 Gypsum Ceiling
The difference between the gypsum ceiling is that it needs to be puttied or painted , that is, additional costs for finishing are necessary. This will require free time and additional money, but the result will not disappoint you, because the ceiling will turn out perfectly smooth and will have good sound insulation characteristics. Due to the elasticity of the coating, you can create unique shaped designs.
Painted ceiling
 Painting the ceiling
Not You know how to make a ceiling in the kitchen with minimal cost, then choose plastering. This ceiling finish is the most time consuming because it requires the presence of certain knowledge, strength and time. It consists of several stages:
- Surface alignment.
- Laying plaster meshes, if necessary.
- Filling.
- Paint the ceiling.
A clear advantage is that the height of the room does not practically change, and the ceiling is neat and beautiful, but it will not sustain permanent cleaning. This is the perfect ceiling design in a small kitchen.
Tension
 In the kitchen stretch ceilings
Strangely enough, but this modern ceiling covering "absorbed" all the advantages of suspended structures:
- Quick installation.
- Smooth surface.
- The base does not need to be processed.
- You can hide communications, insert lights, or equip ventilation.
- Large assortment of patterns and colors.
Disadvantages:
- Reducing the height.
- Inability of the coating to withstand mechanical stress.
The ceiling in the kitchen should be high-quality and non-stainable, since the constant evaporation of fat from the preparing food will settle on it. The ceiling should not be afraid of moisture, as it should be cleaned often. High-quality materials, a little strength and knowledge will help in the difficult endeavor.
We recommend:
- how to hang the chandelier on the ceiling;
- how to glue the ceiling plinth in the corners.
Photo
 Rack in the large kitchen
 Rack plastic
 Suspended plasterboard ceilings for the kitchen
 Plastic with backlight
 Plastic with moldings
 Rack mounted in the interior of the kitchen
 Tension with built-in lights
 Stretch blue
 Colored stretch ceiling
 From wide plastic panels
Search
Related Articles
what, from what and how to weave?

Fashion walks in a circle. And now the wicker home furnishings, once forced out by soft furniture, are returning to the houses again. Wicker furniture and rattan products can not only replace any s...
Adjustable floors on logs with their own hands
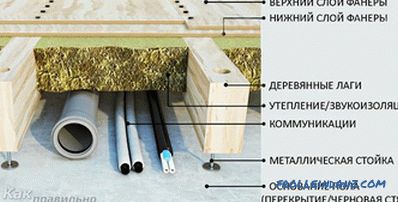
As one of the possible options for arranging rough flooring today, quite often, specific designs, called adjustable floors, are chosen. Arrangement of such structures involves the use of a lag syste...
How to connect the bath to the sewer
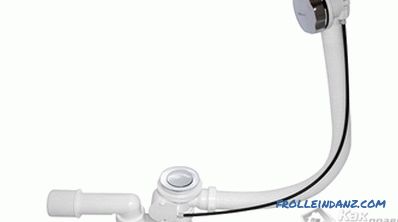
When the bath is installed in its place, it is necessary to perform the last stage of work, after which you can put it into operation. An important step is to connect the bath to the sewer and water...
by material, coating, construction, opening method + Photo

The interior of the room is formed by a combination of a set of elements, materials and building structures. The types of interior doors on the market are varied in design and materials from which t...
How to choose the right radiators
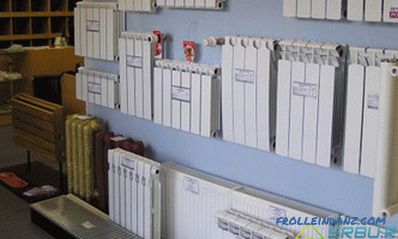
It seems that the times of the old, clumsy cast-iron radiators of the Soviet type are passing. Today, people want to put in their place something more elegant and compact, but with good heat dissipa...