The technology for the manufacture of log cabins provides for two basic options for laying logs: "in the paw" and "in the bowl." The most common in the modern construction of the cabin in the "in the bowl", or it is also called the "oblo". The technology of felling "in the bowl" is made with the remainder of the log, protruding beyond the corner of the building, and the word "oblyy" implies the round shape of the elements. The protruding end parts of the logs protrude by about 30 cm. Using this method there is a significant waste of material, but thanks to the protruding ends the structure is protected from wind and from cold penetration at low temperature.

The technology for the manufacture of wooden log houses provides two options for placing logs: “in the paw” or “in the bowl”.
This method was used even by our ancestors, since the process does not require complex tools, it is simple and easy.
Tools used
These are:

Types of log connections.
- ax;
- chainsaw;
- carpenter chisel;
- dash;
- hammer.
If it is not possible to purchase a line, then it is easy to make it yourself. To do this, use a bar made of square-shaped wood with dimensions of the sides of about 30 mm and a length of about 20 cm. Edges should be grinded and sanded with emery sandpaper. This method is most practical.
To perform the work, you will need two metal strips, the thickness of which is 3 mm and the width is 20 mm. Its length will depend on the cross-section of the logs and the size of the bowl - from 20 cm to 30 cm. Using a hacksaw for metal, you need to sharpen one of the ends on each of the strips. With the help of adhesive tape, you need to fix non-sharp ends to the wooden bar, which will serve as a handle for about 1 m. So that during the work the strips are not bent, they are fixed with the help of bolts or threaded rods. In this case, one hole is made on the strips and bolts with nuts are placed in them. By means of nuts adjustment of the sizes is made. This is a home-made trait.
Cutting logs into the bowl

Deformation of the log when cutting with a traditional Russian bowl.
For convenience, when working, the logs are pre-laid crosswise, and for maximum stability, it is recommended to fix them with staples so that they do not rotate when working.
The bowl should be cut down in such a size that its bottom coincides with the upper edge below the lying log. For convenience of work, it is recommended to make a cut in these places, with respect to the wall axis in the middle of the bowl to the required depth. Further, the bowl is cut, in compliance with the shape of the lower element.
Peeled and aged straight-grained logs go above the setting wreath. The installation process consists in laying two logs in pre-made bowls. Then they are aligned and, if necessary, fixed with brackets from both ends to the underlying transverse logs. From the front side, it is necessary to visually determine the size of the gutter, with the help of which the upper element is mounted on the underlying log. On the line the required size is set. Visually choosing the middle of the line, it is carried out along the log along the line of contact, as a result of which two scratches are formed in parallel passing: one on the bottom log and the other on the top. In the same way, with the help of the dash, they make markings from the inside. Remove the retaining brackets. Further, the log turns over so that the marking is on top. Pull the upper logs from the bowl. Produce fixation, but that later they were easy to dismantle.

Log deformation when chopped by a Canadian cup.
At the top of the log, there are visually noticeable two scratches that need to be cut out of the wood, which should result in a notch. The dimensions of the notch should exactly follow the contours of the underlying element.
When making a notch diagonally and along the whole length, it is recommended to make notches. The ax of the ax should be immersed to the bottom of the future gutter when struck, but the blade should not touch the scratch. Many people use the heel, the other side of the blade, when cutting out the groove.
Similarly, hacks are made from the opposite side, where scratches are marked. After such a process, a section with notches is selected.
During the blows, the ax blade must be directed along the grain of the wood.

Corner hem into the bowl.
When working, only the tip of the blade is used, thanks to which the blows will be more accurate. At the same time make the following movements: cutting ax and vykovyrivanie wood.
After cutting the middle part of the log, the surface of the notch must be cleaned. Usually, the notch is 10-15 cm wide. It is necessary to prepare the bowl itself.For this purpose, recesses are made in it on both sides from the upper edge of the lower log to the markings made. If necessary, the bowl is cut from the outside and inside.
Laying logs in a wooden house: recommendations
When laying, it is necessary to control the accuracy of the fit of the logs in a wooden house. Making installation of logs on each other, the bottom is stained with charcoal. Next, they put the upper log with the finished cut in and immediately remove it. After all this procedure, you need to inspect the log for under workings. Soiled spots of soot and will nedoruby, if such are present, they are cut off. The denser the upper log will lie, the warmer the structure of the log house will be.

Scheme for making the cut into the bowl.
The logs mounted on top must be trimmed to make it round or oval. To prevent the logs from rolling out and to give strength to the whole log, the crowns are fastened with pins. Nails are made of hardwood and must be well dried. They are installed at a distance of about 2 m. It must be remembered that each of the crowns should be bonded. When laying logs from time to time, use a plumb to check the vertical walls.
A gap of about 1 cm may form between the groove and the notch, in this place the insulating layer of tow or moss will be laid.
As the log is set in place, the marks necessary for the location of the dowels are made on the side of it with the help of an ax. Throughout their length should be two or three. After the dismantling of the logs, they are turned upside down with a chute and holes are made in it for the dowels in the places opposite the markings. The holes are made with the help of chisels and mallets and have a size of 7x2x5cm. Pins are hammered into the nests, which additionally fasten the logs with each other. Nagels give strength to the structure; their installation in areas where window and door openings will be located is especially important.
Wall insulation with moss: recommendations

The laying of moss between logs of the log house is done with special tools.
The next step will be moss insulation. In windy weather, in order not to blow the insulation, an ax is fastened along the fibers with an ax. Why precisely moss? According to the characteristics, it is better than tow, because it is the most durable, it smells of incense and will improve the air in the house for a long time.
Moss-laden logs are stacked on sticking dowels. As they lay down on their place, they are knocked on with a wooden hammer to full sediment. Tapping should be done with care, so that the log would set evenly and not break the dowels. They are hit in turn.
The final caulk is produced after the appliance is installed, but it is better to be in time before the onset of the winter period. The caulk is made of wood and has the shape of a spatula. In the case when she becomes blunt, she is hammered with an ax, after which she can continue working.
Further laying of logs in the log house is carried out with the help of ropes, which facilitates the installation of the upper rims. When a log house is cut on a separate site, it is divided into two piles in height. One of them is closed in the center of the window openings with through elements, and after they are installed, they are cut in place for the openings. ,
Two people work at the time of logging; one person at each corner. The trimming of the logs is done by two people, but when sampling the gutter one person works. While sampling is underway, other workers are preparing other elements of the log house for lifting, making dowels and doing other work.
So, the assembly of the frame "in the cup" is made. Due to the use of natural materials, such houses do not require additional finishing. But to prolong the service life of the logs, it is recommended to treat with antiseptics, as well as a thin layer of varnish. This will protect the wood from the effects of the natural environment, and then the house (log house) will delight with its warmth and comfort for more than a dozen years.
Didn't find the answer in the article? More information on the topic:
-

Technology of laying lining inside the house
Laying lining: preparatory work, the manufacture of frame construction, fixing the insulator and vapor barrier. Installation of lining in different ways to the surface of the frame, painting the lining.
Search
Related Articles
Do-it-yourself solar panels - how to make at home (+ photos)

Many people are interested in how to convert solar energy into electricity. Alternative energy sources have always occupied the minds of people, and today everyone can get the energy of the sun. In...
Plywood or OSB (which is better to choose)
Plywood and OSB (OSB, OSB) - two materials with similar characteristics and used in similar situations. However, there are differences between them, which in some cases may be important. To choose t...
Bar-shaped house do it yourself: making dowels
Very often it turns out that after construction is over, many people understand: the next time they will act very differently. The same can be attributed to the people who built the log house with...
Aerated concrete blocks pros and cons
Aerated concrete manufacturers, on numerous sales sites, insist that there is no better construction material. At the not less massive, construction forums claim the opposite, it is impossible to li...
technology, drawings (photo and video)
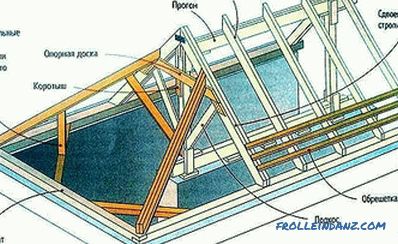
The roof frame of the house is one of the key elements of the building. And if the frame is erected taking into account all the rules and compliance with the norms of the building, then it is highl...