To make a table transformer with your own hands, you need wood, plastic or metal. Pre-prepared drawing.
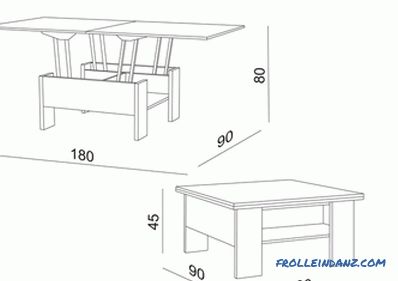
Drawing of the transformer table.
Preparatory work
Professionals know how to make a wooden table. They recommend making the countertop from 1-1 / 2 inch wooden boards or plywood. The choice of material depends on the load that will be on the table transformer. Table legs are made of a bar with a section of 20x45 mm. The table a transformer with the hands is made by means of a screw-driver, a saw on a tree, fasteners, an emery paper, wood stain, a brush and a varnish.
From a constructive point of view, a manufactured product should consist of a table top, a frame with stiffeners and legs. The blanks are made with regard to the prepared drawing. The legs of the transformer table are cut at an angle (for stability). To make a folding tabletop, you need to find its middle. The product is cut into 2 equal parts. On each half place support tires for legs (the distance from the edge should be equal to 5 cm). The halves of the table top are fastened together with the help of loops. Cuts are edged. Loops fixed to the top of the legs. The table itself is assembled with metal fasteners and special glue.
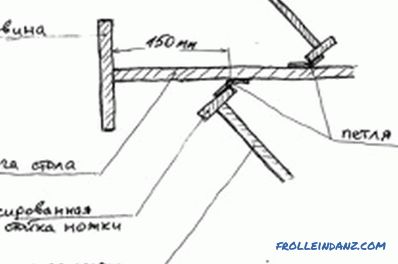
Scheme of fastening the legs of the table-book.
To make a table like a book transformer, you need to decide on its size. The best option is:
- height is 750 mm;
- width is 800 mm;
- the length of the folded structure is 282 mm.
Components of such a table include:
- basis with stiffeners;
- 3 parts of the tabletop;
- 2 legs of the sliding type .
If you wish, you can make 2 tables of this type. For its manufacture you will need a drill, screwdriver, chipboard (3500x1750x16 mm), corners, confirmat (75x4.5 mm), edge, screws.
Main production
Laminated chipboard can be sawed in the workshop. It is not recommended to carry out this process independently in the absence of due experience and knowledge. The future table transformer provides for the manufacture of the following components (mm):
- 2 covers (800x635);
- small cover (800x250);
- 2 racks (734x250) ;
- 3 stiffeners for the base (708x110);
- 2 stiffeners in the extendable legs (568x180);
- 4 struts (702x60);
- 4 slats (600x60).
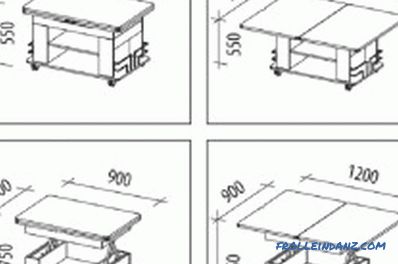
Folding table for the transformer table.
Pre-sawn components are pasted over with a melamine edge. This will require an iron. At the end impose an edge, pressing a hot iron. Unnecessary overlaps are cut with a knife. Legs collected evrovintami. Hinges are screwed to the last elements. The next step involves assembling the base of the table. The horizontal bottom edge must be fixed at a height of 100 mm from the floor level. At the same time make a margin from the edges of the sides of 70 mm. The next edge is set to the previous equivalent. The top edge must be between the previous element and the table top.
The base is installed on the small tabletop upside down. The sides are placed deep into the table, observing a margin of 3 cm from the edge. 2 large covers are laid on 2 sides of the base. The elements are assembled, the caps are screwed with the help of loop-butterflies. The next step involves screwing the legs of the transformer table. The product is ready for operation.
Folding design
If necessary, you can make a folding table transformer. When folded, its length will be 90 cm, and its width will be 18 cm. From a constructive point of view, such furniture consists of a tabletop, a bearing support, 2 struts and a shelf. For its manufacture, laminated chipboard with a thickness of 16 mm, boards or plywood is used. Details of the parameters are as follows (mm):
- 2 braces (345x345);
- table top (450x900);
- shelf (150x900);
- bearing support (900x620).
To make such a table with your own hands, you will need piano hinges, screws, fiberboard. Pre-glue the ends of laminated chipboard melamine edge. To close the rear surface of the bearing support, you will need fiberboard.
This material will hide fixing points and gaps formed between the furniture and the wall. The struts are connected to the side inner ends with the help of piano loops. Brackets are screwed to the back. To fasten the shelf to the main structure, you will need screws. They must accurately enter the butt of the niche. The table top is hung by piano loops. Hooks are fixed to the wall.
There should be a distance of 700 mm from the floor level to the table top.
This parameter depends on the personal preferences of each person. The resulting table is easily dismantled and installed with his own hands in any room.
Didn't find the answer in the article? More information on the topic:
-
How to make a corner cupboard with your own hands
Instructions on how to make a corner cabinet with your own hands. What materials can be used? The complete process from cutting to closing edging. Features of the workflow.
