Chipboard table can be made with your own hands. This will require a hammer, tape measure, screws, screwdriver, pipe with a diameter of 30 mm, flanges, jokers, jigsaw, castors and chipboard 16 mm thick, glue.
")
Drawing of the coffee table.
Preparatory work
To make a table of chipboard with your own hands, you will need to create drawings of each piece of furniture. Details of the parameters are indicated on the corresponding product diagram. On the material impose cut patterns. Their contour is encircled with a pencil and scratched with a nail (to prevent chipping of the material when sawing it).
At the bottom of the table and table top patterns, print out the outline of the legs. Data is transferred to the details. The center line is drawn. Mark out 3 holes 12 mm deep. To do this, use a drill bit of 8 mm. To control this parameter can be a normal tape. On the inside legs, they make markings for the holes that are necessary to support the shelves.
")
Cutting pattern for the coffee table tops.
The ends are trimmed with a flexible U-shaped profile, the texture of which must match the appearance of the plates. Experts recommend making a table out of the chipboard with your own hands using a patch profile that will wrap every detail from 2 sides. No groove for fastening is required.
Each end is treated with sandpaper. Then the profile is glued to the legs. The last elements are connected to the shelf with the help of the dowel. Profile put on the shelf and cut off the other side. If the glue has dried, its excess is removed.
Step by Step Instructions
A tabletop and a bottom shelf (size 100x50 cm) are cut out of the chipboard. Fasten the flanges to the 1st part. From the smaller side, a margin of 6-7 cm is made. A parallel line is drawn along the surface. Similar actions are repeated from 2 sides of the table top and shelf. This technique allows you to get 4 points of intersection, which fasten the flanges. Then mounted wheels made of rubber. The next step is to insert the pipe into the flanges. They are bolted.
To give the furniture stability, the adjacent supports are interconnected by a pipe and a joker. In order for the table to have an attractive appearance, designers recommend installing a shelf. In this case, the standard pipes are replaced with special analogues with the appropriate fixtures for the shelf. Then cut out the glass of the desired size, inserted into the mount.
The lacquer coating prevents the destruction of the structure, protecting it from moisture.
")
The fastening scheme of the coffee table elements.
Sandpaper and scrubbing is required to apply the substance to furniture. If the plates from which the table was made were previously painted, then the material is cleared of varnish / paint. For this, experts recommend using a mechanical, thermal or chemical method. In the latter case, a special substance is applied to the treated coating with a cloth. After 10 minutes the table is wiped with the latest material.
The thermal method of removing old paint or varnish involves the use of a building dryer. The coating is heated, the paint is removed with rags. The mechanical method is performed using a grinding machine (low speed) and sandpaper.
Finishing work
Paintwork material is applied to the table with a roller or brush. Before using colorless varnish, you will need to cover the furniture with several layers of primer or stain. To reduce the consumption of the substance and eliminate minor irregularities, experts advise priming the table.
A composition based on water is used for this. The surface dries for 12 hours. Then the furniture is varnished and left for 24 hours for complete drying. After a specified time, the product is re-treated with paintwork material. Coffee table can be decorated with various methods. Designers recommend home and apartment owners to use mosaic. This will require sandpaper, paint, spatula, brush.
Pre-painted product. After it dries, glue is applied to the parts of the furniture where the pattern is intended. Mosaic tiles are laid and pressed to the surface. If it is dry, then the seams between the tiles are processed. To do this, apply the grout, which is subsequently washed off. Before applying it, you will need to cover that part of the table on which the finishing work has not yet been performed. A similar technique is made on the 2nd half table top. Furniture is ready for use.
Didn't find the answer in the article? More information on the topic:
-
")
Wood flooring
Step by step instructions on how to arrange the floor of the tree. Useful tips and advice, the main points of the workflow, additional nuances.
-
")
How to make a sliding table with your own hands
Detailed instructions on how to make a sliding table with their own hands. Materials that will be needed when modeling a sliding table, how to make a sliding table of a round shape.
Search
Related Articles
Arbolitovy blocks - shortcomings, technical characteristics, dimensions, composition
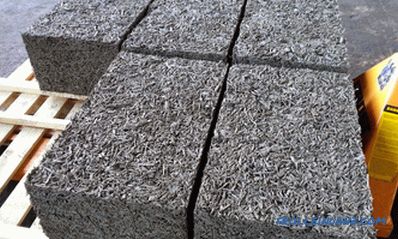
Arbolite is described in most sources as a material with wonderful properties. Advertising articles extol arbolitovyh blocks, material flaws are modestly silent. But miracles do not happen, there ar...
Do-it-yourself workbench: making a design
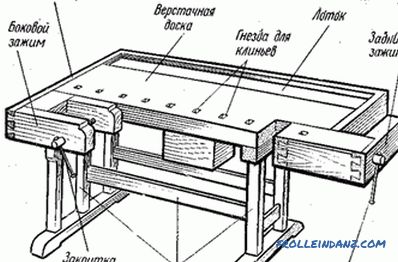
If a person likes tinkering at home, he will definitely need to arrange for himself a comfortable and safe place to work. High-quality imported workbenches are very expensive, and Chinese fakes rai...
Do-it-yourself wooden bathhouse: how to build?

A bathhouse on a household or dacha plot is a place not only for hygienic procedures, but also for rest after working days. A visit to a well-heated bathhouse will raise your spirits and help relie...
Arbor in the country with their own hands: a plan of action
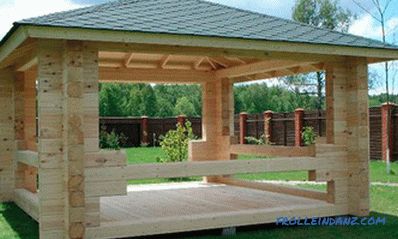
There is practically no such person who would not like to rest away from the noisy bustle of the metropolis, in the lap of nature. Often this function performs a country site with a cozy gazebo. He...
How to glaze a balcony with your own hands
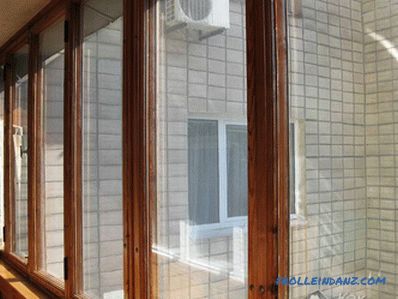
Almost every apartment has its own balcony. And this room serves everyone for different purposes: often some make it a warehouse for all unnecessary things in the house that do not fit in the closet...